In this tutorial, we will implement a Barcode or QR Scanner / Encoder plugin in an Ionic application. Barcodes and QR codes are widely used for multiple purposes like to add a link where a user doesn’t need to type the whole URL it can be easily scanned from a QR code. Barcodes can also be seen everywhere on the day to day items like eatables clothes etc, we can wimple scan these barcodes to get information like item code date of manufacturing, prices, etc.
We will create a similar app to scan these codes.
Using React? Check this tutorial to implement Barcode Scanner in Ionic React
Let’s start…
Version Check
@ionic/cli

   _             _
  (_) ___  _ __ (_) ___
  | |/ _ \| '_ \| |/ __|
  | | (_) | | | | | (__
  |_|\___/|_| |_|_|\___| CLI 6.4.1
# Update Ionic CLI
Run following npm command to update the Ionic CLI tool to the latest version
$ npm install -g @ionic/cli</pre> <h3># Create new Ionic application:</h3> Execute the following command to create a new Ionic Angular application with a <code>blanktemplate:$ ionic start ionic-ng-barcode-demo blank --type=angular </pre> then move to the root path of the application <pre class="wp-block-prismatic-blocks"><code class="language-javascript">$ cd ionic-ng-barcode-demo</pre> <h4></h4> <h3># Install the Cordova and Ionic Native plugins:</h3> Next, we will install Cordova and Ionic Native plugin wrapper to use Bar Code Scanner and Generator in the application. Run following commands in the terminal at the application root: <pre class="wp-block-prismatic-blocks"><code class="language-javascript">$ ionic cordova plugin add phonegap-plugin-barcodescanner $ npm install @ionic-native/barcode-scanner</pre> <h4></h4> <h4># Update Application's App Module</h4> To use Native features, open the <strong>app.module.ts</strong> file to import the <code>BarcodeScannerclass then updateprovidersarray as shown below:// app.module.ts import { NgModule } from '@angular/core'; import { BrowserModule } from '@angular/platform-browser'; import { RouteReuseStrategy } from '@angular/router'; import { IonicModule, IonicRouteStrategy } from '@ionic/angular'; import { SplashScreen } from '@ionic-native/splash-screen/ngx'; import { StatusBar } from '@ionic-native/status-bar/ngx'; import { AppComponent } from './app.component'; import { AppRoutingModule } from './app-routing.module'; import { BarcodeScanner } from '@ionic-native/barcode-scanner/ngx'; import { FormsModule } from '@angular/forms'; @NgModule({ declarations: [AppComponent], entryComponents: [], imports: [ BrowserModule, IonicModule.forRoot(), AppRoutingModule, FormsModule ], providers: [ StatusBar, SplashScreen, BarcodeScanner, { provide: RouteReuseStrategy, useClass: IonicRouteStrategy } ], bootstrap: [AppComponent] }) export class AppModule { }Above we have added
FormsModulein imports, array to use form elements later.Also Check: Ionic 4 | Adding Barcode / QR Code Scanner in Ionic 4 Application using ZBar Cordova and Native Plugin
# Implement Barcode/ QR Code Scanner and Generator
The
BarcodeScannerclass provides two main methods, thescan()is used to scan an Image of Bar or QR code image using the device camera and theencode()method takes the string to convert into a QR code.For adding configuration, import the
BarcodeScannerOptionsinterface. We will discuss various options available later in this tutorial.Update the home.page.ts file with the
scanBar()andgenerateBar()methods.import { Component } from "@angular/core";defines options like to show torch button, show button to flip camera front or back.
import {
BarcodeScannerOptions,
BarcodeScanner
} from "@ionic-native/barcode-scanner/ngx";@Component({
selector: "app-home",
templateUrl: "home.page.html",
styleUrls: ["home.page.scss"]
})
export class HomePage {
encodeData: any;
scannedData: {};
barcodeScannerOptions: BarcodeScannerOptions;constructor(private barcodeScanner: BarcodeScanner) {
this.encodeData = "https://www.FreakyJolly.com";
//Options
this.barcodeScannerOptions = {
showTorchButton: true,
showFlipCameraButton: true
};
}scanCode() {
this.barcodeScanner
.scan()
.then(barcodeData => {
alert("Barcode data " + JSON.stringify(barcodeData));
this.scannedData = barcodeData;
})
.catch(err => {
console.log("Error", err);
});
}encodedText() {
this.barcodeScanner
.encode(this.barcodeScanner.Encode.TEXT_TYPE, this.encodeData)
.then(
encodedData => {
console.log(encodedData);
this.encodeData = encodedData;
},
err => {
console.log("Error occured : " + err);
}
);
}
}
</pre>
The <code>BarcodeScannerOptions# Update Home Template
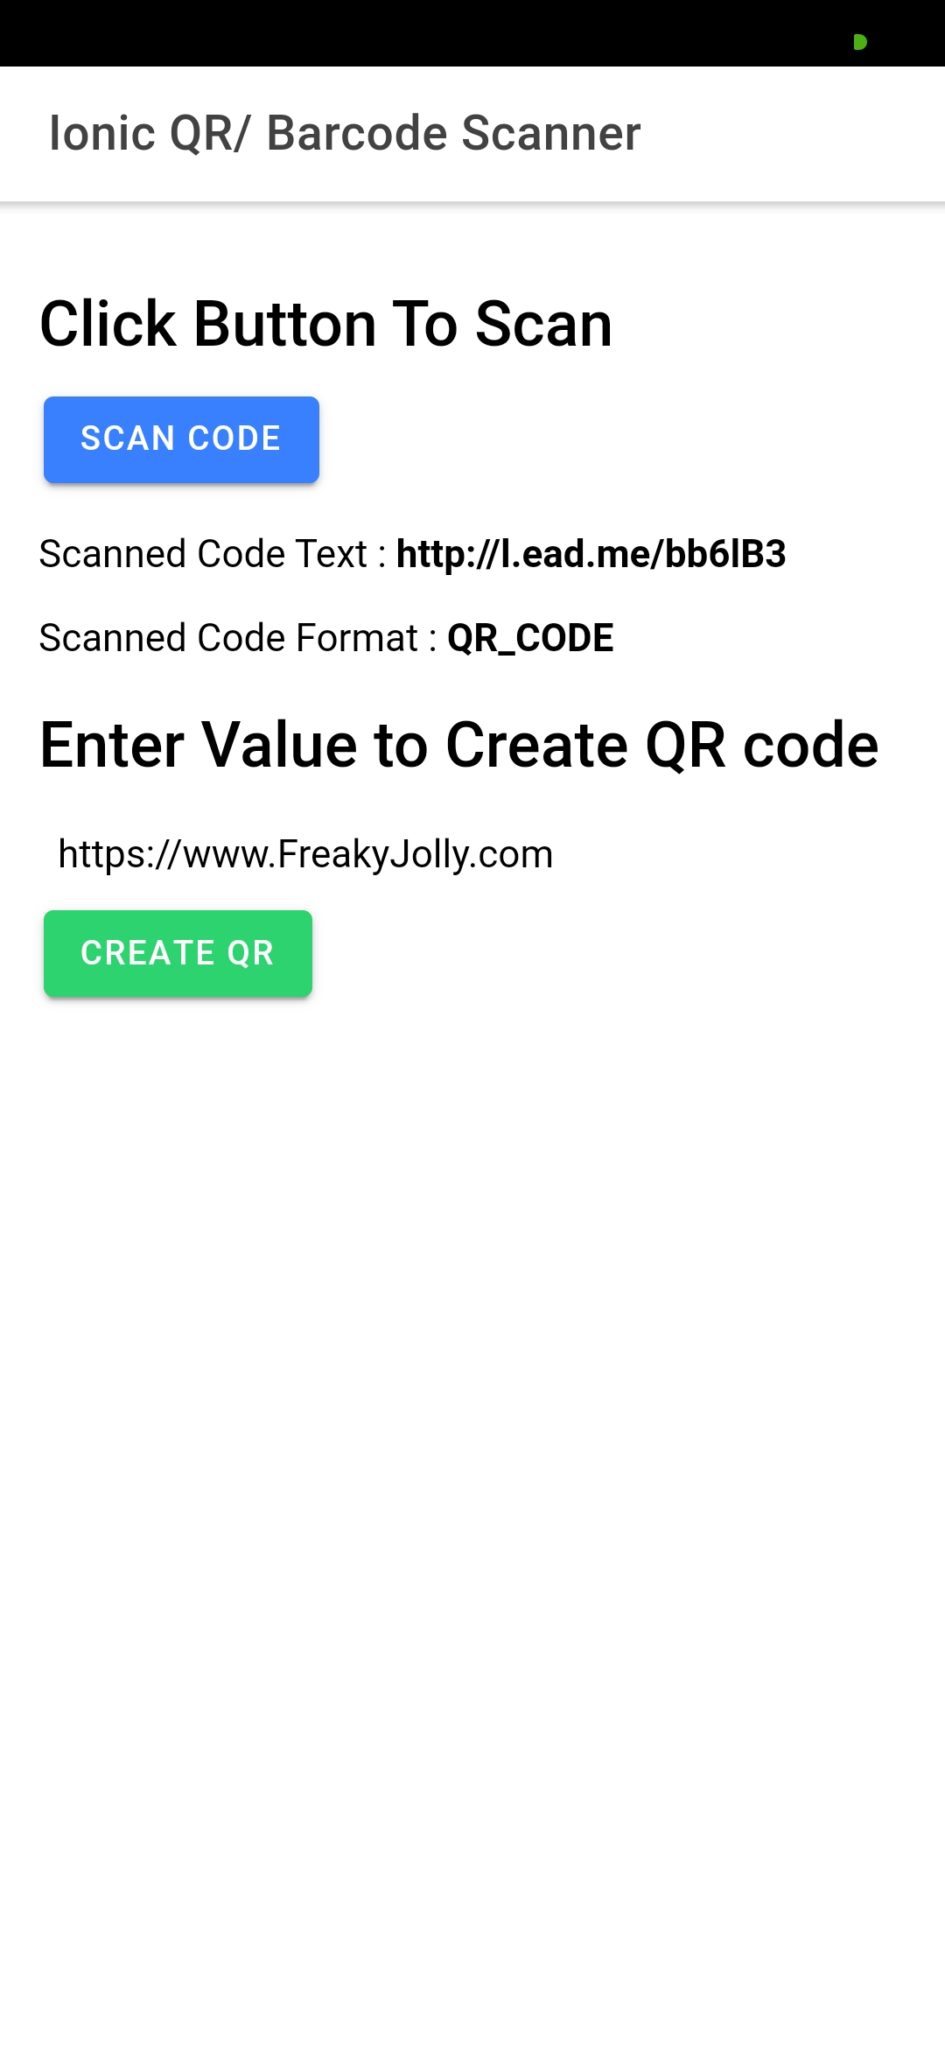
Now we will add a button to start scan and show encoded text, also we have added a text field where a user can input a string which can be generated into a QR Code.
In home.page.html, add a button and show the result of scanned Barcode, having text information bar type.
<ion-header [translucent]="true">
<ion-toolbar>
<ion-title>
Ionic QR/ Barcode Scanner
</ion-title>
</ion-toolbar>
</ion-header><ion-content [fullscreen]="true" class="ion-padding">
<h1>Click Button To Scan</h1><ion-button color="primary" (click)="scanBar()">
Scan Code
</ion-button><div *ngIf="scannedData">
<p>
Scanned Code Text : <b>{{ scannedData["text"] }}</b>
</p>
<p>
Scanned Code Format : <b>{{ scannedData["format"] }}</b>
</p>
</div><h1>Enter Value to Create QR code</h1>
<ion-input placeholder="Enter Input" [(ngModel)]="encodedData"></ion-input><ion-button color="success" (click)="generateBar()">
Create QR
</ion-button>
</ion-content></pre>
Now you have a working Bar and QR scanner application which can also generate QR code by taking a user input string.
<h3># How to test the application?</h3>
To test this application you need to run the app in a real device. Just run following command after connecting your mobile device to the computer via USB wire.<code>$ ionic cordova run android -l
Note: Sometimes you may see an error like this:[ERROR] Could not parse build output file: platforms\android\app\build\outputs\apk\debug\output.json
Try creating the app-debug.apk first by running
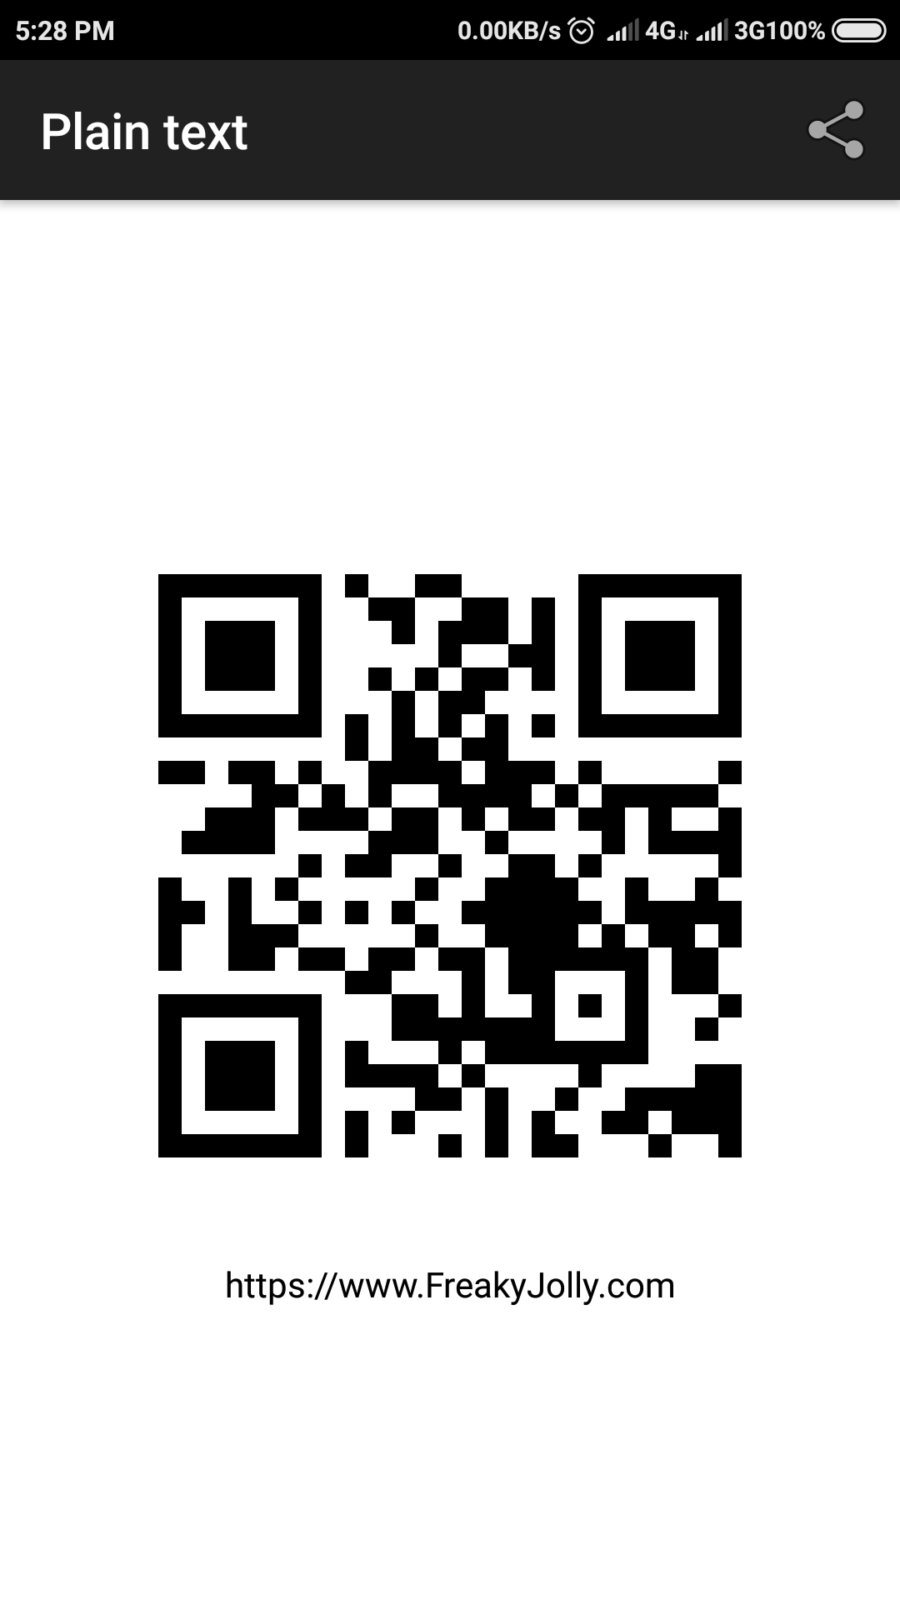
$ ionic cordova build androidYou can generate QR codes online here
See mine :P

Source Code link on GitHub
In this tutorial, we have created a sample app to scan Barcode and QR code using Cordova plugins in Ionic Native.
Category: Ionic Framework