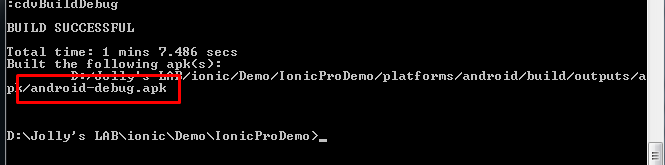
How to Create Production Release in Ionic 2/3

After finishing my app development and testing phase, I tried to find some good documentation for generating production release of my build APK. When I searched on Google, the first link which landed me on Ionic docs explaining to create production release in Ionic 1. As ionic 2/3 is based on Angular 4 latest component-based technology having a powerful feature called AOT (Ahead of Time). AOT in simple terms reduced the code to level where we have only that much code which is required for our application.

So after spending some time on my research and facing issue while creating a Signed application, here I am going to steps to create Signed App using latest Ionic 3.
So Let’s start without waiting any time.
Here I believe you have build version of your application which we develop using this command
$ionic cordova build android
You can visit this article to start at the beginning.
Note: Don’t forget to replace icon.png (1024*1024) and splash.png (2732*2732) in resource folder then run $ ionic cordova resources [<platform>]
Suppose we have android-debug.apk

Step 1 – Go to the root of the application folder. Then run following command.

$ionic cordova build android --prod --release

Here –prod will remove unnecessary code and compress files data to reduce code. –release to create unsigned apk file (android-release-unsigned.apk) at location ~platforms\android\build\outputs\apk

For more information on different options, you can visit official docs here

Step 2 – Now we will create a key, which is a keystore file, makes a signed APK file which then we can upload to an app store.

Copy android-release-unsigned.apk in different folder preferred in C drive where you have added JDK keytool.
From folder where you pasted android-release-unsigned.apk open the CMD prompt and run the command
$keytool -genkey -v -keystore ionicdemo.keystore -alias ionicdemo -keyalg RSA -keysize 2048 -validity 10000
You can change name instead of “ionicdemo” above.
NOTE: If you face issue saying key tool found then add %JAVA_HOME%\bin in environment path variable in windows. Also find the Keytool path “C:\Program Files\Java\jdk1.8.0_121\bin” then add in environment path variable
Now enter a password and other valid information as asked and keep this keystore file safe.

Step 3 – Next step is to actually Sign App with keystore and alias name “ionicdemo” we just created.

$jarsigner -verbose -sigalg SHA1withRSA -digestalg SHA1 -keystore ionicdemo.keystore app-release-unsigned.apk ionicdemo

This will change unsigned to a signed version of APK file which now can be uploaded to Play Store.

Note: Sometimes when we try to install Unsigned application APK file on a real device it shows error “Application Not Installed”. This issue will resolve after performing Step 3.

UPDATE: Some time google playstore publisher shows error to zipalign uploaded APK file. Just run below command: Found it here “C:\Users\%USERNAME%\AppData\Local\Android\Sdk\build-tools\27.0.3”

zipalign -v -p 4 android-release-unsigned.apk newdemoapp.apk


Also See: Optimize App Loading by Implement Lazy Loading in Ionic 3 Existing/ New App

Let me know if you face any problem or you have any advice. 🙂

3 thoughts on “How to Create Production Release in Ionic 2/3”

  1. zipalign is providing .file instead of .apk and when i try install my name-release-unsigned.apk it’s showing app not installed in my mobile

Leave a Comment

Your email address will not be published. Required fields are marked *