In this Angular tutorial, we will learn the implementation of JSON Web Token Authentication in Angular application by using angular2-jwt package.
To create a secured single-page application, we use JWT auth token, which is reviewed by the client application using which a user can access a secured page and call Rest API calls to fetch private data. Before sending the data to the client app, the server first verifies the JWT Authentication token in the header. To manage the JWT on client side we will use the angular2-jwt package module.
We will also learn how to implement auth guards in Angular applications, which are used to limit the access of a user to specific private pages. The auth guards are implemented in the application routing module by using a service class.
What is JWT?
JWT or JSON Web Token is an encrypted string that contains information related to the logged-in user and secret key, this token is generated at the server after user authentication. This JWT is used for further communication between clients and servers.
After getting JWT from the server, every HTTP call to RESTful APIs must have an Authorization header set with JWT, which is encoded at the server end for authenticating the source. After successful validation data is transferred.
Implement JWT in Angular Application
In SPAs (Single Page Applications) like Angular JWT can be implemented very easy which will have a flow like this:
Step 1) User Logs in using Email/Password.
Step 2) After successfully authenticating the user, a JWT is generated and sent back to the client.
Step 3) Now client application needs to store the token received and send it in RESTful APIs as Authorization Headers, which will be decoded for verification at the server to process and return a response.
Also Check: Firebase/ PHP-jwt tutorial with Demo Server code
In Angular application, we can use angular2-jwt package to easily manage JWT after getting it from the server-side. This package takes all responsibility to attach Token in API calls and manages to check the timeout of a token.
Let’s start implementation!
Create a new Angular Project
Run the following command to create a new Angular project using Ng CLI:
$ ng new angular-jwt-demo

? Would you like to add Angular routing? Yes
? Which stylesheet format would you like to use? CSS
Add HttpClient
To make HTTP calls to the server for consuming RESTfull APIs we need to import HttpClientModule in our application.
Navigate to app.module.ts file then import HttpClientModule from @angular/common/http package. After that add in imports array.
// app.module.ts
...
import { HttpClientModule } from '@angular/common/http';

@NgModule({
  declarations: [
    AppComponent
  ],
  imports: [
    ...
    FormsModule,
    HttpClientModule
  ],
  providers: [],
  bootstrap: [AppComponent]
})
export class AppModule { }
Above we also added FormsModule as required by forms on our Login page.
Create Service Class
We will create a new service that will have re-usable methods in one place.
Run the following command to generate an AuthService under _services folder:
$ ng generate service _services/authNow open ~_services/auth.service.ts file and update with the following code
// auth.service.ts
import { Injectable } from '@angular/core';
import { HttpClient, HttpHeaders, HttpErrorResponse } from '@angular/common/http';
import { Observable, throwError } from 'rxjs';
import { retry, catchError } from 'rxjs/operators';
import { Router } from '@angular/router';

interface LoginResponse {
  access_token: string;
  data: any;
  name: string;
  status: string;
  message: string;
}
@Injectable({
  providedIn: 'root'
})
export class AuthService {

  // API path
  basePath = 'https://my-site.com/server/';

  constructor(
    private router: Router,
    private http: HttpClient
  ) { }

  // Http Options
  httpOptions = {
    headers: new HttpHeaders({
      'Content-Type': 'application/json'
    })
  };

  // Handle errors
  handleError(error: HttpErrorResponse) {
    if (error.error instanceof ErrorEvent) {
      console.error('An error occurred:', error.error.message);
    } else {
      console.error(
        `Backend returned code ${error.status}, ` +
        `body was: ${error.error}`);
    }
    return throwError(
      'Something bad happened; please try again later.');
  }


  // Verify user credentials on server to get token
  loginForm(data): Observable<LoginResponse> {
    return this.http
      .post<LoginResponse>(this.basePath + 'api.php', data, this.httpOptions)
      .pipe(
        retry(2),
        catchError(this.handleError)
      );
  }

  // After login save token and other values(if any) in localStorage
  setUser(resp: LoginResponse) {
    localStorage.setItem('name', resp.name);
    localStorage.setItem('access_token', resp.access_token);
    this.router.navigate(['/dashboard']);
  }

  // Checking if token is set
  isLoggedIn() {
    return localStorage.getItem('access_token') != null;
  }

  // After clearing localStorage redirect to login screen
  logout() {
    localStorage.clear();
    this.router.navigate(['/auth/login']);
  }


  // Get data from server for Dashboard
  getData(data): Observable<LoginResponse> {
    return this.http
      .post<LoginResponse>(this.basePath + 'api.php', data, this.httpOptions)
      .pipe(
        retry(2),
        catchError(this.handleError)
      );
  }

}
In Auth service we have added some stuff, let’s quickly discuss that:
basePath: Define API path.
httpOptions: Option object to set HTTP headers.
handleError: Method to handle client or server errors, I got this from Angular Docs.
loginForm: Method for making HTTP post call to API with Email and Password information. This method will be called from Login page.
setUser: After successfully authenticating the credential server will return some more user info with JSON Web Token, which we will save in browser’s local storage to use later.
isLoggedIn: This method will only check if user’s token is set in localStorage.
logout: This method simply clears the localStorage and navigates back to login screen.
Install angular2-jwt
In the Angular application, we can easily manage the JWT token by installing angular2-jwt package. It includes many features which otherwise are required and takes much effort for custom development.
– No need to use Angular Interceptors to add JWT in HTTP headers.
– Easy and one place configuration.
– Whitelist & Blacklist URLs
– Custom header and auth schema.
– Token expiration and other callbacks.
Run the following command to install angular2-jwt using NPM command:
$ npm install @auth0/angular-jwtNow open app.module.ts file import JwtModule module then add in imports array:
// app.module.ts
...
...
import { JwtModule } from '@auth0/angular-jwt';

@NgModule({
  declarations: [
    AppComponent
  ],
  imports: [
    ....
    ....
    JwtModule.forRoot({
      config: {
        tokenGetter: () => {
          return localStorage.getItem('access_token');
        },
        whitelistedDomains: ['localhost'],
        blacklistedRoutes: ['localhost/auth/login']
      }
    })
  ],
  providers: [],
  bootstrap: [AppComponent]
})
export class AppModule { }
Create Login and Dashboard Components
To replicate a real-world application scenario, create login and dashboard components.
The Login component will have login form which will return token from the server. After that user will be redirected to the Dashboard page and make a getData HTTP post-call from the RESTful API endpoint.
That request will be succeeded by the server after checking JWT Authorization headers in the call which are getting handled by the angular2-jwt package.
Now run the following commands to create Login and Dashboard components under _component folder:
$ ng generate component _component/login
$ ng generate component _component/dashboard
Update Component’s Template and Class
For UI styling we have added bootstrap.css file in index.html
<link rel="stylesheet" href="https://stackpath.bootstrapcdn.com/bootstrap/4.3.1/css/bootstrap.min.css">Login Component
Replace below code in login.component.html and login.component.ts files:
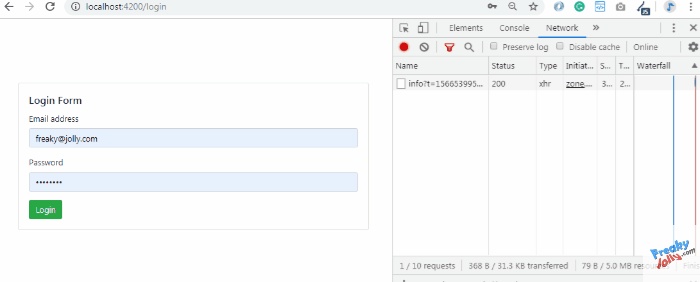
<!-- login.component.html -->
<div class="container" style="display: flex;justify-content: center;align-items: center;height: 100vh;">
  <div class="card" style="width: 50%;">
    <div class="card-body">
      <h5 class="card-title">Login Form</h5>
      <div class="card-text">
        <form (ngSubmit)="login()" #form="ngForm">
          <div class="form-group">
            <label for="exampleInputEmail1">Email address</label>
            <input type="email" class="form-control" id="exampleInputEmail1" name="email" placeholder="Enter email" [(ngModel)]="model.email" required />
          </div>
          <div class="form-group">
            <label for="exampleInputPassword1">Password</label>
            <input type="password" class="form-control" id="exampleInputPassword1" name="password" placeholder="Password" [(ngModel)]="model.password" required />
          </div>
          <button type="submit" class="btn btn-primary" [disabled]="submitted || !form.valid">Submit</button>
        </form>
      </div>
    </div>
  </div>
</div>

In the Login component class, we are calling the Auth service method loginForm on form submit:
// login.component.ts
import { Component, OnInit } from '@angular/core';
import { AuthService } from '../../_services/auth.service';

@Component({
  selector: 'app-login',
  templateUrl: './login.component.html',
  styleUrls: ['./login.component.css']
})
export class LoginComponent implements OnInit {

  model: any = {};

  constructor(
    private authService: AuthService
  ) {}

  ngOnInit() {
    this.authService.logout();
  }

  login() {
    this.model.action = 'login';
    this.authService.loginForm(this.model).subscribe(response => {
      if (response.status === 'success') {
        this.authService.setUser(response);
      }
    }, error => {
      console.error(error);
    });
  }

}
Dashboard Component
After a successful login, the user is navigated to the Dashboard page. In the Dashboard component, we are making an API call with JWT token in Authorization Headers to get data from the database only after verification.
Later we will also discuss Server PHP code on how we can generate a token on login and how to verify on subsequent API calls.
Now replace the below code in the Dashboard template and Component class:
<!-- dashboard.component.html -->
<div class="container" style="display: flex;justify-content: center;align-items: center;height: 100vh;">
    <div class="card" style="width: 90%;">
      <div class="card-body">
        <h5 class="card-title">Dashboard Data <button type="button" class="float-right btn btn-outline-danger btn-sm" (click)="logout()">Logout</button></h5>
        <div class="card-text">
            <table class="table table-striped table-dark">
                <thead>
                  <tr>
                    <th scope="col">Latitude</th>
                    <th scope="col">Longitude</th>
                    <th scope="col">Accuracy</th>
                    <th scope="col">Timestamp</th>
                  </tr>
                </thead>
                <tbody>
                  <tr *ngFor="let item of dataFromServer">
                    <td>{{item.Latitude}}</td>
                    <td>{{item.Longitude}}</td>
                    <td>{{item.Accuracy}}</td>
                    <td>{{item.Timestamp}}</td>
                  </tr>
                </tbody>
              </table>
        </div>
      </div>
    </div>
  </div>
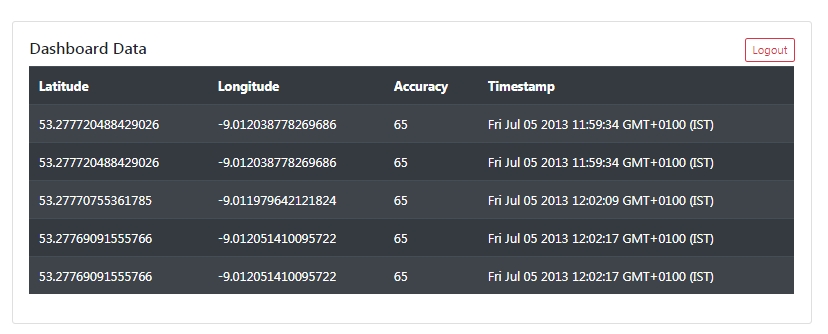
The dashboard will look like this after populating data from the server:
// dashboard.component.ts
import { Component, OnInit } from '@angular/core';
import { AuthService } from '../../_services/auth.service';

@Component({
  selector: 'app-dashboard',
  templateUrl: './dashboard.component.html',
  styleUrls: ['./dashboard.component.css']
})
export class DashboardComponent implements OnInit {
  model: any = {};

  dataFromServer: any = [];

  constructor(
    private authService: AuthService
  ) { }

  ngOnInit() {
    this.getSomePrivateStuff();
  }

  getSomePrivateStuff() {
    this.model.action = 'stuff';
    this.authService.getData(this.model).subscribe(response => {
       if (response.status === 'success') {
        this.dataFromServer = response['data']['Coords'];
       }
    }, error => {
      this.authService.logout();
    });
  }

  logout(){
    this.authService.logout();
  }

}
Create Auth Service
Angular Guards are used to preventing Unauthorised access to private pages like here we have Dashboard, these will only be visible to log in users.
Run following generate a command to create a new Auth guard implements CanActivate:
$ ng generate guard _guards/auth
? Which interfaces would you like to implement?
>( ) CanActivate
Now replace the content of _guards/auth.guard.ts file with the following code:
// auth.guard.ts
import { Injectable } from '@angular/core';
import { CanActivate, Router } from '@angular/router';
import { AuthService } from '../_services/auth.service';

@Injectable({
  providedIn: 'root'
})
export class AuthGuard implements CanActivate {

  constructor(
    private router: Router,
    private authService: AuthService
  ) { }

  canActivate() {
    if (!this.authService.isLoggedIn()) {
      this.router.navigate(['/auth/login']);
      return false;
    } else {
      return true;
    }
  }

}
Update Routing Module
As now we have guards to prevent Dashboard page access by a user without login in the application, finally out app-routing.module.ts file will look like this:
// app-routing.module.ts
import { NgModule } from '@angular/core';
import { Routes, RouterModule } from '@angular/router';
import { AuthGuard } from './_guards/auth.guard';
import { DashboardComponent } from './_component/dashboard/dashboard.component';
import { LoginComponent } from './_component/login/login.component';

const routes: Routes = [
  {
    path: 'dashboard',
    canActivate: [AuthGuard],
    component: DashboardComponent
  },
  {
    path: 'login',
    component: LoginComponent,
  },
  { path: '', redirectTo: '/login', pathMatch: 'full' },
  { path: '**', redirectTo: '/login' },
];

@NgModule({
  imports: [RouterModule.forRoot(routes)],
  exports: [RouterModule]
})
export class AppRoutingModule { }
Now if you try to navigate “http://localhost:4200/dashboard” it will be redirected to the Login page if not logged in as there is AuthGuard.
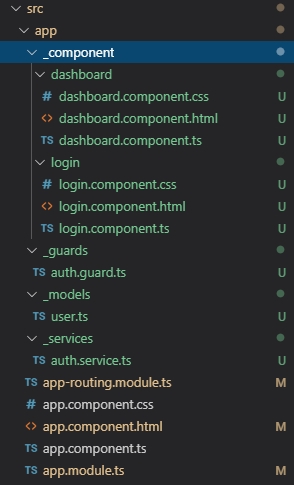
Finally, our project directory will look like this:
So up to here, we are done on client-side application implementation and usage of Token using angular2-jwt package in Angular 6+ application.
Next, we will discuss, How to implement server-side code PHP to generate/ encode JWT and also verify/ decode it to access private data which we did above. For that, we will use firebase/php-jwt.
Leave a Reply