Global Spipper Loader shown on HTTP calls example using ng-http-loader; In this tutorial, we will implement a global Spinner Loader in the Angular project by using a third-party package.
Interceptors take count of pending HTTP calls, thus shows a spinner loader as an indication. Moreover, the loader spinner with a backdrop limits a user to perform any action until the pending HTTP call is completed.
Angular interceptors were introduced after version 4.3, which are used to handle HTTP calls behaviour to the next level. In general, the interception of HTTP calls take care to show/ hide the Loader Spinner, but we can also control it manually for specific situations.
We are going to implement Full page older spinner in the Angular application by using the ng-http-loader package. This spinner loader comes with many configuration settings to customize its look and feel in your project.
How to Add Global Loading Spinner on HTTP Calls in Angular app?
Let’s get started!
Adding Loader Spinner on HTTP calls in Angular App
We will follow these quick steps to implement and customize our Http Loader spinner in the angular project.
- Step 1 – Create Angular Application
- Step 2 – Install Ng-Http-Loader Package
- Step 3 – Update App Module
- Step 4 – Add Loader Spinner
- Step 5 – Testing the Loader Spinner on HTTP Calls
- Step 6 – Customize Style of Spinner Loaders
- Step 7 – Run the Development Server
Step 1 – Create Angular Application
Before creating the Angular application, make sure you have Angular CLI installed on your system.
$ <span class="token function">npm</span> <span class="token function">install</span> -g @angular/cliAfter that, you are ready to create a new Angular project. Execute below CLI command to create a new angular application.
$ ng new angular-http-spinner-loader
? Would you like to add Angular routing? No
? Which stylesheet format would you like to use? CSS
Move into the project directory
$ <span class="token function">cd</span> angular-multiple-image-upload-appStep 2 – Install Ng-Http-Loader Package
After creating our application, head towards the CLI terminal window. Install the Ng-Http-Loader package module by executing the below npm command at the application root
$ npm i ng-http-loader
Step 3 – Update App Module
After successfully installing the package, we need to open the app.module.ts file to import it and add in the imports array as shown below:
// app.module.ts
import { BrowserModule } from '@angular/platform-browser';
import { NgModule } from '@angular/core';

import { AppRoutingModule } from './app-routing.module';
import { AppComponent } from './app.component';

import { HttpClientModule } from '@angular/common/http';
import { NgHttpLoaderModule } from 'ng-http-loader';

@NgModule({
  declarations: [
    AppComponent
  ],
  imports: [
    BrowserModule,
    AppRoutingModule,

    HttpClientModule,
    NgHttpLoaderModule.forRoot(),
  ],
  providers: [],
  bootstrap: [AppComponent]
})
export class AppModule { }
Here we also added HttpClientModule to make HTTP calls in the project.
Step 4 – Add Loader Spinner
Adding the loader spinner is extremely simple, just move to the parent most file. Like we usually have App Component at root module.
Open the app.module.html file and append the following directive component at the bottom.
<ng-http-loader></ng-http-loader>Step 5 – Testing the Loader Spinner on HTTP Calls
To test this loader, we added an HTTP call method to load the Movies list from the IMDB server:
Add the following code in the app.component.ts file:
// app.component.ts
import { Component } from '@angular/core';
import { HttpClient } from '@angular/common/http';

@Component({
  selector: 'app-root',
  templateUrl: './app.component.html',
  styleUrls: ['./app.component.css']
})
export class AppComponent {
  title = 'angular-http-spinner-loader';

  constructor(private http: HttpClient) {}

  getIMDBData() {
    return this.http
    .get<any>('http://www.omdbapi.com/?apikey=YOUR_OMDB_KEY&s=car')
    .subscribe((response) => {
      console.log(response);
    }, (error) => {
      alert('Error Found!');
    });
  }
}
Here we are making a get HTTP call to test our spinner.
You can get your free key here
In app.component.html there is a button and loader component:
<div class="container text-center" style="margin-top:100px;">

  <button type="button" class="btn btn-warning" (click)="getIMDBData()">Get Data</button>

</div>


<ng-http-loader></ng-http-loader>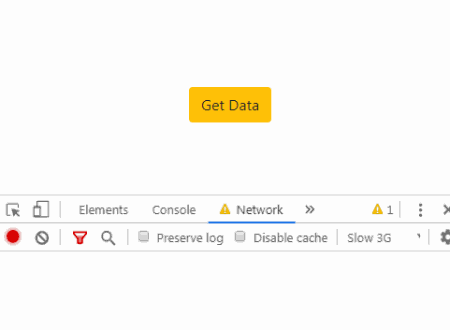
This loader will show a spinner and a backdrop shadow on the full screen, we can customize its properties.
Step 6 – Customize Style of Spinner Loaders
The following properties of the NgHttpLoader component can be customized to change spinner style and behavior:
<strong>[backdrop]</strong>: Takes boolean to show/ hide backdrop shadow; default is true.
[backgroundColor]: Color of the spinner.
<strong>[debounceDelay]</strong>: After how much milliseconds the spinner will show.
<strong>[extraDuration]</strong>: Time in milliseconds to show spinner after completing Http call.
<strong>[minDuration]</strong>: Minimum duration for which spinner will show at least.
<strong>[opacity]</strong>: Opacity of the spinner.
<strong>[spinner]</strong>: Different styles of the spinner can be added.
<ng-http-loader
[backdrop]="false"
[backgroundColor]="'#ff0000'"
[debounceDelay]="100"
[extraDuration]="300"
[minDuration]="300"
[opacity]=".6"
[spinner]="spinkit.skWave">
</ng-http-loader>
Spinner Style
Spinner style can be changed by importing Spinkit class in component as shown below:
// app.component.ts
import { Component } from '@angular/core';
import { HttpClient } from '@angular/common/http';
import { Spinkit } from 'ng-http-loader';

@Component({
  selector: 'app-root',
  templateUrl: './app.component.html',
  styleUrls: ['./app.component.css']
})
export class AppComponent {
  title = 'angular-http-spinner-loader';
  spinnerStyle = Spinkit;

  ....
  ....
In the template, we can change style using [spinner] property:
<ng-http-loader
    [backdrop]="false"
    [backgroundColor]="'#ff0000'"
    [debounceDelay]="100"
    [extraDuration]="300"
    [minDuration]="300"
    [opacity]=".6"
    [spinner]="spinnerStyle.skWanderingCubes"
    >
</ng-http-loader>
Different style for the loader include skChasingDots, skCubeGrid, skDoubleBounce, skRotatingPlane, skSpinnerPulse, skThreeBounce, skWanderingCubes and skWave
Custom Template for Loader
You can also use your custom template for spinner loader by following these steps:
- Create your component
- Add it to the
entryComponentsarray in your module’s configuration - Reference your component as a public property in your
app.component.ts - Reference the predefined property in the ng-http-loader component selector like this:
<<span class="pl-ent">ng-http-loader</span> [entryComponent]=<span class="pl-s"><span class="pl-pds">"</span>myAwesomeComponent<span class="pl-pds">"</span></span>></<span class="pl-ent">ng-http-loader</span>>Step 7 – Run the Development Server
Now, run the angular application to test our loader spinner. Execute the below command to serve the application in the browser.
$ ng serve --open
The application will open at the following URL in your default browser.
http://localhost:4200
Conclusion
That’s it using the ng-http-loader package you can easily add a Spinner loader quickly to your project. We are actually inheriting the interceptors under the hood to monitor HTTP status in applications.
Adding a global spinner is useful, especially when you don’t want a user other actions till the current one is completed. With the spinner, a backdrop layer will show up, preventing any accidental clicks.
Hope this tutorial was helpful.. do share your feedback and thoughts…Thanks…