Upload multiple images and preview in Angular 2+ applications; In this Angular tutorial, we will discuss how to upload multiple images with preview and how to save them on the server using PHP backend.
To upload images, we will use the Angular reactive form approach. Using the form, a user can select more than one image. The images will be displayed to the user a preview before upload. After submitting the form, images will be saved into the server using the PHP backend.
How to Upload Multiple Images with Preview in Angular application?
We’ll follow these quick steps to implement the multiple-image uploaded with preview using Angular’s reactive form.
- Create Angular Application
- Import FormsModule in App Module
- Update View of Template Component
- Update Component Class
- Create PHP Server File
- Run Angular Application and Server File
Create Angular Application
Before creating the Angular application, make sure you have Angular CLI installed on your system.
$ <span class="token function">npm</span> <span class="token function">install</span> -g @angular/cliAfter that, you are ready to create a new Angular project. Execute below CLI command to create a new angular application.
$ ng new angular-multiple-image-upload-appMove into the project directory
$ <span class="token function">cd</span> angular-multiple-image-upload-appImport FormsModule in App Module
To use the reactive form in our Angular application, we need to import the FormsModule and ReactiveFormsModule into our App Module.
Also, to trigger HTTP calls, we need HttpClientModule to provide different HTTP methods.
Open the app.module.ts file and update it with the following code.
import { NgModule } from '@angular/core';
import { BrowserModule } from '@angular/platform-browser';
import { AppComponent } from './app.component';

import { HttpClientModule } from '@angular/common/http';
import { FormsModule, ReactiveFormsModule } from '@angular/forms';

@NgModule({
  declarations: [
    AppComponent
  ],
  imports: [
    BrowserModule,
    HttpClientModule,
    FormsModule,
    ReactiveFormsModule
  ],
  providers: [],
  bootstrap: [AppComponent]
})
export class AppModule { }
Update View of Template Component
To select image files, add a reactive form into the App Component template HTML. This form will have input form control of file type. The input field to take name value and also IMG tag to preview our selected images with a *ngFor directive to iterate over selected files.
Open the app.component.html file and update it with this template.
<div class="container">

  <h1>Multiple Image Uploader with Preview - FreakyJolly.com</h1>

  <form [formGroup]="myForm" (ngSubmit)="submit()">

    <div class="form-group">
      <label for="name">Name</label>
      <input formControlName="name" id="name" type="text" class="form-control">
      <div *ngIf="formValue.name.touched && formValue.name.invalid" class="alert alert-danger">
        <div *ngIf="formValue.name.errors && formValue.name.errors.required">Name is required.</div>
      </div>
    </div>

    <div class="form-group">
      <label for="file">File</label>
      <input formControlName="file" id="file" type="file" class="form-control-file" multiple=""
        (change)="onFileChange($event)">
      <div *ngIf="formValue.file.touched && formValue.file.invalid" class="alert alert-danger">
        <div *ngIf="formValue.file.errors && formValue.file.errors.required">File is required.</div>
      </div>
    </div>

    <div class="preview-wrapper">
      <div class="img-preview" *ngFor='let url of images'>
        <img [src]="url" width="200px">
        <button type="button" class="btn btn-danger btn-sm" (click)="removeImage(url)">Remove</button>
      </div>
    </div>

    <button class="btn btn-primary" type="submit">Submit</button>
  </form>

</div>
The image preview wrapper is listing all the selected images. Each having a Remove button to remove the selected image before upload.
There is error handling as well to show messages for required fields before submitting the form.
Update Component Class
Now, update the component class file with submit, onFileChange, remove and patchValue methods. The formValue getter method will be used to show errors if required fields are not filled.
We are fetching the Base64 URL after the files are selected inside the onFileChange methods. Then pushing the Base64 string into the images array.
Open the app.component.html file and update it with the following code.
import { Component } from '@angular/core';
import { HttpClient } from '@angular/common/http';
import { FormGroup, FormControl, Validators} from '@angular/forms';

@Component({
  selector: 'app-root',
  templateUrl: './app.component.html',
  styleUrls: ['./app.component.scss']
})
export class AppComponent {
   images : string[] = [];
   myForm = new FormGroup({
    name: new FormControl('', [Validators.required]),
    file: new FormControl('', [Validators.required]),
    fileSource: new FormControl('', [Validators.required])
  });

  constructor(private http: HttpClient) { }

  get formValue(){
    return this.myForm.controls;
  }

  onFileChange(event:any) {
    if (event.target.files && event.target.files[0]) {
        var filesAmount = event.target.files.length;
        for (let i = 0; i < filesAmount; i++) {
                var reader = new FileReader();
                reader.onload = (event:any) => {
                  // Push Base64 string
                  this.images.push(event.target.result);
                  this.patchValues();
                }
                reader.readAsDataURL(event.target.files[i]);
        }
    }
  }

  // Patch form Values
  patchValues(){
    this.myForm.patchValue({
       fileSource: this.images
    });
  }

  // Remove Image
  removeImage(url:any){
    console.log(this.images,url);
    this.images = this.images.filter(img => (img != url));
    this.patchValues();
  }

  // Submit Form Data
  submit(){
    this.http.post('http://localhost:8005/upload.php', this.myForm.value)
      .subscribe(res => {
        console.log(res);
        alert('Uploaded Successfully.');
      })
  }
}
On submit. we are passing the form data to the server using POST HTTP call. We will create the PHP server in next step.
Setup PHP Server File
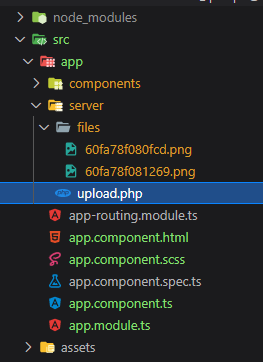
Now, head towards the application root and create the server/files folder with a PHP file named upload.php. Update the file with the following content in it.
<?php

header("Access-Control-Allow-Origin: *");
header("Access-Control-Allow-Methods: PUT, GET, POST");
header("Access-Control-Allow-Headers: Origin, X-Requested-With, Content-Type, Accept");

$folderPath = "files/";
$postdata = file_get_contents("php://input");
$request = json_decode($postdata);
foreach ($request->fileSource as $key => $value) {
    $image_parts = explode(";base64,", $value);
    $image_type_aux = explode("image/", $image_parts[0]);
    $image_type = $image_type_aux[1];
    $image_base64 = base64_decode($image_parts[1]);
    $file = $folderPath . uniqid() . '.'.$image_type;
    file_put_contents($file, $image_base64);
}
The final folder structure will look like this.
Run Angular Application and Server File
Now, we will serve the Angular application and PHP server to manage our uploaded files.
Serve Angular Application
Head towards the application root folder and execute the following command in the CLI terminal window:
$ ng serve --openThis will open the Angular application on 4200 port at the following URL
http://localhost:4200/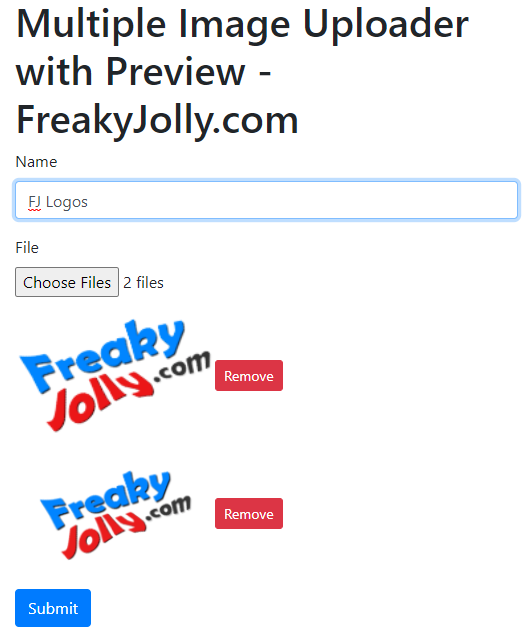
Start PHP Server
To start PHP server, move inside the directory where we put the upload.php file. In our case at this location ~src\app\server
Now execute the following command to run the PHP server, that will save your uploaded files in the src\app\server\files folder
php -S localhost:8005
Conclusion
We are completed with multiple image uploads using the PHP server in the Angular application. The image preview section is also having the remove button to remove any selected image before uploading. We achieved this functionality using the Reactive Angular form, which converts the selected image into Base64 string format and mange an images array to push to the server. The uploaded images are saved to the file system with randomly generated names.
Hope this tutorial was helpful, d share your feedback and suggestions, thanks…