In this tutorial, we will go through easy steps to start using SASS instead of traditional CSS in React JS application.
Syntactically Awesome Style or SASS is the CSS with superpowers. SASS provides a wide variety of easy methods and techniques to develop modern-era web applications. It helps in robust and powerful management of CSS code which proves more efficient and easy to maintain.
When doing development in React, we sometimes find it difficult to use SASS instead of CSS or it may sound like a cumbersome job to switch. Leave all that hassle to use, in this guide you will learn how to easily configure your React app to easily adapt to use SASS in a few steps.
Node SASS is a powerful package that undercovers the C-based tool called LibSASS that will help for easy integration of react app to use SASS preprocessors and its features.
How to use SASS style in React app?
Step 1 – Create React App
Step 2 – Install Node SASS Library
Step 3 – Rename Files and Add SASS Style
Step 4 – Update CSS with SASS paths
Step 5 – See In Action
Create React App
Before we create React app, make sure you have installed the create-rest-app tool to start:
npm install create-react-app --global
Thereafter you are ready to create new react app:
npx create-react-app react-sass-app
Move inside the react app folder:
cd react-sass-app
Install Node SASS Library
To enable SASS processing in react app, we will install the node-sass package library. Move to the terminal and execute the following command:
npm install node-sass
Rename Files and Add SASS Style
Now we will rename all the CSS files to SCSS. For example, we have index.css and App.css file by default. Rename these files to index.scss and App.scss.
Now open the App.scss file and update it with the following sample SCSS style code:
.wrap {
  margin: 15px;
  h1 {
    color: brown;
    font-style: italic;
  }
  div {
    padding: 15px;
    background-color: aquamarine;
    .my-style {
      color: red;
      font-weight: bold;
    }
    .sub-heading {
      color: blue;
    }
    ul {
      padding: 5px;
      background: gray;
      li {
        color: white;
        margin-left: 25px;
      }
    }
  }
}
Update CSS with SASS paths
With this change done, also update the import paths accordingly. Open the index.js file and update the import paths from “./index.css” to “./index.scss”
Similarly, open the App.js file and update the import path from “./App.css” to “./App.scss“;
You need to perform similar renaming of files and import charges everywhere in your application structure.
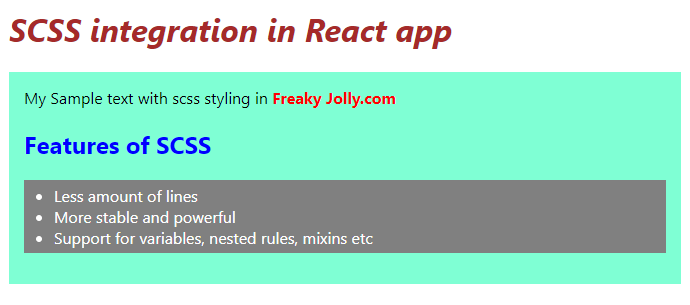
import React from "react";
import "./App.scss";
function App() {
  return (
    <div className="wrap">
      <h1>SCSS integration in React app</h1>
      <div>
        My Sample text with scss styling in{" "}
        <span className="my-style">Freaky Jolly.com</span>
        <h2 className="sub-heading">Features of SCSS</h2>
        <ul>
          <li>Less amount of lines</li>
          <li>More stable and powerful</li>
          <li>Support for variables, nested rules, mixins etc</li>
        </ul>
      </div>
    </div>
  );
}
export default App;
See In Action
Finally, execute the following command to start the development webserver:
npm startOpen the application at the following URL:
Conclusion
We discussed how to quickly implement SCSS support in a react application. By using the node-scss plugin we can easily start using the powerful and robust SCSS-based CSS styling in our components.