Slick Carousel using ngx-slick-carousel is going to be discussed in this guide; we’ll create a demo application and create an example of Slick Carousel and check its properties and methods available as a configuration.
Features of Slick Carousel in Angular Application
- Fully equipped carousel
- Easy to integrate using the exclusive
ngx-slick-carouselpackage for Angular - Responsive layout to fit in screen size.
- Server-Side Rendering with Angular Universal support.
- Lazy-Loaded Images in Carousel
- HTML content can be easily added, also support variable height of slides with cool effects.
Slick Carousel provides much flexibility and customization. Which make it easy to integrate with your application. Moreover, you can easily customize the theme to enhance usability further.
Slick Carouse Example Tutorial in Angular 12
We will begin with the installation of required packages including the core Slick Carousel, jQuery and ngx-slixk-carousel adapter. After that, the modules need to be imported into the Angular app to use its directive, properties and methods.
Following are the major steps to integrate Slick Carousel in the Angular application.
- Setup Angular application
- Install Slick and Other Packages
- Configure Slick Styles and Script
- Import Slick Carousel Modules
- Use Slick Carousel in Application
- Adding Responsive Breakpoints in Slick Carousel Angular
- Other Useful Configurations
- Serve the Application
Setup Angular application
To create an Angular application, make sure you have NG CLI installed in your system.
$ npm install -g @angular/cliNow, you can create a new Angular application, by executing the below command. You can skip if you already have an application setup.
$ ng new angular-slick-carousel-appMove to the application directory
$ cd angular-slick-carousel-appInstall Slick and Other Packages
After we have the project ready, go on and install the required packages. We’ll install the slick carousel core library, jQuery and ngx-slick-carousel.
You can install them all in a single npm command
$ npm install jquery slick-carousel ngx-slick-carousel --save
Configure Slick Styles and Script
The packages are installed, but we need to manually add few CSS and JS files in the styles and scripts array.
For that, open the angular.json file at the application root and update.
...
"styles": [
    ...
    "node_modules/slick-carousel/slick/slick.scss",
    "node_modules/slick-carousel/slick/slick-theme.scss"
],
"scripts": [
    "node_modules/jquery/dist/jquery.min.js",
    "node_modules/slick-carousel/slick/slick.min.js"
]
...
Import Slick Carousel Modules
To add the Slick carousel, we need to import the SlickCarouselModule to the application module, therefore update the imports array in the app.module.ts file.
import { BrowserModule } from '@angular/platform-browser';
import { NgModule } from '@angular/core';

import { AppRoutingModule } from './app-routing.module';
import { AppComponent } from './app.component';

import { SlickCarouselModule } from 'ngx-slick-carousel';

@NgModule({
  declarations: [
    AppComponent
  ],
  imports: [
    BrowserModule,
    AppRoutingModule,
    SlickCarouselModule
  ],
  providers: [],
  bootstrap: [AppComponent]
})

export class AppModule { }
Using Slick Carousel in Application
Almost there, we just need to implement the Slick Carousel in the Angular application by adding the ngx-slick-carousel directive component. There are various properties and methods to handle events.
For each slide, we have the ngxSlickItem directive. The same element with directive can be iterated to show multiple Slider images or content slides. To dynamically show the content, we have added the *ngFor Angular directive here.
In the app.component.html file, update the following template.
<div class="slick-wrapper">

<!-- You can now use your library component in app.component.html -->
<ngx-slick-carousel class="carousel" #slickModal="slick-carousel" [config]="slideConfig" (init)="slickInit($event)"
  (breakpoint)="breakpoint($event)" (afterChange)="afterChange($event)" (beforeChange)="beforeChange($event)">
  <div ngxSlickItem *ngFor="let slide of slides" class="slide">
    <img src="https://picsum.photos/536/354?{{slide}}" alt="" width="100%">
  </div>
</ngx-slick-carousel>

</div>

<button (click)="addSlide()">Add</button>
<button (click)="removeSlide()">Remove</button>
<button (click)="slickModal.slickGoTo(2)">slickGoto 2</button>
<button (click)="slickModal.unslick()">unslick</button>
The slick carousel is wrapped inside a class to provide max-width to the slider. In upcoming sections, we will discuss how to make the slick carousel responsive.
Next, update the component class with slides array and method definitions which we used for emitting events. The slickGoTo method is used to directly show a slide.
Open the app.component.ts file and update it with the following code.
import { Component } from '@angular/core';

@Component({
  selector: 'app-root',
  templateUrl: './app.component.html',
  styleUrls: ['./app.component.scss']
})
export class AppComponent {
  title = 'ngSlick';


  slides = [342, 453, 846, 855, 234, 564, 744, 243];

  slideConfig = {
    "slidesToShow": 4,
    "slidesToScroll": 1,
    "dots": true,
    "infinite": false
  };

  addSlide() {
    this.slides.push(488)
  }

  removeSlide() {
    this.slides.length = this.slides.length - 1;
  }

  slickInit(e: any) {
    console.log('slick initialized');
  }

  breakpoint(e: any) {
    console.log('breakpoint');
  }

  afterChange(e: any) {
    console.log('afterChange');
  }

  beforeChange(e: any) {
    console.log('beforeChange');
  }
}
Next, add the following style in the styles.scss file to align it properly and color the Next, Prev icons on while background.
.slick-wrapper{
    width: 1000px;
    margin: 20px auto;
}

.slick-prev:before, .slick-next:before {
    color: black!important;
}
How to Configure Slick Carousel to Responsive Slides in Angular?
For responsive control and to show an optimal number of slides for different screen sizes, we can configure the [config] object.
We need to specify the screen size break points under “responsive” property as shown below:
slideConfig = {
    "slidesToShow": 4,
    "slidesToScroll": 1,
    "dots": true,
    "infinite": false,
    "responsive": [
      {
        breakpoint: 1024,
        settings: {
          slidesToShow: 3,
          slidesToScroll: 3,
          infinite: true,
          dots: true
        }
      },
      {
        breakpoint: 600,
        settings: {
          slidesToShow: 2,
          slidesToScroll: 2
        }
      },
      {
        breakpoint: 480,
        settings: {
          slidesToShow: 1,
          slidesToScroll: 1
        }
      }
    ]
  };
Now, the slick slider will show a different numbers of slides for each screen break point defined.


Other Useful Configurations
There are a ton of useful features and configurations available in Slick Carousel. Let’s discuss some of the important ones.
arrows: The boolean property; Default istrue; Set tofalseto hide the Next Previous Navigation icons.adaptiveHeight: Slides of variable height can be adjusted automatically; Default is false.autoplay: You can turn on autoplay, so the slider will auto move to the next slide. Also, add theautoplaySpeedto control slide timing.
Disable Mouse Dragging in Slick Carousel Angular
You can turn off the default draggable behaviour of Slick Carouse by setting the draggable:false.
Adding Fade Effect to Slick Carousel Angular
The fade effect to slider can be added by using following two props.
{
 ...
   fade: true,
   cssEase: 'linear'
  ...
}
The important thing to notice is, the fade effect works when one Slide is shown.
Lazy Loaded Images in Slick Carousel Angular
For large-sized images in the carousel, this option is a boon to optimize page load. You can set the lazyLoad<span class="token punctuation">:</span> <span class="token string">'ondemand'</span>, to lazy load images whenever they come to view.
Check out more settings on official documentation.
Serve the Application
You can now quickly check the Slick Carousel working by hitting the following command
$ ng serve --openit will open the application at localhost:4200, and the carousel will look like this
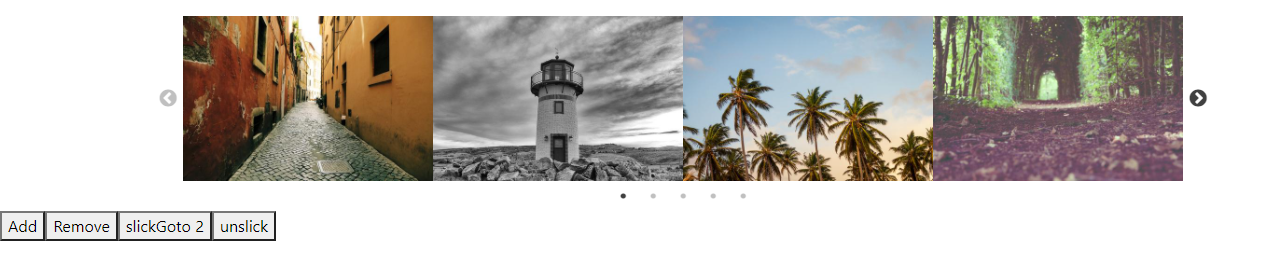
Conclusion
Finally, we’re done with the Slick Carouse implementation tutorial in the Angular application. We discussed how to easily and quickly configure the application to add a fully customised carousel.
Can I Wear a Hat After a Hair Transplant?