When developing Android-based applications for example React Native or other Hybrid solutions like Ionic Framework, we may need to test our application on the computer by running the app in an emulator if no physical device is connected.
In this guide, you will learn how to find the location of the emulator folder, list all available devices, and run those devices without opening the Android Studio on your computer.
Make sure to run the emulator device, we need to add it first. No worries we will cover those steps as well at the end. But first have looked at the answer to the question of how to run the emulator device without Android Studio.
How to Find the Location of an Android Emulator in Your Computer?
If you have already installed the Android studio, and you have no idea about the installation location, try out the following steps to find its location:
Method 1: Check Emulator Path from CMD / Terminal
Method 2: Check Emulator Path from Android Studio
Method 1: Check Emulator Path from CMD / Terminal
The quickest way is to check the path by hitting the following command in the CMD command prompt terminal or any other like PowerShell or Bash.
Linux or macOS
echo $ANDROID_HOME
Windows OS
echo %ANDROID_HOME%
This will print the path to the Android SDK on your computer.
Note: If the ANDROID_HOME environment variable is not set in your environment variables, then this method will not work. If it doesn’t work try using the next method.
Method 2: Check Emulator Path from Android Studio
In this method, we will check the Android SDK path using the Android Studio:
Step 1 – Open Android Studio, by clicking the Desktop icon or you can search by clicking on the Windows Icon or Start Menu.
Step 2 – On the top horizontal many find Tools > SDK Manager.
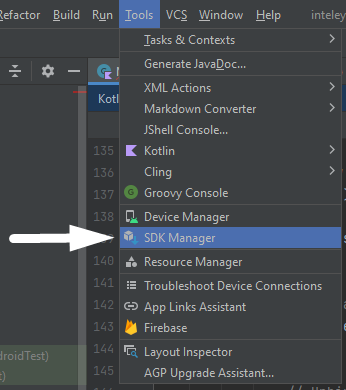
Step 3 – In the pop-up Settings dialogue, you will see the Android SDK path:

How to Run Android Emulator from Android SDK Directory?
After finding the Android SDK path, let’s have a look at how to run the emulator device:
Open the CMD command prompt terminal and change its location to the Android SDK directory which we find out in previous steps.
cd C:\Users\Lenovo\AppData\Local\Android\Sdk\emulatorMake sure to replace C:\Users\Lenovo\AppData\Local\Android\Sdk\emulator with the actual path to the emulator/ directory of your Android SDK.
Step 3: List Available Virtual Devices
Now, list the available emulator or virtual devices with the -list-avds option:
emulator -list-avdsThis command will list the available virtual devices you have already setup, if not we will discuss later in this guide how to add devices.
Step 4: Start a Virtual Device
Finally, we can start a virtual device with the -avd option followed by the name of the virtual device from the list you got in the previous step:
emulator -avd <name-of-virtual-device>After executing the above command, the selected emulator device will open up and start running to be available for your application to run on.
How to Add Emulator & Run Device in Android Studio?
In this section we will get to know how to add a new emulator device and run it from Android Studio by following these steps:
Step 1: Open the AVD Manager
Open the Android Studio then go to the topmost horizontal menu and click on Tools > Device Manager in the toolbar.
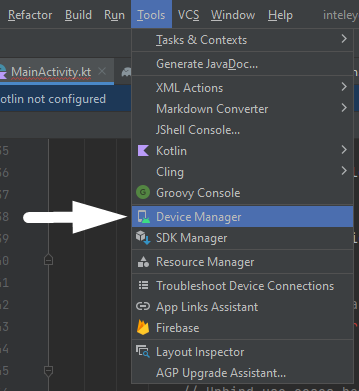
This will open a new section on the right end, then click on Create Device:
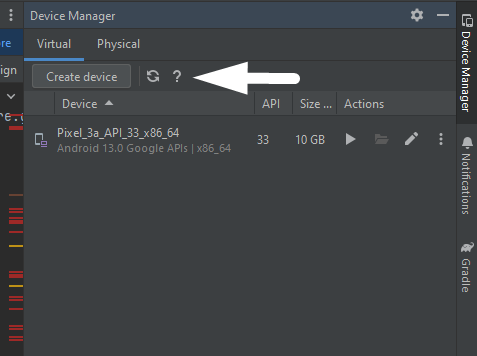
In the dialogue box, you can search for your preferred device, name it and then click on Next:

Thereafter you will see other screens to Select a System Image, Configure the Virtual Device and then click on Finish.
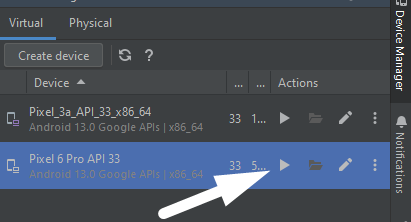
Step 2: Run the Virtual Device
You can go to Tools > Device Manager, which will open the section to show the list of available devices. Then you can hit the Play button to start that emulator device.
Conclusion
Here you go, we discussed how to add a new emulator Android device in Android Studio and run it. Most importantly we discussed how to run the available emulator devices from the CMD terminal by knowing the location of the Android SDK path using two methods.
Hope this will be helpful…