React application needs to include a routing library to add routing capabilities. In this tutorial, we will learn How to add React Router Dom library in a React app to switch between multiple components.
The react-router-dom is a popular and well-supported library available which is the most preferred routing library for React applications due to number fantastic features with ease of implementation.
Let’s start implementation after creating a new React app.
Create a React App
Note: You must have installed the latest version of NodeJs.
Step 1) Install the create-react-app package in your working library
$ npm install -g create-react-app</pre> <strong>Step 2)</strong> Create a new React app using the create-react-app using <code>npxcommand$ npx create-react-app react-routing-demo</pre> Enter in the application folder by running <code>cdcommand$ cd react-routing-demo</pre> <h3>Install react-router-dom in React Application</h3> Next, we will install the <code>react-router-domlibrary to use Routing capabilities in our React app. Run the following command in the terminal window at application root: Using NPM$ npm install react-router-dom</pre> OR Using <strong>YARN</strong> <pre class="wp-block-prismatic-blocks"><code class="language-javascript">$ yarn add react-router-dom</pre> <h3>How to use React Router Dom?</h3> After successful installation of <code>react-router-dom, go to the index.js file then we have to importBrowserRouterfromreact-router-dom// index.js import React from 'react'; import ReactDOM from 'react-dom'; import './index.css'; import App from './App'; import * as serviceWorker from './serviceWorker'; import { BrowserRouter } from 'react-router-dom' ReactDOM.render( <BrowserRouter> <React.StrictMode> <App /> </React.StrictMode> </BrowserRouter>, document.getElementById('root') ); // If you want your app to work offline and load faster, you can change // unregister() to register() below. Note this comes with some pitfalls. // Learn more about service workers: https://bit.ly/CRA-PWA serviceWorker.unregister();The
BrowserRouteris a component, which gives our application the functionality of routing by wrapping around the <App /> component.Adding Routes
Now go to App.js them import
Routeclass fromreact-router-dom.// App.js import React from 'react'; import { Route } from 'react-router-dom' import './App.css'; function App() { ... }In the App component, we will create three local functional components to keep the tutorial easy. But in real-world applications, we should keep them separately which we will discuss later.
Replace the content in App component by code as shown below:
// App.js import React from 'react'; import { Route } from 'react-router-dom' import './App.css'; function App() { return ( <div> <div> <Route exact path='/' component={Home} /> <Route path='/about' component={About} /> <Route path='/dashboard' component={Dashboard} /> </div> </div> ); } // Dummy Functional Components const Home = () => { return ( <div> <h2>Home</h2> </div> ); } const About = () => { return ( <div> <h2>About</h2> </div> ); } const Dashboard = () => { return ( <div> <h2>Dashboard</h2> </div> ); } export default App;
RoutecomponentIn the above code, you can see, each routeing path is defined by adding a Route component which takes in three important properties:
<strong>exact</strong>: It is a boolean property to match a URL exactly or not.If we will not add the
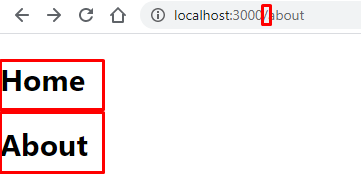
exactproperty on first Route then the localhost:3000/about will load both Home as well as About<div> <Route path='/' component={Home} /> <Route path='/about' component={About} /> <Route path='/dashboard' component={Dashboard} /> </div>
<strong>path</strong>: This will be the string as the URL path which will be visited to open a component.
<strong>component</strong>: This defines the component which should be rendered in the App component when a user visits a URL
There are two methods to navigate between component pages:
Method 1) Using
<Link/>ComponentWe can add a
Linkcomponent with atoproperty having a path to navigate during routing. Here we will add links to our Home component:const Home = () => { return ( <div> <Link to='/'>Home</Link> <Link to='/about'>About</Link> <Link to='/dashboard'>Dashboard</Link> </div> ); }Method 2) Using
historyproperty onpropsAs we have called components in Router, now they will return use props property to navigate by using history property to push URL paths:
const Home = props => { return ( <div> <button onClick={() => { props.history.push('/') }}>Home</button> <button onClick={() => { props.history.push('/about') }}>About</button> <button onClick={() => { props.history.push('/dashboard') }}>Dashboard</button> </div> ); }Conclusion: In this tutorial, we got to know how to implement basic concepts regarding the implementation of Routing in a React application and different methods to navigate between pages using Link component and history property in props.
Category: React