Image slider with thumbnail navigator example in React js application; In this React 16+ tutorial, we will demonstrate the implementation of responsive image gallery with preview thumbnails. The image slider will slide images with animation effects and supporting a wide range of features.
The image gallery on top of the page makes it more attractive. In react application, we have a number of options out there to implement an image slider, but today we are going to add great looking and fully featured carousel with a preview pane. Moreover, it provides proficient features like lazy-loading, responsive layout, fullscreen lightbox, autoplay, touch screen support and many more land it to the toppers.
This guide will walk you through step by step tutorial on how to add an Image carousel with preview and fullscreen showcase features. We will be using the react-image-slider plugin to implement the image gallery.
Sound Features of React-Image-Slider
- Mobile swipe gestures
- Thumbnail navigation
- Fullscreen support
- Custom rendered slides
- RTL support
- Responsive design
- Tons of customization options
- Lightweight ~13.1kb gzipped
Without any further wait, let’s start with the implementation.
How to Add Image Slider with Preview Thumbnails in React js App?
- Step 1 – Create React App
- Step 2 – Install React Image Gallery Plugin
- Step 3 – Create Image Slider Component
- Step 4 – Import Component in App.js
- Step 5 – Configuration Props and Settings
- Step 6 – Run React App
Step 1 – Create React App
To start, let’s create a new React Js application. Execute the following command in the terminal window:
npx create-react-app react-demo-appThen, move inside the application directory:
cd react-demo-appStep 2 – Install React Image Gallery Plugin
Now, we will install the React Image Gallery package in the react application. Execute the following npm command at application root:
npm install react-image-galleryStep 3 – Create Image Slider Component
Next, move into the src directory and create a new component named image-slider.component.js file. This will have the Image Slider component which can be used anywhere inside the app.
Update the ~src/image-slider.component.js file with the following code:
import React from "react";
import '../node_modules/react-image-gallery/styles/css/image-gallery.css';
import ImageGallery from 'react-image-gallery';

const images = [
    {
      original: 'https://picsum.photos/id/1018/1000/400/',
      thumbnail: 'https://picsum.photos/id/1018/250/150/',
    },
    {
      original: 'https://picsum.photos/id/1015/1000/400/',
      thumbnail: 'https://picsum.photos/id/1015/250/150/',
    },
    {
      original: 'https://picsum.photos/id/1026/1000/400/',
      thumbnail: 'https://picsum.photos/id/1026/250/150/',
    }
  ];

class ImageSliderComponent extends React.Component {

  render() {
    return (
        <div className="wrapper">
            <ImageGallery items={images} />
        </div>
    );
  }
}
export default ImageSliderComponent;
Step 4 – Import Component in App.js
Now, we will use our ImageSliderComponent in the App.js file which is the main component in a React app. Open the App.js file and update it as shown below:
import './App.css';
import ImageSliderComponent from './image-slider.component';
function App() {
return (
<div className="App">
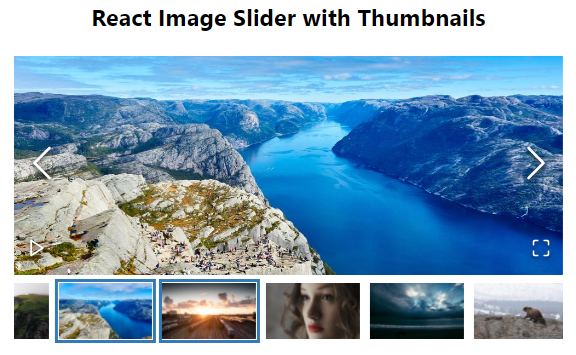
<h3>React Image Slider with Thumbnails</h3>
<ImageSliderComponent />
</div>
);
}
export default App;Step 5 – Configuration Props and Settings
Let’s have a look at important props and functions available on the Image Gallery component:
React Image Gallery Functions with Example
The following functions can be accessed using refs
play(): plays the slidespause(): pauses the slidesfullScreen(): activates the full screenexitFullScreen(): deactivates the full screenslideToIndex(index): slides to a specific indexgetCurrentIndex(): returns the current index
Let’s get into more detail on using some of the functions with examples
import React from "react";
import "../node_modules/react-image-gallery/styles/css/image-gallery.css";
import ImageGallery from "react-image-gallery";

const images = [
  {
    original: "https://picsum.photos/id/1018/1000/400/",
    thumbnail: "https://picsum.photos/id/1018/250/150/",
  },
  {
    original: "https://picsum.photos/id/1015/1000/400/",
    thumbnail: "https://picsum.photos/id/1015/250/150/",
  },
  {
    original: "https://picsum.photos/id/1026/1000/400/",
    thumbnail: "https://picsum.photos/id/1026/250/150/",
  },
];

class ImageSliderComponent extends React.Component {
  constructor(props) {
    super(props);
    this.myImageRef = React.createRef();
    this.onFullscreen = this.onFullscreen.bind(this);
    this.onPlay = this.onPlay.bind(this);
    this.onPause = this.onPause.bind(this);
    this.onMoveToSlide = this.onMoveToSlide.bind(this);
  }

  onFullscreen() {
    this.myImageRef.current.fullScreen()
  }
  onPlay() {
    this.myImageRef.current.play()
  }
  onPause() {
    this.myImageRef.current.pause()
  }
  onMoveToSlide() {
    // Index start from 0 so 2 will move to 3rd slide
    this.myImageRef.current.slideToIndex(2)
  }

  render() {
    return (
      <div className="wrapper">
        <ImageGallery items={images}  ref={this.myImageRef} />
        <button onClick={this.onFullscreen}>FullScreen</button>
        <button onClick={this.onPlay}>Play</button>
        <button onClick={this.onPause}>Pause</button>
        <button onClick={this.onMoveToSlide}>SlideTo 3rd Slide</button>
      </div>
    );
  }
}
export default ImageSliderComponent;
Props available in React Image Gallery
There are a large number of props available. We will discuss a few of them over here and discuss how to use them efficiently.
items: (required) Array of objects with image URLs.infinite: Enable infinite sliding.lazyLoad: Enable lazy loading of images. useful when loading large size images.autoPlay: This will auto slide images after a specified duration of time.slideDuration: Duration of sliding the images.
Some of the important Events:
onSlide: Triggered on sliding the image.onClick: Triggered on slide click.onTouchMove: Triggered on touch move.
class ImageSliderComponent extends React.Component {
  constructor(props) {
    super(props);
    this.myImageRef = React.createRef();
    this.onFullscreen = this.onFullscreen.bind(this);
    this.onPlay = this.onPlay.bind(this);
    this.onPause = this.onPause.bind(this);
    this.onMoveToSlide = this.onMoveToSlide.bind(this);
  }

  onFullscreen() {
    this.myImageRef.current.fullScreen()
  }
  onPlay() {
    this.myImageRef.current.play()
  }
  onPause() {
    this.myImageRef.current.pause()
  }
  onMoveToSlide() {
    // Index start from 0 so 2 will move to 3rd slide
    this.myImageRef.current.slideToIndex(2)
  }

  onEventTrigger(eventName){
    console.log('Event Name ',eventName);
  }

  render() {
    return (
      <div className="wrapper">

        <ImageGallery

        items={images}
        infinite={true}
        lazyLoad={true}
        autoPlay={true}
        autoPlay={true}
        slideDuration={3000}

        onSlide={() => this.onEventTrigger('onSlide')}
        onClick={() => this.onEventTrigger('onClick')}
        onTouchMove={() => this.onEventTrigger('onTouchMove')}

        ref={this.myImageRef} />

        <button onClick={this.onFullscreen}>FullScreen</button>
        <button onClick={this.onPlay}>Play</button>
        <button onClick={this.onPause}>Pause</button>
        <button onClick={this.onMoveToSlide}>SlideTo 3rd Slide</button>
      </div>
    );
  }
}
export default ImageSliderComponent;
You can check all of them on docs here.
Step 6 – Run React App
Finally, you can hit the following command to see the CKEditorin action.
npm startCheck out your React app on the following URL:
http://localhost:3000Conclusion
We are done with our tutorial. We discussed how to add a fully-featured Image Gallery in a React js application. For that, we used the React Image Gallery plugin and demonstrated how to quickly integrate it. The Image Gallery component provides a number of props and event handlers to modify the slider according to the requirements.
A wide range of great features like fullscreen view, preview thumbnail pane, lazy-loaded images, responsive layout support and much more make it to the top list plugins.
Hope this tutorial helped you … thanks…