In this React tutorial, we will discuss how we can download multiple sections of a page into a PDF file, where each page will have a separate HTML section.
Sometimes there are requirements, where a page has various sections like charts, tabular data or images, that we need to download as a PDF file. On top of that, each section should show up on a separate PDF file page.
We will walk through step by step tutorial where we will create a similar feature in our react app that will download the sections into a PDF file with multiple pages.
Also, we will discuss how to add padding on PDF file pages and how to improve PDF content quality, which is always a challenge while generating front-end PDF files.
We will use the popular html2canvas and jsPDF npm packages to easily achieve this functionality.
How to Download Multi-page PDF in React App?
Follow these quick steps to easily create and download multi-page PDF on front-end from various HTML containers:
Step 1 – Install Dependencies
Step 2 – App.js Overview
Step 3 – Creating the Download Button
Step 4 – Implementing the handleDownload Function
Step 5 – Setting up HTML2Canvas
Step 6 – Configuring the PDF Layout
Step 7 – Creating a New Canvas
Step 8 – Drawing the PDF
Step 9 – Saving the PDF
Step 10 – Implementing the Content Section
Step 11 – Testing the Application
Step 1 – Install Dependencies
First, we need to install html2canvas and jsPDF libraries using npm:
npm install html2canvas jspdf
Step 2 – App.js Overview
Here’s an overview of the App.js file we will be using in this tutorial:
import React from "react";
import html2canvas from "html2canvas";
import jsPDF from "jspdf";
import "./App.css";

const App = () => {
  // ...
};

export default App;
Step 3 – Creating the Download Button
Now, let’s add a button in the App component that will be used to download the div section as a PDF:
return (
  <div className="App">
    <button onClick={handleDownload}>Download as PDF</button>
    {/* ... */}
  </div>
);
Step 4 – Implementing the handleDownload Function
Next, we will implement the handleDownload function that will be called when the user clicks on the “Download as PDF” button:
const handleDownload = () => {
  const content = document.getElementById("content-to-download");

  if (!content) {
    console.error("Element not found!");
    return;
  }

  // ...
};
Step 5 – Setting up HTML2Canvas
We will use the html2canvas library to capture the content of the div section. We will pass the content element and a scale factor of 3 to improve the quality of the captured content:
html2canvas(content, { scale: 3 }).then((canvas) => {
  // ...
});
Step 6 – Configuring the PDF Layout
Now, let’s configure the layout of the PDF by adding padding to the content:
const paddingTop = 50;
const paddingRight = 50;
const paddingBottom = 50;
const paddingLeft = 50;

const canvasWidth = canvas.width + paddingLeft + paddingRight;
const canvasHeight = canvas.height + paddingTop + paddingBottom
Step 7 – Creating a New Canvas
Next, we will create a new canvas with the updated dimensions that include the padding. We will also set the background color for the new canvas:
const newCanvas = document.createElement("canvas");
newCanvas.width = canvasWidth;
newCanvas.height = canvasHeight;
const ctx = newCanvas.getContext("2d");

if (ctx) {
  ctx.fillStyle = "#ffffff"; // Background color
  ctx.fillRect(0, 0, canvasWidth, canvasHeight);
  ctx.drawImage(canvas, paddingLeft, paddingTop);
}
Step 8 – Drawing the PDF
After setting up the canvas, we will initialize a new jsPDF instance and add the image data from the new canvas to the PDF:
const pdf = new jsPDF("p", "mm", "a4");
const imgData = newCanvas.toDataURL("image/png");
const imgProps = pdf.getImageProperties(imgData);
const pdfWidth = pdf.internal.pageSize.getWidth();
const pdfHeight = (imgProps.height * pdfWidth) / imgProps.width;

pdf.addImage(imgData, "PNG", 0, 0, pdfWidth, pdfHeight);
Step 9 – Saving the PDF
Finally, we will save the generated PDF with the name “content.pdf”:
pdf.save("content.pdf");
Step 10 – Implementing the Content Section
Update the JSX structure in the return statement to include multiple div containers with different content:
return (
  <div className="App">
    <button onClick={handleDownload}>Download as PDF</button>
    <div className="pages">
      <div id="page-1" className="page">
        {/* Page 1 content goes here */}
      </div>
      <div id="page-2" className="page">
        {/* Page 2 content goes here */}
      </div>
      <div id="page-3" className="page">
        {/* Page 3 content goes here */}
      </div>
    </div>
  </div>
);
Here is the final and complete App.js file after merging all the discussed parts of the code:
import React from "react";
import html2canvas from "html2canvas";
import jsPDF from "jspdf";
import "./App.css";
import logo from "./logo.png";
const App = () => {
const handleDownload = async () => {
const pdf = new jsPDF("p", "mm", "a4");
const pages = document.querySelectorAll(".page");
for (const [index, page] of pages.entries()) {
const canvas = await html2canvas(page, { scale: 3 });
const paddingTop = 50;
const paddingRight = 50;
const paddingBottom = 50;
const paddingLeft = 50;
const canvasWidth = canvas.width + paddingLeft + paddingRight;
const canvasHeight = canvas.height + paddingTop + paddingBottom;
const newCanvas = document.createElement("canvas");
newCanvas.width = canvasWidth;
newCanvas.height = canvasHeight;
const ctx = newCanvas.getContext("2d");
if (ctx) {
ctx.fillStyle = "#ffffff"; // Background color
ctx.fillRect(0, 0, canvasWidth, canvasHeight);
ctx.drawImage(canvas, paddingLeft, paddingTop);
}
const imgData = newCanvas.toDataURL("image/png");
const imgProps = pdf.getImageProperties(imgData);
const pdfWidth = pdf.internal.pageSize.getWidth();
const pdfHeight = (imgProps.height * pdfWidth) / imgProps.width;
pdf.addImage(imgData, "PNG", 0, 0, pdfWidth, pdfHeight);
if (index < pages.length - 1) {
pdf.addPage();
}
}
pdf.save("content.pdf");
};
return (
<div className="App">
<button onClick={handleDownload}>Download as PDF</button>
<div className="pages">
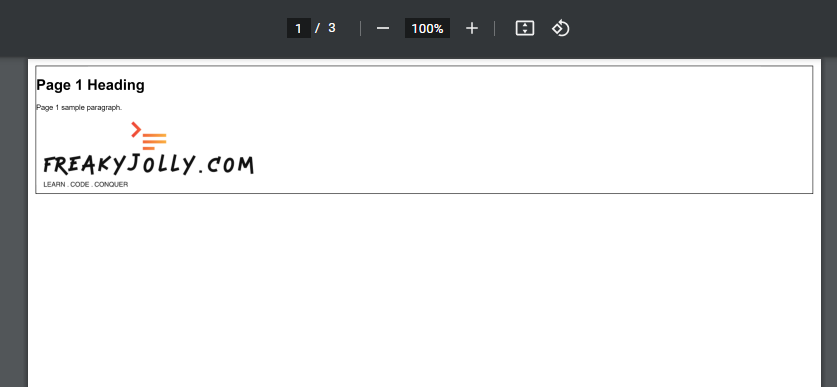
<div id="page-1" className="page">
<h1>Page 1 Heading</h1>
<p>Page 1 sample paragraph.</p>
<img src={logo} alt="Sample Image for Page 1" />
</div>
<div id="page-2" className="page">
<h1>Page 2 Heading</h1>
<p>Page 2 sample paragraph.</p>
<img src={logo} alt="Sample Image for Page 2" />
</div>
<div id="page-3" className="page">
<h1>Page 3 Heading</h1>
<p>Page 3 sample paragraph.</p>
<img src={logo} alt="Sample Image for Page 3" />
</div>
</div>
</div>
);
};
export default App;
Step 11 – Testing the Application
Now that we have implemented all the required functionality, run your React app and test the “Download as PDF” button. It should download the div section as a high-quality PDF with the added padding.
Conclusion
In this tutorial, we learned how to download a div section as a high-quality PDF with padding in a React app using html2canvas and jsPDF.
Each page will be created separately by identifying the various division with className=”page”. You can easily change these selector name by anything you like
This functionality can be useful in various applications, such as generating reports, invoices, or other documents that need to be downloaded as PDF files.