In this React 16+ tutorial, we’ll learn how to implement Bootstrap Table with pagination, filter …….. in React js application by using the react-bootstrap-table2 package.
Bootstrap tables catch a lot of eyeballs when we need a table grid in the application. In today’s tutorial, we’ll learn how to add a Bootstrap table in React application which will be loaded with features like Customized pagination, Sorting, Filter search, Export to excel, etc.
We can easily modify the Bootsrap tables to have custom column widths, have tooltips, vertical and horizontal scrolls. These can easily use traditional bootstrap’s table style for the border, stripped, dark tables as well.
So let’s get into it…
Create a React Application
First, we’ll create a new React application using npx create-react-app command
$ npx create-react-app react-bootstrap-table-tutorial-appMove inside the react app
$ cd react-bootstrap-table-tutorial-appRun application
$ npm start
Install react-bootstrap-table-next Package
Next, we’ll install the required package to create a bootstrap table inside the React application. We’ll install the react-bootstrap-table-next package which was previously known as react-bootstrap-table2. They changed the package name as npm already having the same name for some other package.
Run the following npm command to install the page.
$ npm install react-bootstrap-table-next --save
Install Bootstrap for Styling
By default the above package doesn’t provide styling, so we need to install the bootstrap package to use the bootstrap.css file in the React components.
$ npm install bootstrap
Creating Bootstrap Table in React Component
To create the Bootstrap table, import the BootstrapTable class and also import the bootstrap.css file.
import BootstrapTable from 'react-bootstrap-table-next';
import 'bootstrap/dist/css/bootstrap.min.css';
The bootstrap table is created by adding the <BootstrapTable/> with three required properties
keyField: Takes the unique column name available in the data.data: Collection of data to render in the table.columns: The column definition taking thedataFieldandtextas required.
Update the App.js file as shown below:
// App.js
import React from 'react';
import './App.css';
import BootstrapTable from 'react-bootstrap-table-next';
import 'bootstrap/dist/css/bootstrap.min.css';

function App() {

  const products = [
    { id: 1, name: 'George', animal: 'Monkey' },
    { id: 2, name: 'Jeffrey', animal: 'Giraffe' },
    { id: 3, name: 'Alice', animal: 'Giraffe' },
    { id: 4, name: 'Alice', animal: 'Tiger' }
  ];

  const columns = [
    { dataField: 'id', text: 'Id' },
    { dataField: 'name', text: 'Name' },
    { dataField: 'animal', text: 'Animal' }
  ];

  return (
    <div className="App">
      <h3>React Bootstrap Table 2</h3>

      <BootstrapTable keyField='id' data={products} columns={columns} />
    </div>
  );
}

export default App;
Now run the application to see it working.

Sorting in React Bootstrap Table
The sorting feature can be easily implemented on the React Bootstrap Table Next by following these steps:
# Step 1: Update columns Object
The columns Object definition will have sort: true property to enable Sorting for each column. You can remove it to disable sorting on a particular column.
const columns = [
    { dataField: 'id', text: 'Id', sort: true },
    { dataField: 'name', text: 'Name', sort: true },
    { dataField: 'animal', text: 'Animal', sort: true }
  ];
# Step 2: Add defaultSorted
To sort a column by default we need to pass the object to the defaultSorted property.
...
  const defaultSorted = [{
    dataField: 'name',
    order: 'desc'
  }];

  return (
    <div className="App">
      <BootstrapTable bootstrap4 keyField='id' data={products} columns={columns} defaultSorted={defaultSorted} />
    </div>
  );
...
# Step 3: Import the react-bootstrap-table2.css
The columns with the sorting feature show arrow icons. To style them import the CSS file provided by the package
import 'react-bootstrap-table-next/dist/react-bootstrap-table2.css';The final App.js will look like this:
// App.js
import React from 'react';
import './App.css';
import 'bootstrap/dist/css/bootstrap.min.css';
import 'react-bootstrap-table-next/dist/react-bootstrap-table2.css';
import BootstrapTable from 'react-bootstrap-table-next';
function App() {
const products = [
{ id: 1, name: 'George', animal: 'Monkey' },
{ id: 2, name: 'Jeffrey', animal: 'Giraffe' },
{ id: 3, name: 'Alice', animal: 'Giraffe' },
{ id: 4, name: 'Alice', animal: 'Tiger' }
];
const columns = [
{ dataField: 'id', text: 'Id', sort: true },
{ dataField: 'name', text: 'Name', sort: true },
{ dataField: 'animal', text: 'Animal', sort: true }
];
const defaultSorted = [{
dataField: 'name',
order: 'desc'
}];
return (
<div className="App">
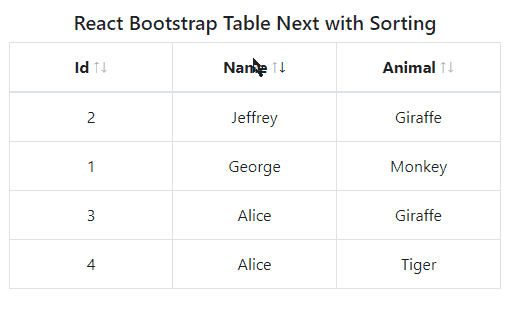
<h5>React Bootstrap Table Next with Sorting</h5>
<BootstrapTable bootstrap4 keyField='id' data={products} columns={columns} defaultSorted={defaultSorted} />
</div>
);
}
export default App;That’s it now run the app to see the Sorting feature applied on the React Bootstrap table.
Pagination on React Bootstrap Table
To add pagination in our React Bootstrap table, follow these few steps:
# Step 1: Install Required Package
Run the following npm command to install the react-bootstrap-table2-paginator package.
$ npm install react-bootstrap-table2-paginator --save
# Step 2: Add CSS file for pagination
Import the CSS file to provide required styling to pagination.
import 'react-bootstrap-table2-paginator/dist/react-bootstrap-table2-paginator.min.css';
# Step 3: Import paginationFactory
On the add <BootstrapTable/> component, add pagination={paginationFactory()} property.
We can also configure the Pagination component by adding option properties inside the pagingFactory()
const pagination = paginationFactory({
    page: 2,
    sizePerPage: 5,
    lastPageText: '>>',
    firstPageText: '<<',
    nextPageText: '>',
    prePageText: '<',
    showTotal: true,
    alwaysShowAllBtns: true,
    onPageChange: function (page, sizePerPage) {
      console.log('page', page);
      console.log('sizePerPage', sizePerPage);
    },
    onSizePerPageChange: function (page, sizePerPage) {
      console.log('page', page);
      console.log('sizePerPage', sizePerPage);
    }
});page: The default page to show for the table.sizePerPage: The number of rows to show on each page.showTotal: This will show information about the total rows in the table.alwaysShowAllBtns: Boolean to control all button visibility on pagination.onPageChange(): This event it triggered when the page is changed using pagination controls. It returns the current page and rows per page.onSizePerPageChange(): This event is triggered when the number of rows to show per page is changed using the dropdown.
Final App.js file will look like this
// App.js
import React from 'react';
import './App.css';
import 'bootstrap/dist/css/bootstrap.min.css';
import 'react-bootstrap-table-next/dist/react-bootstrap-table2.css';
import 'react-bootstrap-table2-paginator/dist/react-bootstrap-table2-paginator.min.css';
import BootstrapTable from 'react-bootstrap-table-next';
import paginationFactory from 'react-bootstrap-table2-paginator';
function App() {
const products = [
{ id: 1, name: 'George', animal: 'Monkey' },
{ id: 2, name: 'Jeffrey', animal: 'Giraffe' },
{ id: 3, name: 'Alice', animal: 'Giraffe' },
{ id: 4, name: 'Foster', animal: 'Tiger' },
{ id: 5, name: 'Tracy', animal: 'Bear' },
{ id: 6, name: 'Joesph', animal: 'Lion' },
{ id: 7, name: 'Tania', animal: 'Deer' },
{ id: 8, name: 'Chelsea', animal: 'Tiger' },
{ id: 9, name: 'Benedict', animal: 'Tiger' },
{ id: 10, name: 'Chadd', animal: 'Lion' },
{ id: 11, name: 'Delphine', animal: 'Deer' },
{ id: 12, name: 'Elinore', animal: 'Bear' },
{ id: 13, name: 'Stokes', animal: 'Tiger' },
{ id: 14, name: 'Tamara', animal: 'Lion' },
{ id: 15, name: 'Zackery', animal: 'Bear' }
];
const columns = [
{ dataField: 'id', text: 'Id', sort: true },
{ dataField: 'name', text: 'Name', sort: true },
{ dataField: 'animal', text: 'Animal', sort: true }
];
const defaultSorted = [{
dataField: 'name',
order: 'desc'
}];
const pagination = paginationFactory({
page: 2,
sizePerPage: 5,
lastPageText: '>>',
firstPageText: '<<',
nextPageText: '>',
prePageText: '<',
showTotal: true,
alwaysShowAllBtns: true,
onPageChange: function (page, sizePerPage) {
console.log('page', page);
console.log('sizePerPage', sizePerPage);
},
onSizePerPageChange: function (page, sizePerPage) {
console.log('page', page);
console.log('sizePerPage', sizePerPage);
}
});
return (
<div className="App">
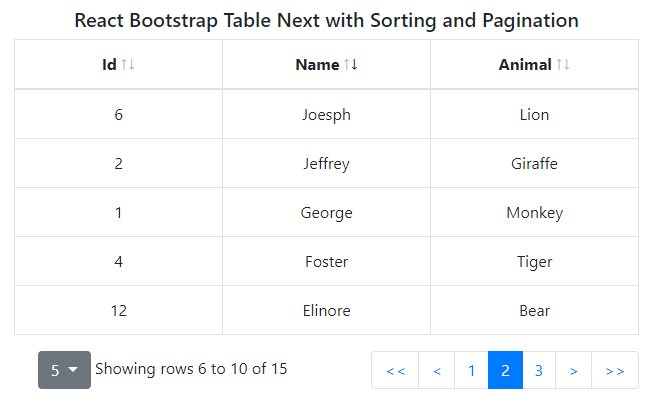
<h5>React Bootstrap Table Next with Sorting and Pagination</h5>
<BootstrapTable bootstrap4 keyField='id' data={products} columns={columns} defaultSorted={defaultSorted} pagination={pagination} />
</div>
);
}
export default App;By default, 5 records will be visible. Run the application to see the table grid with Sorting and Pagination.
Filter/ Search on Table Data
Filter or Search input control can be easily integrated to our React Bootstrap table by folloiwng these steps:
# Step 1: Install the Toolkit package
The toolkit package provides many extended add-ons and features to the React Bootstrap table. Let’s run following npm command to install for adding Filter search.
$ npm install react-bootstrap-table2-toolkit --save
# Step 2: Configure for Search
Next, import the ToolkitProvider and Search namespace
import ToolkitProvider, { Search } from 'react-bootstrap-table2-toolkit';And also destructure Search to fetch SearchBar component and ClearSearchButton.
const { SearchBar, ClearSearchButton } = Search;
# Step 3: Wrap the <BootstrapTable/> with <ToolkitProvider/>
Now we are going empower the <BootstrapTable/> by wrapping it with <ToolkitProvider/> and moving all properties except Sorting and Pagination to it.
Also, add search property on ToolkitProvider to enable the Search feature.
Finally, the React Bootstrap table with Sorting, Pagination, and Search will have this code in App.js file
// App.js
import React from 'react';
import './App.css';
import 'bootstrap/dist/css/bootstrap.min.css';
import 'react-bootstrap-table-next/dist/react-bootstrap-table2.css';
import 'react-bootstrap-table2-paginator/dist/react-bootstrap-table2-paginator.min.css';
import BootstrapTable from 'react-bootstrap-table-next';
import paginationFactory from 'react-bootstrap-table2-paginator';
import ToolkitProvider, { Search } from 'react-bootstrap-table2-toolkit';
function App() {
const products = [
{ id: 1, name: 'George', animal: 'Monkey' },
{ id: 2, name: 'Jeffrey', animal: 'Giraffe' },
{ id: 3, name: 'Alice', animal: 'Giraffe' },
{ id: 4, name: 'Foster', animal: 'Tiger' },
{ id: 5, name: 'Tracy', animal: 'Bear' },
{ id: 6, name: 'Joesph', animal: 'Lion' },
{ id: 7, name: 'Tania', animal: 'Deer' },
{ id: 8, name: 'Chelsea', animal: 'Tiger' },
{ id: 9, name: 'Benedict', animal: 'Tiger' },
{ id: 10, name: 'Chadd', animal: 'Lion' },
{ id: 11, name: 'Delphine', animal: 'Deer' },
{ id: 12, name: 'Elinore', animal: 'Bear' },
{ id: 13, name: 'Stokes', animal: 'Tiger' },
{ id: 14, name: 'Tamara', animal: 'Lion' },
{ id: 15, name: 'Zackery', animal: 'Bear' }
];
const columns = [
{ dataField: 'id', text: 'Id', sort: true },
{ dataField: 'name', text: 'Name', sort: true },
{ dataField: 'animal', text: 'Animal', sort: true }
];
const defaultSorted = [{
dataField: 'name',
order: 'desc'
}];
const pagination = paginationFactory({
page: 2,
sizePerPage: 5,
lastPageText: '>>',
firstPageText: '<<',
nextPageText: '>',
prePageText: '<',
showTotal: true,
alwaysShowAllBtns: true,
onPageChange: function (page, sizePerPage) {
console.log('page', page);
console.log('sizePerPage', sizePerPage);
},
onSizePerPageChange: function (page, sizePerPage) {
console.log('page', page);
console.log('sizePerPage', sizePerPage);
}
});
const { SearchBar, ClearSearchButton } = Search;
return (
<div className="App">
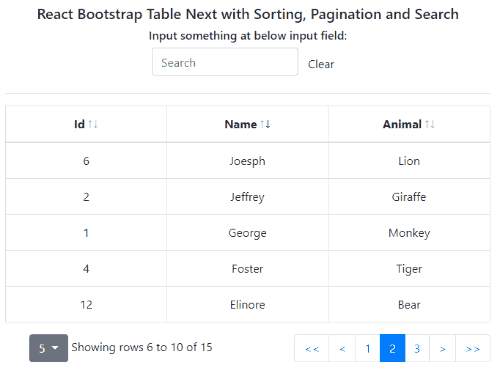
<h5>React Bootstrap Table Next with Sorting, Pagination and Search</h5>
<ToolkitProvider
bootstrap4
keyField='id'
data={products}
columns={columns}
search
>
{
props => (
<div>
<h6>Input something at below input field:</h6>
<SearchBar {...props.searchProps} />
<ClearSearchButton {...props.searchProps} />
<hr />
<BootstrapTable
defaultSorted={defaultSorted}
pagination={pagination}
{...props.baseProps}
/>
</div>
)
}
</ToolkitProvider>
</div>
);
}
export default App;There is also a Clear button to remove search term. We can easily change Search and Clear button by adding properties available on each component.
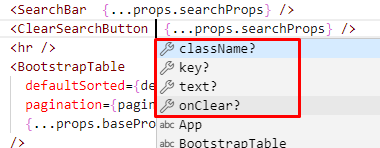
Bonus Tip: If using VS Code, just press Ctrl+SPACE while keeping the cursor on component to see available properties.
Run app to see it working
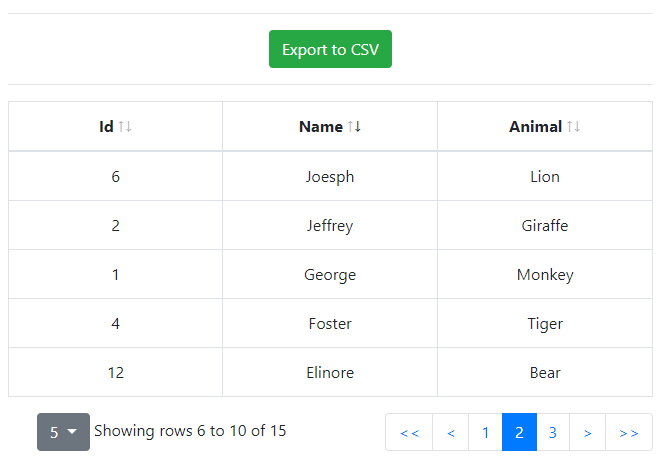
Export To Excel / CSV for React Bootstrap Table
A very much required feature, export to excel can be added to allow users to download data in the form of CSV files.
# Step 1: Import CSVExport from Toolkit
Import the CSVExport namespace from toolkit package
import ToolkitProvider, { CSVExport } from 'react-bootstrap-table2-toolkit';# Step 2: Add components for CSV
Then define a destructured variable
const { ExportCSVButton } = CSVExport;# Step 3: Add the Export Button component
Update the ToolkitProvider with exportCSV property and also add the <ExportCSVButton/> component to show a button to export data in an XLS file.
Or we can just add a custom Export CSV button and using the props.csvProps as shown below
Final App.js will look like this
// App.js
import React from 'react';
import './App.css';
import 'bootstrap/dist/css/bootstrap.min.css';
import 'react-bootstrap-table-next/dist/react-bootstrap-table2.css';
import 'react-bootstrap-table2-paginator/dist/react-bootstrap-table2-paginator.min.css';
import BootstrapTable from 'react-bootstrap-table-next';
import paginationFactory from 'react-bootstrap-table2-paginator';
import ToolkitProvider, { Search } from 'react-bootstrap-table2-toolkit';

function App() {

  const products = [
    { id: 1, name: 'George', animal: 'Monkey' },
    { id: 2, name: 'Jeffrey', animal: 'Giraffe' },
    { id: 3, name: 'Alice', animal: 'Giraffe' },
    { id: 4, name: 'Foster', animal: 'Tiger' },
    { id: 5, name: 'Tracy', animal: 'Bear' },
    { id: 6, name: 'Joesph', animal: 'Lion' },
    { id: 7, name: 'Tania', animal: 'Deer' },
    { id: 8, name: 'Chelsea', animal: 'Tiger' },
    { id: 9, name: 'Benedict', animal: 'Tiger' },
    { id: 10, name: 'Chadd', animal: 'Lion' },
    { id: 11, name: 'Delphine', animal: 'Deer' },
    { id: 12, name: 'Elinore', animal: 'Bear' },
    { id: 13, name: 'Stokes', animal: 'Tiger' },
    { id: 14, name: 'Tamara', animal: 'Lion' },
    { id: 15, name: 'Zackery', animal: 'Bear' }
  ];

  const columns = [
    { dataField: 'id', text: 'Id', sort: true },
    { dataField: 'name', text: 'Name', sort: true },
    { dataField: 'animal', text: 'Animal', sort: true }
  ];

  const defaultSorted = [{
    dataField: 'name',
    order: 'desc'
  }];

  const pagination = paginationFactory({
    page: 2,
    sizePerPage: 5,
    lastPageText: '>>',
    firstPageText: '<<',
    nextPageText: '>',
    prePageText: '<',
    showTotal: true,
    alwaysShowAllBtns: true,
    onPageChange: function (page, sizePerPage) {
      console.log('page', page);
      console.log('sizePerPage', sizePerPage);
    },
    onSizePerPageChange: function (page, sizePerPage) {
      console.log('page', page);
      console.log('sizePerPage', sizePerPage);
    }
  });

  const { SearchBar, ClearSearchButton } = Search;

  const MyExportCSV = (props) => {
    const handleClick = () => {
      props.onExport();
    };
    return (
      <div>
        <button className="btn btn-success" onClick={handleClick}>Export to CSV</button>
      </div>
    );
  };

  return (
    <div className="App">
      <h5>React Bootstrap Table Next with Sorting, Pagination and Search</h5>

      <ToolkitProvider
        bootstrap4
        keyField='id'
        data={products}
        columns={columns}
        search
        exportCSV
      >
        {
          props => (
            <div>
              <h6>Input something at below input field:</h6>
              <SearchBar  {...props.searchProps} />
              <ClearSearchButton  {...props.searchProps} />
              <hr />
              <MyExportCSV {...props.csvProps} />
              <BootstrapTable
                defaultSorted={defaultSorted}
                pagination={pagination}
                {...props.baseProps}
              />

            </div>
          )
        }
      </ToolkitProvider>

    </div>
  );
}

export default App;
Run the app to see it working.
Conclusion
We discussed how to implement Bootstrap tables in a React application by using react-bootstrap-table-next package and also add features like pagination, sorting filter search by installing some add-on packages.
This package is very flexible to apply any type of customization. You can also visit the Storybook to see detailed examples in the official documentation.
Do let us know your feedback and if other features need to be discussed.