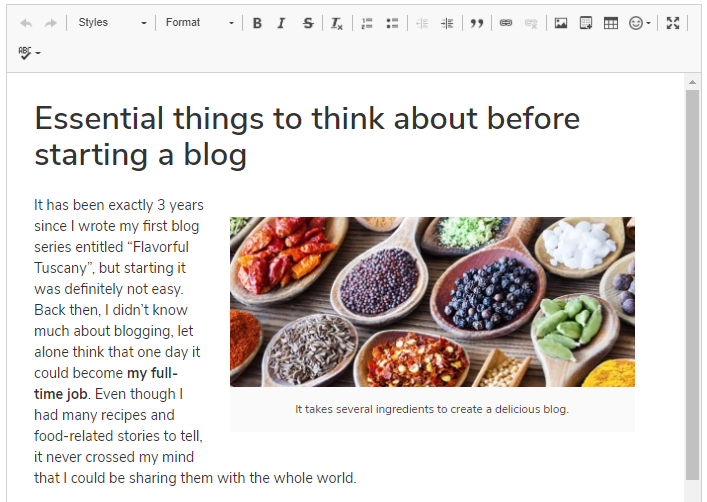
Rick content editor integration in React Js application using CKEditor example; In this tutorial, you will learn how to integrate WYSIWYG rich text editor in React JS app using the profound CKEditor plugin.
What is WYSIWYG Editor?
A WYSIWYG editor is used in the application, which needs to allow users to add editable content with a number of features like bold, italics, font-size, and other numerous editing capabilities.
The CKEditor provides such a rich-featured loaded component. It adds Word-like editing proficiency to a simple content editor. Using CKEditor can do formating of a simple text, adding different font styles, size, making bold italics underline text information. Moreover, media files like images can also be added.
Editor created by CKEditor is highly customizable and it is very easy to integrate into existing applications. It provides a number of flexible features with loads of actions in the toolbars.

Using CKEditor in React JS Application
We can use the react-ckeditor library to integrate CKEditor rich content editor in React application. We will go through step by step tutorial to integrate the WYSIWYG content editor in React application.
Bootstrap 4 will be used in addition to style our component in the React application. Let’s go ahead and start integrating the CKEditor in our example application.
How to Add Rich Content editor CKEditor in React App?
- Step 1 – Create React App
- Step 2 – Install CKEditor and Bootstrap Packages
- Step 3 – Create CKEditior Component
- Step 4 – Add CKEditor Component in App
- Step 5 – Run React App
Step 1 – Create React App
To start, let’s create a new React Js application. Execute the following command in the terminal window:
npx create-react-app react-demo-appThen, move inside the application directory:
cd react-demo-appStep 2 – Install CKEditor and Bootstrap Packages
Now, we will install the CKEditor and Bootstrap packages in the react application. Execute the following npm command at application root:
npm install react-ckeditor-component bootstrap --saveStep 3 – Create CKEditor Component
Next, move into the src directory and create a new component named ckeditor.component.js file. This will have the CKEditor component which can be used anywhere inside the app.
Update the ~src/ckeditor.component.js file with the following code:
import React from 'react'
import CKEditor from "react-ckeditor-component";

class CkEditorComponent extends React.Component{

    constructor(props) {
        super(props);

        this.state = {
            content: 'content',
        }

        this.updateContent = this.updateContent.bind(this);
        this.onChange = this.onChange.bind(this);
    }

    updateContent(newContent) {
        this.setState({
            content: newContent
        })
    }

    onChange(evt){
      var newContent = evt.editor.getData();
      this.setState({
        content: newContent
      })
      console.log("onChange fired with event info: ", newContent);
    }

    onBlur(evt){
      console.log("onBlur event called with event info: ", evt);
    }

    afterPaste(evt){
      console.log("afterPaste event called with event info: ", evt);
    }

    render(){
        return(
            <div>
                <CKEditor
                activeClass="p10"
                content={this.state.content}
                events={{
                    "blur": this.onBlur,
                    "afterPaste": this.afterPaste,
                    "change": this.onChange
                }}
                />
            </div>
        )
    }

}

export default CkEditorComponent;
Step 4 – Add CKEditor Component in App
Now, we will use our CKEditorComponent in the App.js file which is the main component in a React app. Open the App.js file and update it as shown below:
import React from 'react';

import '../node_modules/bootstrap/dist/css/bootstrap.min.css';

import CkEditorComponent from './ckeditor.component.js'

function App() {

  return (
    <div className="App">
      <CkEditorComponent />
    </div>
  );
}

export default App;
Step 5 – Run React App
Finally, you can hit the following command to see the CKEditorin action.
npm startCheck out your React app on the following URL:
http://localhost:3000
Conclusion
We are done with our tutorial. We discussed how to add a fully-featured rich content editor in a React js application. For that, we used the CKEditor plugin and demonstrated how to quickly integrate it.
