In this tutorial, we will discuss how to use ngx-countdown to show days, hours, minutes and seconds in separate big boxes with a custom UI design. Also we will add even actions to start, stop, pause and restart the counter.
ngx-countdown is an Angular module that provides a customizable countdown timer component. It allows you to easily add a countdown timer to your Angular application, and customize its appearance and behaviour to match your needs.
The module supports a variety of options such as setting the countdown start time, setting the time format, and adding custom events when the timer reaches certain milstones. Some of the key features of ngx-countdown include a simple and intuitive API, easy customization through CSS styles and options. It support for multiple formats such as days, hours, minutes and seconds, and integration with Angular animations for dynamic user interfaces. With ngx-countdown, you can add a professional and visually-pleasing countdown timer to your Angular applications in no time.
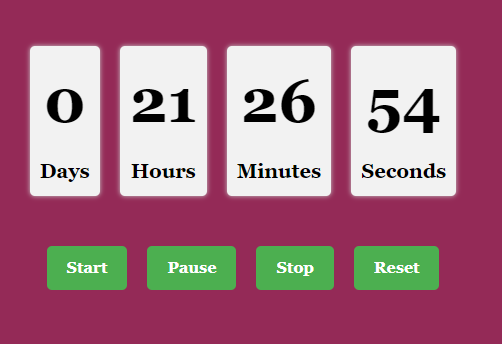
In our example app, we have implemented a countdown timer using the ngx-countdown module in Angular. The countdown timer is displayed in separate boxes for days, hours, minutes, and seconds, with a custom UI design. The boxes are styled using CSS to give them a modern and professional look, with a background color, padding, border-radius, and box-shadow.
How to customize NGX-Coundown in Angular app?
Follow these quick steps to customize the design on counter:
Step 1 – Create Angular App
Step 2 – Install NGX-Countdown Liberary
Step 3 – Update AppModule
Step 4 – Define Template to Create Coundown
Step 5 – Update Component Class
Step 6 – Add CSS Style
Step 7 – Run the Application
Step 1 – Create Angular App
First, we need to create an Angular application using the Angular CLI by running the command:
ng new my-app
Step 2 – Install NGX-Countdown Liberary
Now, we need to install the NGX-Countdown library using the npm package manager by running the command
npm install ngx-countdown
Step 3 – Update AppModule
In this step, we need to import the CountdownModule from ngx-countdown in our AppModule and add it to the imports array to make it available in the application.
Open the app.module.ts file and update as shown below:
import { NgModule } from '@angular/core';
import { BrowserModule } from '@angular/platform-browser';

import { AppComponent } from './app.component';
import { CountdownModule } from 'ngx-countdown';

@NgModule({
  declarations: [AppComponent],
  imports: [BrowserModule, CountdownModule],
  providers: [],
  bootstrap: [AppComponent],
})
export class AppModule {}
Step 4 – Define Template to Create Countdown
In this step, we need to define the HTML template in our component to display the countdown with separate boxes for days, hours, minutes, and seconds. We also need to add buttons for start, stop, and reset functionalities.
Open the app.component.html file and update with following code:
<div class="countdown-container">
      <div class="countdown-box">
        <div class="countdown-number">{{ countdownTimer.days }}</div>
        <div class="countdown-label">Days</div>
      </div>
      <div class="countdown-box">
        <div class="countdown-number">{{ countdownTimer.hours }}</div>
        <div class="countdown-label">Hours</div>
      </div>
      <div class="countdown-box">
        <div class="countdown-number">{{ countdownTimer.minutes }}</div>
        <div class="countdown-label">Minutes</div>
      </div>
      <div class="countdown-box">
        <div class="countdown-number">{{ countdownTimer.seconds }}</div>
        <div class="countdown-label">Seconds</div>
      </div>
    </div>
    <div class="controls-container">
      <button (click)="startCountdown()">Start</button>
      <button (click)="pauseCountdown()">Pause</button>
      <button (click)="stopCountdown()">Stop</button>
      <button (click)="resetCountdown()">Reset</button>
    </div>
    <countdown
      #cd
      [config]="countdownConfig"
      (event)="handleCountdownEvent($event)"
    ></countdown>`
Step 5 – Update Component Class
Thereafter, we need to define the component class to control the countdown and the button functionalities. We also need to define variables to store the countdown configuration, the countdown object, and the countdown values for days, hours, minutes, and seconds.
Open app.component.ts file and update with following code:
import {
  CountdownComponent,
  CountdownConfig,
  CountdownEvent,
} from 'ngx-countdown';

.....
.....

export class AppComponent {
  @ViewChild('cd')
  public countdown!: CountdownComponent;
  countdownConfig: CountdownConfig = {
    leftTime: 86400000, // 24 hours in milliseconds
    demand: true,
    notify: 0,
  };
  days: number = 0;
  hours: number = 0;
  minutes: number = 0;
  seconds: number = 0;

  countdownTimer: any = { days: 0, hours: 0, minutes: 0, seconds: 0 };

  handleCountdownEvent(event: CountdownEvent) {
    setTimeout(() => {
      let leftTime = event.left / 1000;
      this.countdownTimer = {
        days: Math.floor(leftTime / (1000 * 60 * 60 * 24)),
        hours: Math.floor((leftTime % (24 * 60 * 60)) / (60 * 60)),
        minutes: Math.floor((leftTime % (60 * 60)) / 60),
        seconds: Math.floor(leftTime % 60),
      };
    });
  }

  startCountdown() {
    this.countdown.begin();
  }

  stopCountdown() {
    this.countdown.stop();
  }
  pauseCountdown() {
    this.countdown.pause();
  }

  resetCountdown() {
    this.countdown.restart();
  }
}
Step 6 – Add CSS Style
To customize the style of our Countdown numbers, add the following CSS style in app.component.css file:
.countdown-container {
        display: flex;
        justify-content: center;
        align-items: center;
        margin: 20px 0;
      }
      .countdown-box {
        display: flex;
        flex-direction: column;
        justify-content: center;
        align-items: center;
        margin: 0 10px;
        background-color: #f2f2f2;
        padding: 10px;
        border-radius: 5px;
        color: #000000;
        box-shadow: 0px 0px 5px 0px #ccc;
      }

      .countdown-number {
        font-size: 60px;
        font-weight: bold;
      }

      .countdown-label {
        font-size: 20px;
        font-weight: bold;
        margin-top: 10px;
      }

      .controls-container {
        display: flex;
        justify-content: center;
        margin: 20px 0;
      }

      button {
        margin: 0 10px;
        font-size: 16px;
        font-weight: bold;
        background-color: #4caf50;
        color: white;
        border: none;
        border-radius: 5px;
        padding: 10px 20px;
        cursor: pointer;
      }

      button:disabled {
        opacity: 0.5;
        cursor: not-allowed;
      }
Step 7 – Run the Application
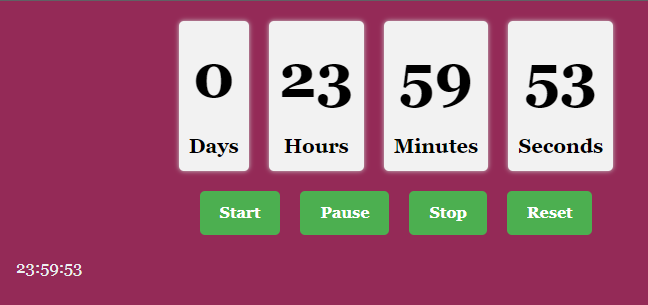
Finally, we can run our application using the ng serve command to see the countdown working with the custom UI design and the button functionalities.
Conclusion
We discussed how to use the NGX Countdown library to create a countdown timer in an Angular aplication. We started by creating a new Angular app, installing the NGX-Countdown library, and updating the app module to import the library.
Then, we defined a template to display the countdown timer in separte boxes for days, hours, minutes, and seconds, and we updated the component class to include logic for starting, stopping, and resetting the countdown. Finally, we added CSS styling to customize the look and feel of the countdown timer and ran the application to see it in action.
With the knowledge gained from this exercise, you should be able to create your own countdown timer in an Angular app and customize it to fit the needs of your application. The NGX-Countdown library provides a powerful set of fetures and options for creating and controlling countdown timers, making it a valuable tool to have in your Angular development toolkit.