Angular’s HttpClient service enables the communication between application and server by making an HTTP call to RESTfull API endpoints. In response, we get JSON data which is consumed to show meaningful content to users in client-side applications.
In this tutorial we are going to learn, how to use HttpClient service in Ionic 5 Application to make server HTTP calls with custom headers and propper Error Handling using RxJS operators. In our student application, we will implement CRUD (Create, Read, Update and Delete) operations to communicate with a Mock Server which we will build using JSON-Server NPM package.
Let’s get started with our step-wise tutorial!
Here we will create a new Ionic 5 Application a blank template using Ionic CLI tool with the latest version v6.5.0
Note: To upgrade to Ionic’s latest version 5, we need to uninstall the
ionicpackage as it is deprecated and install the@ionic/clipackage
How to Upgrade Ionic 4 to latest version 5?
First, we need to uninstall the ionic package and install @ionic/cli:
$ npm uninstall ionic $ npm install @ionic/cli</pre> Check more on migration <a href="https://ionicframework.com/docs/reference/migration" target="_blank" rel="nofollow noopener noreferrer">here</a>. <h3>Create an Ionic Application</h3> Run the following command in terminal to create a new Ionic application of type <code>angularwith ablanktemplate:$ ionic start Ionic4HttpClient blank --type=angular</pre> <h3>Add New Pages in Application</h3> For our Students application, we will create 4 new pages and delete Home page, which is created by default with <code>blanktemplate. Run the following commands to generate new pages:$ ionic generate page student-create $ ionic generate page student-edit $ ionic generate page student-list $ ionic generate page student-detail</pre> <h3>Update Routing Module</h3> Also, update <strong>app-routing.module.ts</strong> file to add the route paths for above new added components and remove home route as we don't need it right now. <pre class="lang:js mark:5-23 decode:true">// app-routing.module.ts import { NgModule } from '@angular/core'; import { PreloadAllModules, RouterModule, Routes } from '@angular/router'; const routes: Routes = [ { path: '', redirectTo: 'student-list', pathMatch: 'full' }, { path: 'student-create', loadChildren: () => import('./student-create/student-create.module').then(m => m.StudentCreatePageModule) }, { path: 'student-edit', loadChildren: () => import('./student-edit/student-edit.module').then(m => m.StudentEditPageModule) }, { path: 'student-list', loadChildren: () => import('./student-list/student-list.module').then(m => m.StudentListPageModule) }, { path: 'student-detail', loadChildren: () => import('./student-detail/student-detail.module').then(m => m.StudentDetailPageModule) }, ]; @NgModule({ imports: [ RouterModule.forRoot(routes, { preloadingStrategy: PreloadAllModules }) ], exports: [RouterModule] }) export class AppRoutingModule { } </pre> <h3>Add HttpClientModule in Application</h3> For making HTTP calls to the server we need to import <code>HttpClientModulein application's main module file. Update the app.module.ts file with the following code://app.module.ts import { NgModule } from '@angular/core'; import { BrowserModule } from '@angular/platform-browser'; import { RouteReuseStrategy } from '@angular/router'; import { IonicModule, IonicRouteStrategy } from '@ionic/angular'; import { SplashScreen } from '@ionic-native/splash-screen/ngx'; import { StatusBar } from '@ionic-native/status-bar/ngx'; import { AppComponent } from './app.component'; import { AppRoutingModule } from './app-routing.module'; import { HttpClientModule } from '@angular/common/http'; @NgModule({ declarations: [AppComponent], entryComponents: [], imports: [ BrowserModule, IonicModule.forRoot(), AppRoutingModule, HttpClientModule ], providers: [ StatusBar, SplashScreen, { provide: RouteReuseStrategy, useClass: IonicRouteStrategy } ], bootstrap: [AppComponent] }) export class AppModule {}HttpConfig Service with Methods for CRUD Operations
Next, we will create a new service which will have methods for making server HTTP calls for CRUD operations.
In this service, we will also import
HttpHeaderandHttpErrorResponseclass for manipulating HTTP headers and handle errors.Now create a new service file named api.service.ts under services folder by running following ng generate command:
$ ng generate service services/api</pre> For getting JSON response from the server we need to set the '<em>Content-Type</em>' of every with '<em>application/json</em>' <pre class="wp-block-prismatic-blocks"><code class="language-javascript">//api.service.ts import { Injectable } from '@angular/core'; import { HttpClient, HttpHeaders, HttpErrorResponse } from '@angular/common/http'; import { Student } from '../models/student'; import { Observable, throwError } from 'rxjs'; import { retry, catchError } from 'rxjs/operators'; @Injectable({ providedIn: 'root' }) export class ApiService { // API path base_path = 'http://localhost:3000/students'; constructor(private http: HttpClient) { } // Http Options httpOptions = { headers: new HttpHeaders({ 'Content-Type': 'application/json' }) } // Handle API errors handleError(error: HttpErrorResponse) { if (error.error instanceof ErrorEvent) { // A client-side or network error occurred. Handle it accordingly. console.error('An error occurred:', error.error.message); } else { // The backend returned an unsuccessful response code. // The response body may contain clues as to what went wrong, console.error( `Backend returned code ${error.status}, ` + `body was: ${error.error}`); } // return an observable with a user-facing error message return throwError( 'Something bad happened; please try again later.'); }; // Create a new item createItem(item): Observable<Student> { return this.http .post<Student>(this.base_path, JSON.stringify(item), this.httpOptions) .pipe( retry(2), catchError(this.handleError) ) } // Get single student data by ID getItem(id): Observable<Student> { return this.http .get<Student>(this.base_path + '/' + id) .pipe( retry(2), catchError(this.handleError) ) } // Get students data getList(): Observable<Student> { return this.http .get<Student>(this.base_path) .pipe( retry(2), catchError(this.handleError) ) } // Update item by id updateItem(id, item): Observable<Student> { return this.http .put<Student>(this.base_path + '/' + id, JSON.stringify(item), this.httpOptions) .pipe( retry(2), catchError(this.handleError) ) } // Delete item by id deleteItem(id) { return this.http .delete<Student>(this.base_path + '/' + id, this.httpOptions) .pipe( retry(2), catchError(this.handleError) ) } }</pre> Also, create an <strong>Interface class</strong> for <em>Students </em>data by running following command defining the type of values for student item. <pre class="wp-block-prismatic-blocks"><code class="language-javascript">$ ng generate class models/Student</pre> then replace the following content in the newly created file "~/models/<strong>student.ts</strong>" <pre class="wp-block-prismatic-blocks"><code class="language-javascript">export class Student { id: number; name: string; age: string; address: string; }</pre> <h3>Mock Server for Application</h3> To create a fully working Application, we will create a local running server by installing <code>json-serverpackage. Run following NPM command to install:$ npm install -g json-server</pre> Create a new data.json file at the project root "~<strong>API/data.json</strong>" under <strong>Ionic5HttpClient</strong> folder and replace the following JSON data in it: <img class="alignnone wp-image-3757 size-full" src="https://www.freakyjolly.com/wp-content/uploads/2019/08/Pasted-into-Ionic-45-HttpClient-CRUD-Service-Tutorial-to-Consume-RESTful-Server-API.png" /> <pre class="wp-block-prismatic-blocks"><code class="language-javascript">{ "students": [ { "id": 1, "name": "Enola Rowe", "class": "tony@mcu.com", "address": "131 Oswaldo Street" },{ "id": 2, "name": "Timmothy Lueilwitz", "age": "15", "address": "37137 Abbigail Lock" },{ "id": 3, "name": "Madilyn Pacocha", "age": "14", "address": "094 Morris Plains" },{ "id": 4, "name": "Harley Cremin", "age": "17", "address": "14855 Cathy Square" },{ "id": 5, "name": "Juana Ziemann", "age": "16", "address": "612 Dayana Stream" } ] }</pre> You can run server response by running following NPM command: <pre class="wp-block-prismatic-blocks"><code class="language-javascript">$ json-server --watch API/data.json</pre> It will return a smiley face \{^_^}/ hi! with the server data path: <a href="http://localhost:3000/students">http://localhost:3000/students</a> <h3>Create New Students</h3> In Create component template we will add a form to take <strong>Name</strong>, <strong>Age</strong>, and <strong>Address</strong> values from the user which will get submitted using<code> submitForm()method. Update student-create.page.html file with below code:<!-- student-create.html --> <ion-header> <ion-toolbar color="tertiary"> <ion-title>Create Student</ion-title> </ion-toolbar> </ion-header> <ion-content class="ion-padding"> <ion-item> <ion-label>Name</ion-label> <ion-input [(ngModel)]="data.name" placeholder="Enter Name"></ion-input> </ion-item> <ion-item> <ion-label>Age</ion-label> <ion-input [(ngModel)]="data.age" placeholder="Enter Age"></ion-input> </ion-item> <ion-item> <ion-button (click)="submitForm()">Add </ion-button> </ion-item> </ion-content> </pre> <a href="https://www.freakyjolly.com/wp-content/uploads/2019/08/create.png"><img class="aligncenter size-full wp-image-2794" src="https://www.freakyjolly.com/wp-content/uploads/2019/08/create.png" alt="" width="316" height="250" /></a> In the <strong>student-create.page.ts</strong> file, we will have the <code>submitForm()method to call API service methodcreateItem()to return an Observable. After successfully submitting value we will navigate to list page using Router service.//student-create.page.ts import { Component, OnInit } from '@angular/core'; import { Student } from '../models/student'; import { ApiService } from '../services/api.service'; import { Router } from '@angular/router'; @Component({ selector: 'app-student-create', templateUrl: './student-create.page.html', styleUrls: ['./student-create.page.scss'], }) export class StudentCreatePage implements OnInit { data: Student constructor( public apiService: ApiService, public router: Router ) { this.data = new Student(); } ngOnInit() { } submitForm() { this.apiService.createItem(this.data).subscribe((response) => { this.router.navigate(['student-list']); }); } } </pre> <h3>List Students Component</h3> In list page, we will list all Students in our <strong>data.json</strong> file in a bootstrap table with rows iterating using <code>*ngFordirective. The table will also have an Action colum to show Edit and Delete buttons. In Edit action we are simply redirecting to Edit component with item id which we will update in later. The delete button will call delete method in our API service. Replace the student-list.page.html file with the following code:<!-- student-list.page.html --> <ion-header> <ion-toolbar color="tertiary"> <ion-title>List All Students</ion-title> </ion-toolbar> </ion-header> <ion-content class="ion-padding"> <table class="table"> <thead> <tr> <th scope="col">Id</th> <th scope="col">Name</th> <th scope="col">Age</th> <th scope="col">Address</th> <th scope="col">Actions</th> </tr> </thead> <tbody> <tr *ngFor="let item of studentsData"> <td>{{ item.id }}</td> <td>{{ item.name }}</td> <td>{{ item.age }}</td> <td>{{ item.address }}</td> <td style="display: flex"> <ion-button color="warning" size="small" routerLink='/student-edit/{{item.id}}'> <ion-icon name="create"></ion-icon> </ion-button> <ion-button color="danger" size="small" (click)="delete(item)"> <ion-icon name="trash"></ion-icon> </ion-button> </td> </tr> </tbody> </table> <ion-button [routerLink]="['/student-create']"> Add Student </ion-button> </ion-content></pre> <a href="https://www.freakyjolly.com/wp-content/uploads/2019/08/list.png"><img class="aligncenter size-full wp-image-2793" src="https://www.freakyjolly.com/wp-content/uploads/2019/08/list.png" alt="" width="315" height="426" /></a>In the <strong>student-list.page.ts</strong> file, we will get the list of all students by calling <code>getList()and also adddelete()to calldeleteItem()method in API service.//student-list.page.ts import { Component, OnInit } from '@angular/core'; import { ApiService } from '../services/api.service'; @Component({ selector: 'app-student-list', templateUrl: './student-list.page.html', styleUrls: ['./student-list.page.scss'], }) export class StudentListPage implements OnInit { studentsData: any; constructor( public apiService: ApiService ) { this.studentsData = []; } ngOnInit() { // this.getAllStudents(); } ionViewWillEnter() { // Used ionViewWillEnter as ngOnInit is not // called due to view persistence in Ionic this.getAllStudents(); } getAllStudents() { //Get saved list of students this.apiService.getList().subscribe(response => { console.log(response); this.studentsData = response; }) } delete(item) { //Delete item in Student data this.apiService.deleteItem(item.id).subscribe(Response => { //Update list after delete is successful this.getAllStudents(); }); } } </pre> <h3>Update Student Item</h3> In Edit component we will get the <code>idof item usingActivatedRouteservice then get its details. After that, we will show Form field controls to edit them, after that user can update the value to call theupdateItem()method in API service. In the student-edit.page.html file replace following HTML content:<!-- student-edit.page.html --> <ion-header> <ion-toolbar color="tertiary"> <ion-title>Edit Student Record</ion-title> </ion-toolbar> </ion-header> <ion-content class="ion-padding"> <ion-item> <ion-label>Name</ion-label> <ion-input [(ngModel)]="data.name" placeholder="Enter Name"></ion-input> </ion-item> <ion-item> <ion-label>Age</ion-label> <ion-input [(ngModel)]="data.age" placeholder="Enter Age"></ion-input> </ion-item> <ion-item> <ion-label>Address</ion-label> <ion-input [(ngModel)]="data.address" placeholder="Enter Address"></ion-input> </ion-item> <ion-button (click)="update()" color="success" size="small"> Update </ion-button> <ion-button [routerLink]="[ '/student-list']" color="danger" size="small"> Cancel </ion-button> </ion-content>
Now in student-edit.page.ts file replace following class component code:
//student-edit.page import { Component, OnInit } from '@angular/core'; import { ActivatedRoute, Router } from '@angular/router'; import { Student } from '../models/student'; import { ApiService } from '../services/api.service'; @Component({ selector: 'app-student-edit', templateUrl: './student-edit.page.html', styleUrls: ['./student-edit.page.scss'], }) export class StudentEditPage implements OnInit { id: number; data: Student; constructor( public activatedRoute: ActivatedRoute, public router: Router, public apiService: ApiService ) { this.data = new Student(); } ngOnInit() { this.id = this.activatedRoute.snapshot.params["id"]; //get item details using id this.apiService.getItem(this.id).subscribe(response => { console.log(response); this.data = response; }) } update() { //Update item by taking id and updated data object this.apiService.updateItem(this.id, this.data).subscribe(response => { this.router.navigate(['student-list']); }) } }That's it now you are ready to run your app by hitting following command
$ ionic serve --open
Don't forget to run the json-server to up API server by running following command in a separate console.
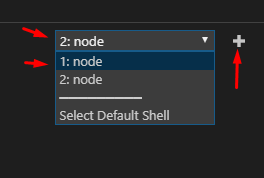
$ json-server --watch API/data.jsonIf you are using Visual Studio Code terminal then you can hit plus icon to open a new terminal.
Conclusion: So here we create a demo application to show how to communicate with the server to consume RESTful API. We also created a Mock server with the help of awsome json-server npm package.
Category: Angular