In today’s digital world, images are an integral part of web development, and it’s essential to have a smooth and straightforward image management system. Converting images to Base64 in Angular is one way to achieve that. Base64 encoding is a method of converting binary data into text so that it can be easily transmitted over the internet.
Converting images to Base64 in Angular makes it easy to manage images on your website. It eliminates the need to store images in a separate directory, reducing the number of requests to the server. Base64-encoded images can be embedded directly into HTML or CSS files, making them more lightweight and faster to load.
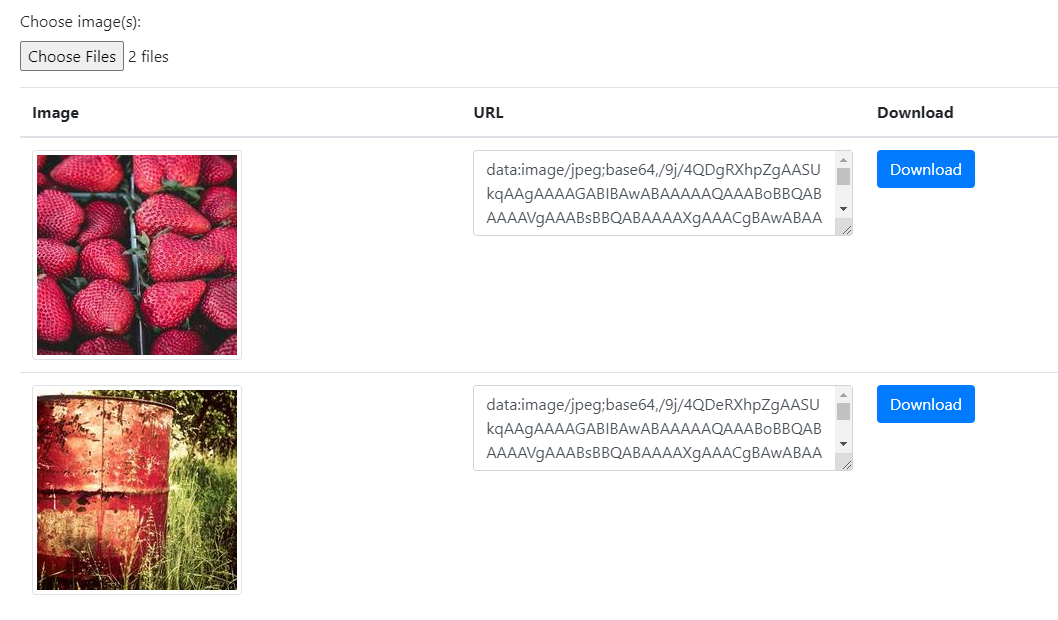
In our sample app, we’ve created a file form that allows the user to select one or more images. The selected images are then converted to Base64 and displayed in a table with their corresponding URL. We’ve also added a download link for each image, making it easy to download the encoded image.
File Select Input Field:
<input
        type="file"
        id="fileInput"
        accept="image/*"
        multiple
        class="form-control-file"
        (change)="onFileSelected($event)"
      />
This is an input element in HTML with several attributes set. Let’s go through each attribute:
type="file": This attribute specifies the type of the input element to be a file picker.id="fileInput": This attribute gives an ID to the input element. The ID is useful to refer to the input element in the code to perform any operations like setting focus, clearing, or resetting the input element.accept="image/*": This attribute specifies the types of files that the file picker will accept. In this case, it only accepts image files.multiple: This attribute specifies that the input element allows multiple files to be selected.class="form-control-file": This attribute sets the CSS class of the input element toform-control-file. This class is a Bootstrap class used for styling the input element.(change)="onFileSelected($event)": This attribute specifies a function to be called when the input element changes. In this case, theonFileSelectedfunction will be called with the$eventargument, which contains information about the selected files.
Overall, this input element creates a file picker that allows the user to select multiple image files. The onFileSelected function will be called when the files are selected, and it will handle the selected files by checking if they are images, converting them to Base64, and storing them in an array for later use.
Thereafter we will add the onFileSelected() function in the component class:
onFileSelected(event: any) {
    const files = event.target.files;
    for (let i = 0; i < files.length; i++) {
      const file = files[i];
      if (!file.type.startsWith('image/')) {
        alert('Please select only image files.');
        return;
      }
      const reader = new FileReader();
      reader.onload = () => {
        const base64 = reader.result as string;
        this.images.push({ base64 });
      };
      reader.readAsDataURL(file);
    }
  }
The onFileSelected() function is called when the user selects one or more image files. It checks if each selected file is an image and loads it using a FileReader() object. When the file is loaded, the function gets the base64 data and stores it in an array. The array is used to display the images and their base64 strings in a table.
Complete AppComponent File:
Let’s have look on complete App Component file with template:
import { Component } from '@angular/core';

@Component({
  selector: 'app-root',
  template: `
    <div class="form-group">
      <label for="fileInput" class="mr-2">Choose image(s):</label>
      <input
        type="file"
        id="fileInput"
        accept="image/*"
        multiple
        class="form-control-file"
        (change)="onFileSelected($event)"
      />
    </div>

    <table class="table mt-3">
      <thead>
        <tr>
          <th>Image</th>
          <th>URL</th>
          <th>Download</th>
        </tr>
      </thead>
      <tbody>
        <tr *ngFor="let image of images">
          <td>
            <img
              [src]="image.base64"
              class="img-thumbnail"
              style="max-width: 300px"
            />
          </td>
          <td>
            <textarea
              [value]="image.base64"
              class="form-control"
              rows="3"
            ></textarea>
          </td>
          <td>
            <a
              [href]="image.base64"
              download="image.png"
              class="btn btn-primary"
              >Download</a
            >
          </td>
        </tr>
      </tbody>
    </table>
  `,
  styleUrls: ['./app.component.css'],
})
export class AppComponent {
  images: { base64: string }[] = [];

  onFileSelected(event: any) {
    const files = event.target.files;
    for (let i = 0; i < files.length; i++) {
      const file = files[i];
      if (!file.type.startsWith('image/')) {
        alert('Please select only image files.');
        return;
      }
      const reader = new FileReader();
      reader.onload = () => {
        const base64 = reader.result as string;
        this.images.push({ base64 });
      };
      reader.readAsDataURL(file);
    }
  }
}
Now, you can run your app by executing npm start to see it working:
Other Uses:
Base64 encoding is not limited to images. It can also be used for encoding other types of files, such as videos and audio files. Base64 encoding is useful when sending files over the internet or in email attachments. It’s also used in data URIs to embed images directly into HTML or CSS files.
Conclusion:
Converting images to Base64 in Angular is a simple and effective way to manage images on your website. It reduces the number of requests to the server and makes your website faster to load. With our sample app, you can easily convert your images to Base64 and use them in your website.