Quickly add the Google SignIn or Login button in React js application; In this tutorial, we will integrate Google oAuth to enable a user login with Google credential in React application.
In our Google + React example application we will implement the SignIn through Google account by using the react-google-login package. By going through this tutorial, you will learn how to authenticate a user’s Google account with React application.
Firstly, we will learn how to get Google OAuth Client Id from the google developer console portal. To get the Google client id, we will follow some quick steps. Thereafter, the ClientID will be used to fetch user details including Name, Image URL, Email Address after proper authentication.
Finally, you can use this information to create a user’s account and save it in a database using a server API call.
So, let’s start by looking into the steps on how to get Google Client ID.
How to Get Google Client ID for OAuth Login in React App?
Follow these steps, to create your application and get a client Id from Google Console.
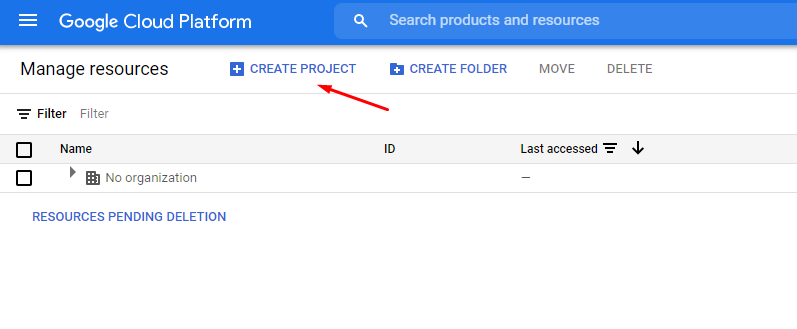
Step 1 – Visit Google developer console, then click on Create or New Project as shown below:
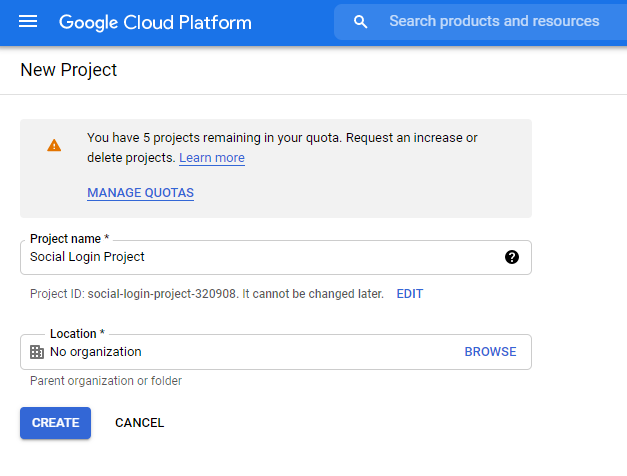
Step 2 – Enter project details, then click on the create button:
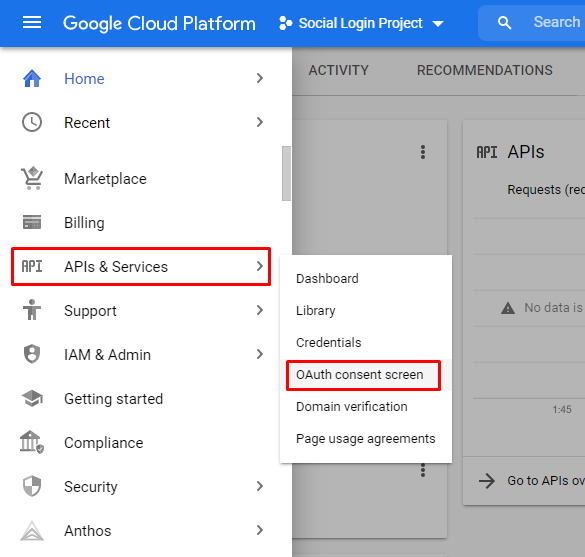
Step 3 – After that, select the created project. Now head towards the left sidebar menu and click on the APIs & Services > OAuth consent screen menu as shown below:
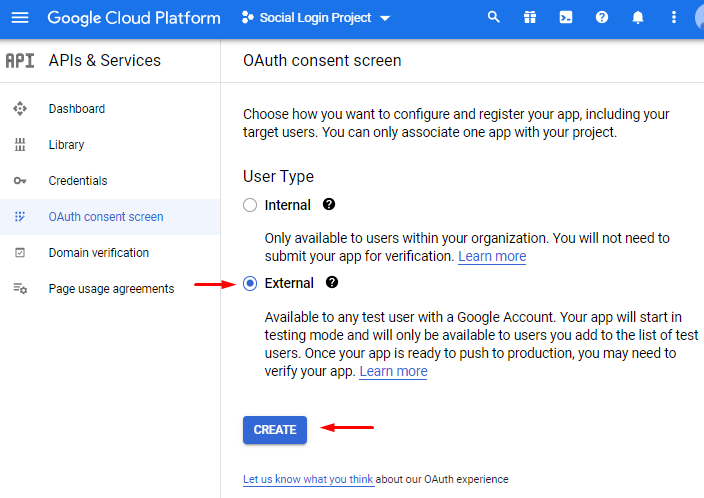
Step 4 – On next screen, select the External radio option and hit create.
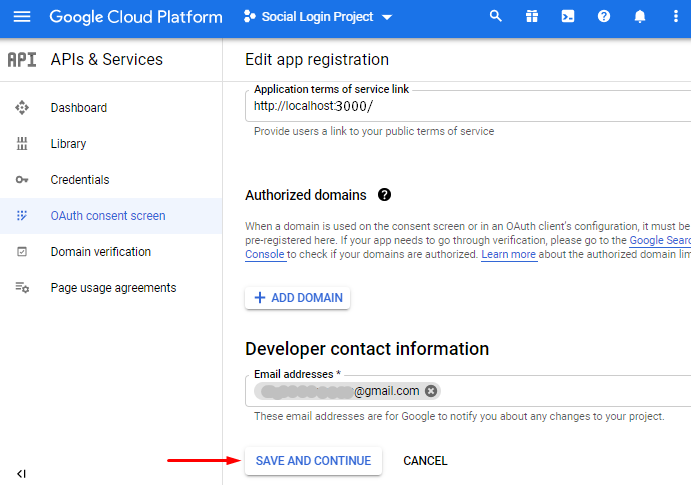
Step 5 – The upcoming screen will ask for details including App name and email address. Fill this information then click on Save and Continue button.
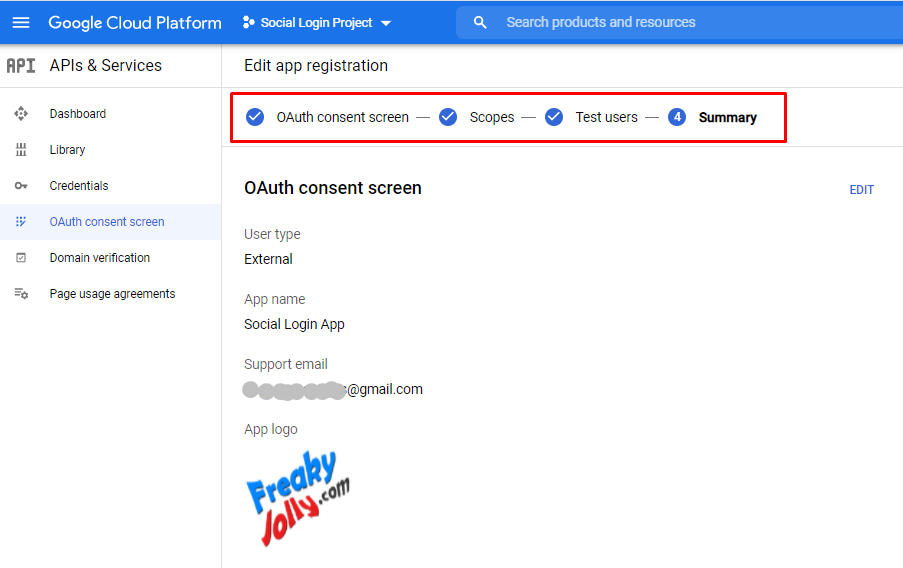
Step 6 – Follow all the furthermore steps as shown below:
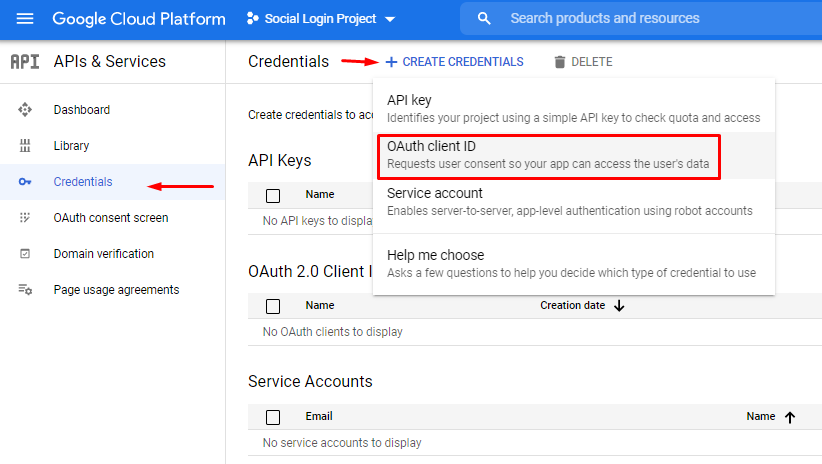
Step 7 – Next, visit the Credentials tab on the left sidebar, then click on Create Credential then select the OAuth client ID option.
Step 8 – Further, the Application type is “Web application”. Just after that, add URL for the application inside the origin URIs then click on create button as shown below:
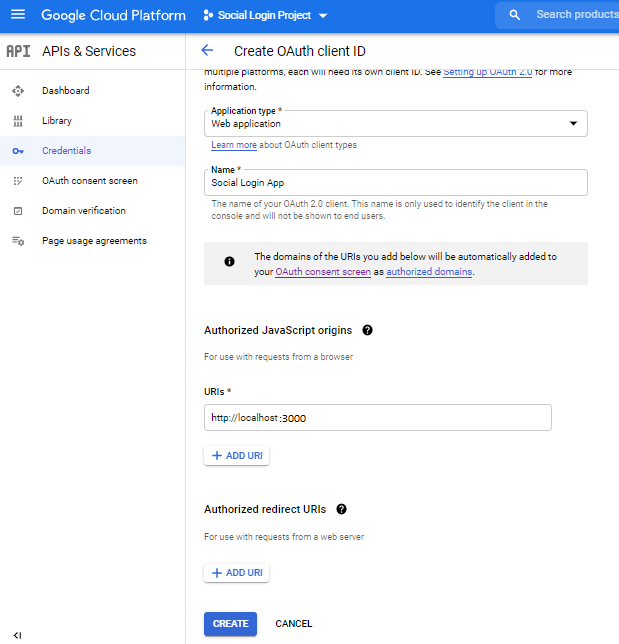
Note: We have added localhost:3000 as of now for testing purposes.
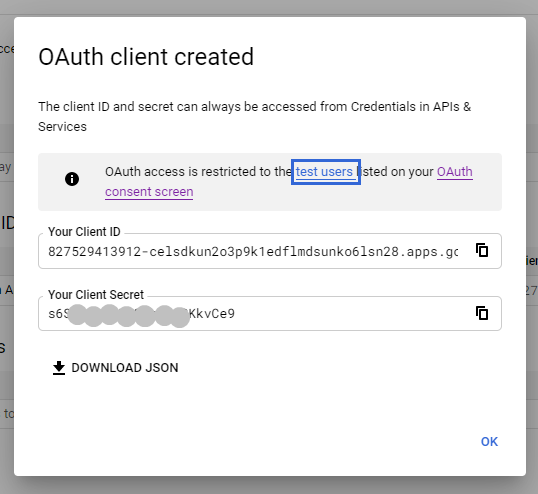
Step 9 – Finally, you will be provided with a Client ID and Secret Key as shown below. Keep these details handy but safe!
How to Add Google SignIn Button in React Application?
After getting the Google Client ID, next, we will integrate the Google SignIn or Login button to authentication and connect users in React Application.
We will be following these steps ahead:
- Step 1 – Create React Application
- Step 2 – Install Bootstrap Library
- Step 3 – Install React Google Login Library
- Step 4 – Create Google Login Button Component
- Step 5 – Using Google Button Component in React App
- Step 6 – Testing React App
Step 1 – Create React Application
To start, head towards the terminal window and execute following command to create a new React application:
npx create-react-app react-goolge-login-appMove into the application
cd react-goolge-login-appStep 2 – Install Bootstrap Library
To style our application, install the bootstrap library package by executing the below npm command:
npm install bootstrap --saveStep 3 – Install React Google Login Package
Now, we will install the React Google Login library package. This library will allow us to add Google’s Single SignIn Button in react application. Execute the following command to install the package:
npm install react-google-loginStep 4 – Create Google Login Button Component
Next, we will create the GoogleLoginComponent, which will have code to authenticate our user with a Google account.
Create a new file named googlebutton.component.js under the src folder and update it with the following code:
import React, { Component } from "react";
import { GoogleLogin, GoogleLogout } from "react-google-login";

const CLIENT_ID =
  "827529413912-celsdkun_YOUR_API_KEY_lsn28.apps.googleusercontent.com";

class GoogleLoginComponent extends Component {
  constructor() {
    super();
    this.state = {
      isLoggedIn: false,
      userInfo: {
        name: "",
        emailId: "",
      },
    };
  }

  // Success Handler
  responseGoogleSuccess = (response) => {
    console.log();
    let userInfo = {
      name: response.profileObj.name,
      emailId: response.profileObj.email,
    };
    this.setState({ userInfo, isLoggedIn: true });
  };

  // Error Handler
  responseGoogleError = (response) => {
    console.log(response);
  };

  // Logout Session and Update State
  logout = (response) => {
    console.log(response);
    let userInfo = {
      name: "",
      emailId: "",
    };
    this.setState({ userInfo, isLoggedIn: false });
  };

  render() {
    return (
      <div className="row mt-5">
        <div className="col-md-12">
          {this.state.isLoggedIn ? (
            <div>
              <h1>Welcome, {this.state.userInfo.name}</h1>

              <GoogleLogout
                clientId={CLIENT_ID}
                buttonText={"Logout"}
                onLogoutSuccess={this.logout}
              ></GoogleLogout>
            </div>
          ) : (
            <GoogleLogin
              clientId={CLIENT_ID}
              buttonText="Sign In with Google"
              onSuccess={this.responseGoogleSuccess}
              onFailure={this.responseGoogleError}
              isSignedIn={true}
              cookiePolicy={"single_host_origin"}
            />
          )}
        </div>
      </div>
    );
  }
}
export default GoogleLoginComponent;
The GoogleLogin and GoogleLogout components, create the Google SignIn buttons. They have even handlers as well to return the success and error callbacks responses.
Based on the isLoggedIn state, we are controlling these buttons. Also, the userInfo state variable is carrying information like name and email address.
The isSignedIn property is required to be set as true if you want to check if a user is already logged in if the application is refreshed. It will call the SuccessHandler again at component initialized.
Step 5 – Using Google Button Component in React App
Next, will import our Google Login button compoennt in the App.js file as shown below:
import { Component } from "react";
import "./App.css";
import "../node_modules/bootstrap/dist/css/bootstrap.min.css";
import GoogleLoginComponent from "./googlebutton.component";
class App extends Component {
render() {
return (
<div className="App container">
<h2>React Google Login Example</h2>
<GoogleLoginComponent />
</div>
);
}
}
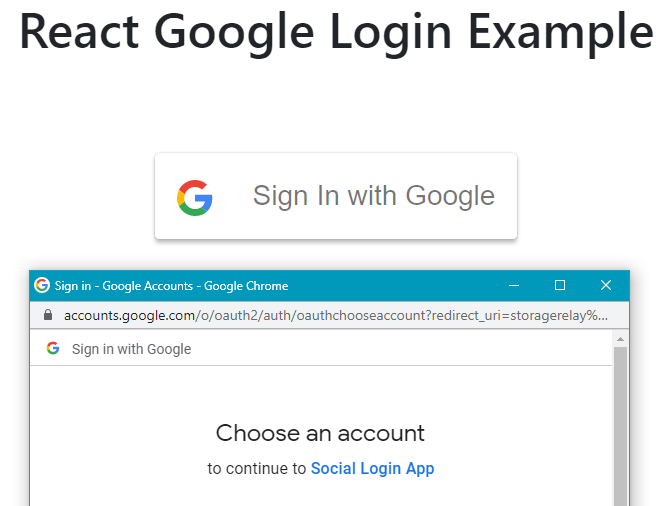
export default App;Step 6 – Testing React App
Finally, you can run the React application by executing the below command:
npm startit will start the development server and open the application at the following URL:
http://localhost:3000

<img class="wp-image-11323 size-full aligncenter" src="https://www.freakyjolly.com/wp-content/uploads/2021/08/Pasted-into-Google-SignIn-Login-Button-in-React-Js-Example-using-React-Google_Login-Package-1.png" />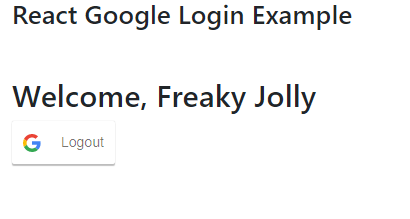
Conclusion
We have completed the integration of Google Authentication by adding a Login SignIn button. We used the React Google Login package, to easily integrate the Google Login button in React application. You can check the official documentation here.