Angular 12 Login with Google Example by Tutorial; Google authentication of the user using OAuth2 protocol; The Angularx-Social-Login package tutorial; In this elaborated angular tutorial, you will learn how to implement Google login in an Angular 2+ application. We will utilize the angularx-social-login library package.
In today’s era, almost everyone is connected with social media in one or the other ways. The trends of connected a person to an application have now changed a lot. Applications use these social platforms to connect a user to their own applications.
We usually see social buttons like Google, Facebook, Instagram, Twitter etc. Ideally, a user just needs to click on one of these social buttons to get connected after authentication. Social login methods are quick, in which a user doesn’t need to fill those lengthy traditional forms.
In this tutorial, we will go through some quick steps, to implement a similar kind of Google login button on the Angular application. We will be creating a Google developers account (If you don’t have one already) and will use the angularx-social-login library to do heavily loaded kinds of stuff for you.
Using the angularx-social-login library, you can easily add Social login or SignIn buttons to your application. Moreover, you can add multiple social buttons including Google, Facebook, Amazon, Microsoft and VK.
In this guide, we will concentrate only on Google login/ SignUp. We also need to create an application in Google’s developer account to get a Client ID and Secret key.
How to add Google Login in the Angular application?
No worries! we will explain each and step in detail to make the integration process serener.
- Step 1 – Create Angular Application
- Step 2 – Install Bootstrap Styling UI
- Step 3 – Obtain Google Developer Credentials
- Step 4 – Install Angularx Social Login Library
- Step 5 – Configure App Module
- Step 6 – Add Google Login Button in Angular
- Step 7 – Run Application
Step 1 – Create Angular Application
Start by creating a new Angular application by hitting the below ng command:
$ ng new angular-google-login-appMove inside the application directory:
$ cd angular-google-login-appStep 2 – Install Bootstrap Styling UI
To quickly style our application, install the bootstrap package, run the following npm command to install the package:
$ npm install bootstrapTo import the bootstrap style file, open the angular.json file and configure the "styles" property array:
...
	"styles": [
		"src/styles.scss",
		"node_modules/bootstrap/dist/css/bootstrap.min.css"
	]
...
Step 3 – Obtain Google Developer Credentials
In this step, we will discuss the detailed steps to get Google credentials from the developer console. These include the Client ID and Secret Key, which is required to implement the Google social login.
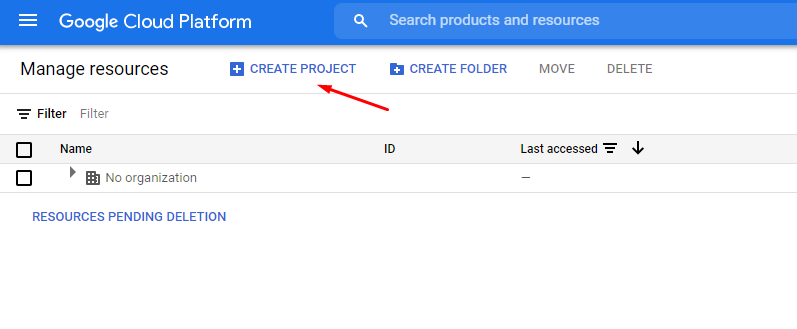
Step 3.1 – Visit Google developer console, then click on Create or New Project as shown below:
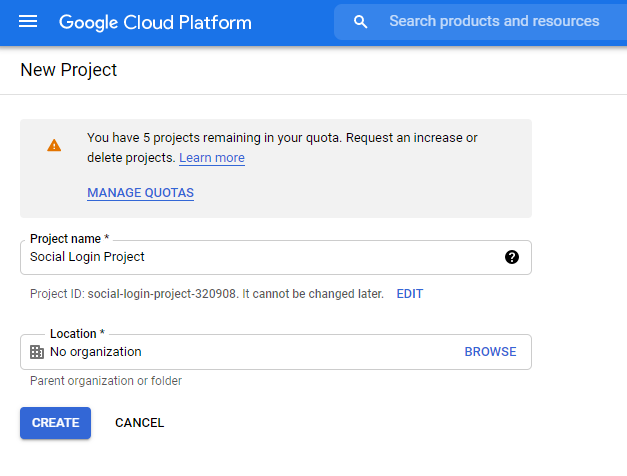
Step 3.2 – Enter project details, then click on the create button:
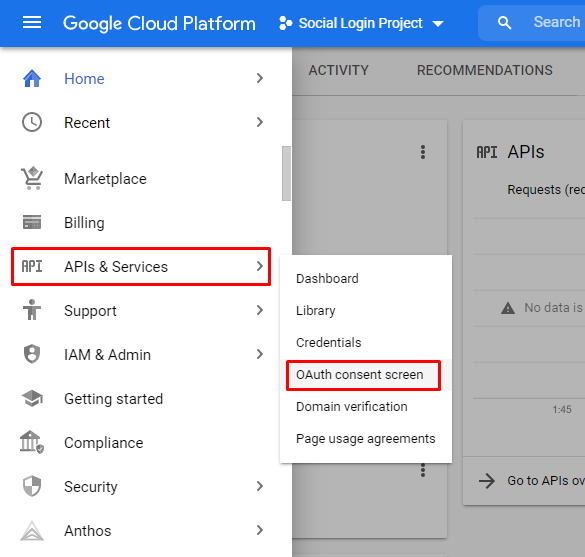
Step 3.3 – After that, select the created project. Now head towards the left sidebar menu and click on the APIs & Services > OAuth consent screen menu as shown below:
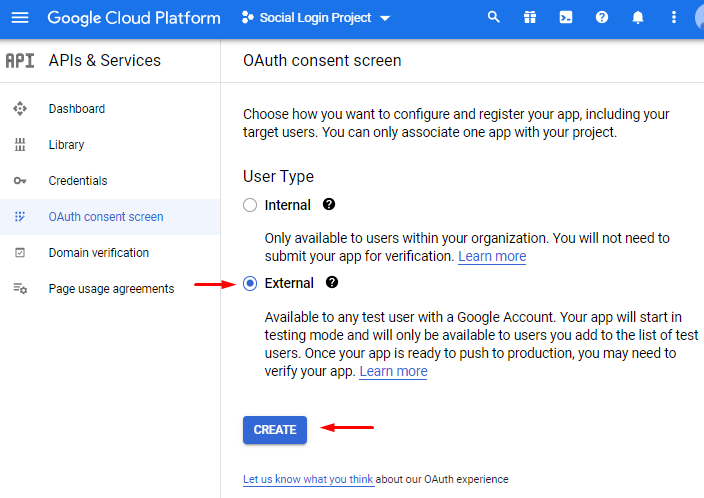
Step 3.4 – On next screen, select the External radio option and hit create.
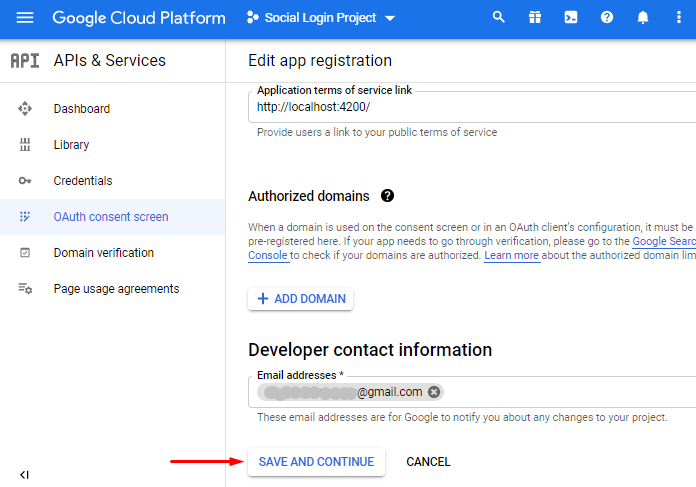
Step 3.5 – The upcoming screen will ask for details including App name and email address. Fill this information then click on Save and Continue button.
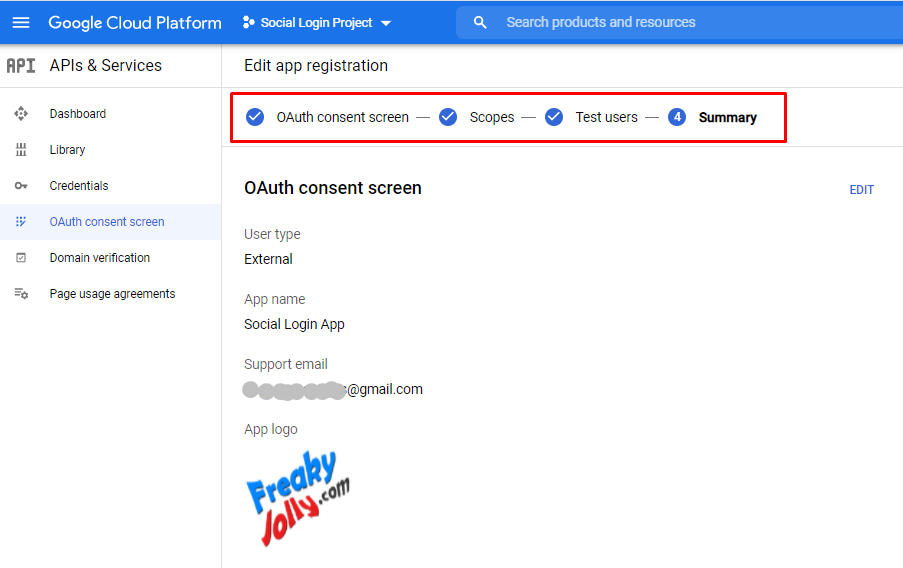
Step 3.6 – Follow all the furthermore steps as shown below:
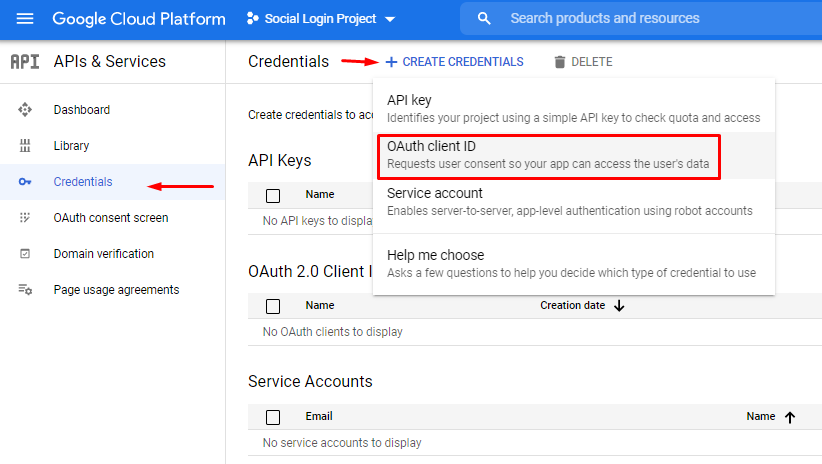
Step 3.7 – Next, visit the Credentials tab on the left sidebar, then click on Create Credential then select the OAuth client ID option.
Step 3.8 – Further, the Application type is “Web application”. Just after that, add URL for the application inside the origin URIs then click on create button as shown below:
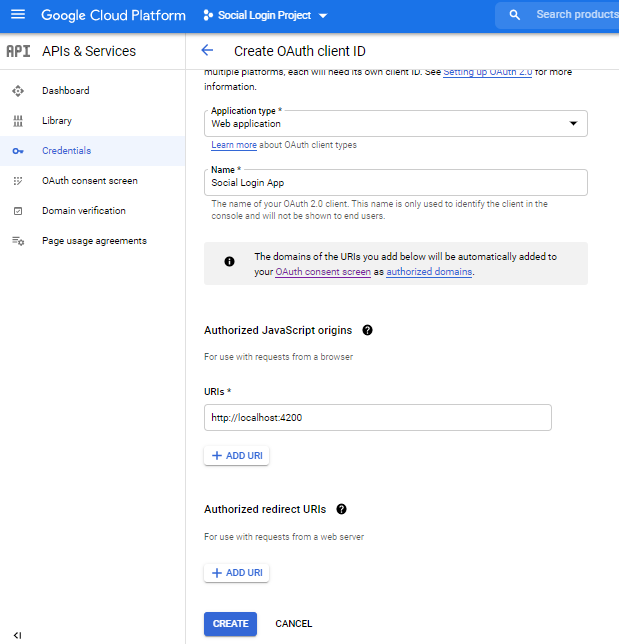
Note: We have added localhost:4200 as of now for testing purposes.
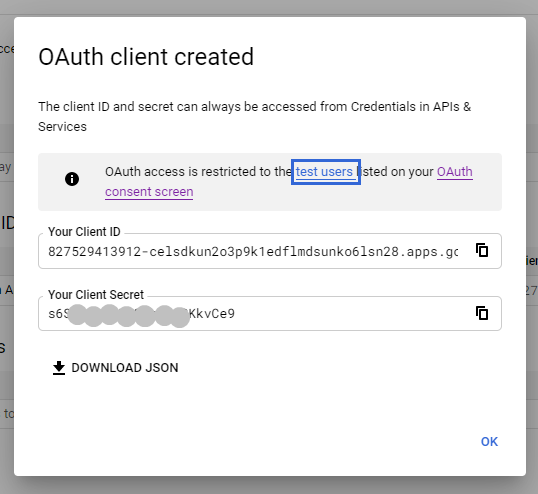
Step 3.9 – Finally, you will be provided with a Client ID and Secret Key as shown below. Keep these details handy but safe!
Step 4 – Install Angularx Social Login Library
In this step, we will install the Angularx Social Login library package. This will allow using the completion of the Social login functionally using the OAuth2 protocol in angular application.
Go on and install the angularx-social-login npm package by hitting the below npm command:
$ npm install angularx-social-login
Step 5 – Configure App Module and Add Google Credentials
Now, we will configure the App Module by importing the required modules including ReactiveFormsModule, SocialLoginModule, SocialAuthServiceConfig and GoogleLoginProvider.
Open the app.module.ts file, then update the imports array as shown below:
import { BrowserModule } from '@angular/platform-browser';
import { NgModule } from '@angular/core';
import { AppRoutingModule } from './app-routing.module';
import { AppComponent } from './app.component';

import { ReactiveFormsModule } from '@angular/forms';

import { SocialLoginModule, SocialAuthServiceConfig } from 'angularx-social-login';
import { GoogleLoginProvider } from 'angularx-social-login';

@NgModule({
  declarations: [
    AppComponent
  ],
  imports: [
    BrowserModule,
    AppRoutingModule,
    ReactiveFormsModule,
    SocialLoginModule
  ],
  providers: [
    {
      provide: 'SocialAuthServiceConfig',
      useValue: {
        autoLogin: false,
        providers: [
          {
            id: GoogleLoginProvider.PROVIDER_ID,
            provider: new GoogleLoginProvider(
              'Your-Google-Client-ID-Here'
            )
          }
        ]
      } as SocialAuthServiceConfig,
    }
  ],
  bootstrap: [AppComponent]
})

export class AppModule { }
We have imported the GoogleLoginProvider, but as per requirements, you can import other providers as well.
Other providers for different social applications have following modules:
- AmazonLoginProvider
- FacebookLoginProvider
- MicrosoftLoginProvider
- VKLoginProvider
The Google client id will be injected into the GoogleLoginProvider() provider.
Step 6 – Add Google Login Button in Angular
Get your hands dirty!
In this step, we will implement the Google social login functionality in our Angular application.
Open the app.component.html file and update it with the following template HTML code.
<div class="container" style="max-width: 550px">
  <h2 class="text-center mb-5">Angular Login with Google</h2>

  <div *ngIf="isLoggedin === false">
    <div>
      <button type="button" (click)="loginWithGoogle()" class="btn btn-success">SignIn Google</button>
    </div>
  </div>

  <div *ngIf="isLoggedin === true">
    <div class="form-group">
      <label>First Name</label>
      <input type="text" class="form-control" [value]="socialUser.firstName" id="firstname" readonly>
    </div>
    <div class="form-group">
      <label>Last Name</label>
      <input type="text" class="form-control" [value]="socialUser.lastName" id="lastname" readonly>
    </div>
    <div class="form-group">
      <label>Email</label>
      <input type="text" class="form-control" [value]="socialUser.email" id="email" readonly>
    </div>
    <br/>
    <button type="button" (click)="logOut()" class="btn btn-primary">Logout from Google</button>


  </div>
</div>
Next, open the app.component.ts file and update the component class with the following code:
import { Component, OnInit } from '@angular/core';

import { FormBuilder, FormGroup, Validators } from '@angular/forms';
import { SocialAuthService, GoogleLoginProvider, SocialUser } from 'angularx-social-login';

@Component({
  selector: 'app-root',
  templateUrl: './app.component.html',
  styleUrls: ['./app.component.scss']
})

export class AppComponent implements OnInit {

  loginForm: FormGroup | undefined;
  socialUser!: SocialUser;
  isLoggedin: boolean = false;

  constructor(
    private formBuilder: FormBuilder,
    private socialAuthService: SocialAuthService
  ) { }

  ngOnInit() {
    // init the react form object
    this.loginForm = this.formBuilder.group({
      email: ['', Validators.required],
      password: ['', Validators.required]
    });

    this.socialAuthService.authState.subscribe((user) => {
      this.socialUser = user;
      this.isLoggedin = (user != null);
      console.log(this.socialUser);
    });
  }

  // Initial implicite flow using OAuth2 protocol
  loginWithGoogle(): void {
    this.socialAuthService.signIn(GoogleLoginProvider.PROVIDER_ID);
  }

  // Logout the current session
  logOut(): void {
    this.socialAuthService.signOut();
  }

}
Step 7 – Run Application
Eventually, we have integrated the Google social login into our angular application, now you can see it in action.
Run the application by executing the below ng command to open the application.
$ ng serve --openIt will open the application at the default port 4200 on the following URL
http://localhost:4200
Conclusion
Finally, the implementation of Google Social login with the Angular application is completed! We discuss step by step how to get the google development project credential including client id and secret key and configure the angular application.
Do share your feedback and suggestions … thanks!