Integration of Facebook authentication and login in react application; In this React tutorial, you will learn how to implement the Facebook login button in react by utilising the react-facebook-login plugin.
To start using Facebook authentication in your application, you need to create a developer account and get the Client ID. After that, you will be able to use Facebook API’s in your application and implement OAuth2 to enable Sign-In with the Facebook feature.
We will go through step by step tutorial, in implementing the Facebook Sign-In button in React application.
How to Get Client ID from Facebook Developer Console?
Let’s follow these quick steps to get the Client ID after creating an application on the Facebook developer console.
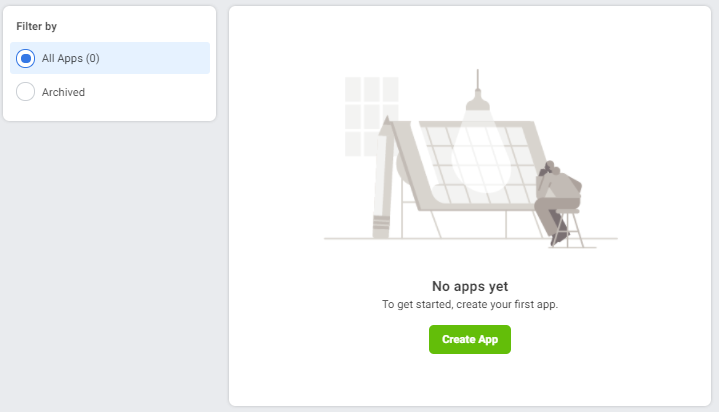
Step 1: Visit Facebook Developer Console and create an application by clicking the “Create App” button.
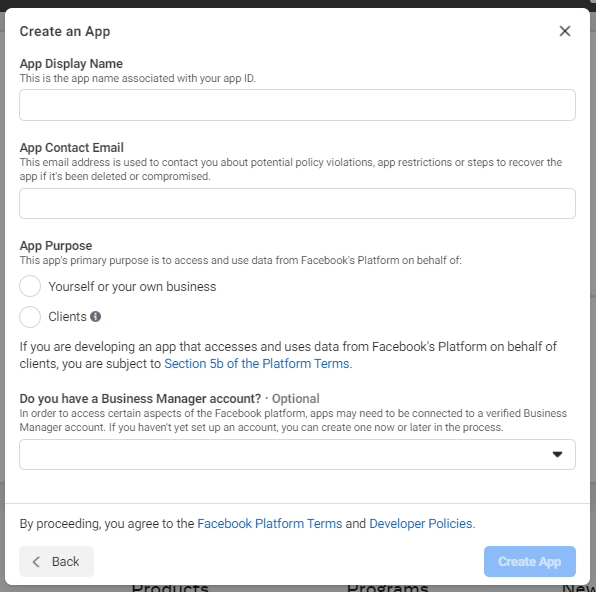
Step 2: Next, you will see a Create app popup, enter information including display name and contact email address.
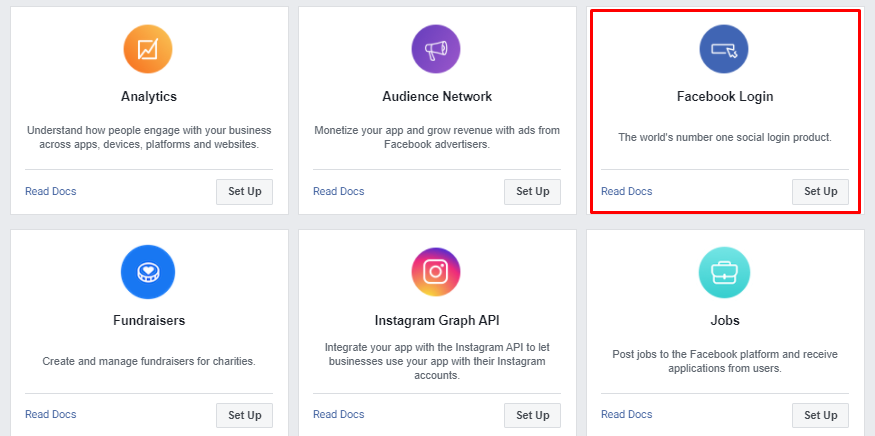
Step 3: On the next, screen you will see some cards to add to your application. Under the Facebook Login click on the Set Up button
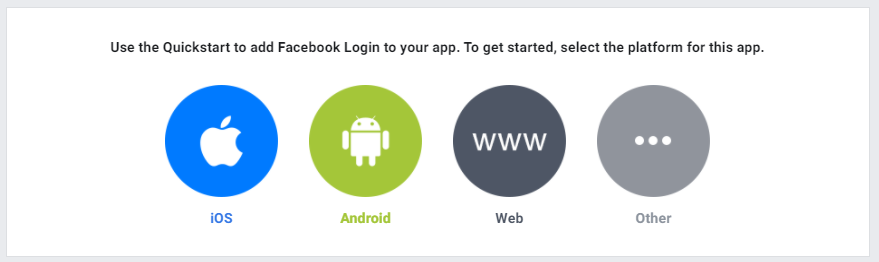
Step 3: Thereafter, you will see various platforms. Just click on the Web.
Step 4: The next screen will ask to enter the URL of your application. For now, it will be http://localhost:3000
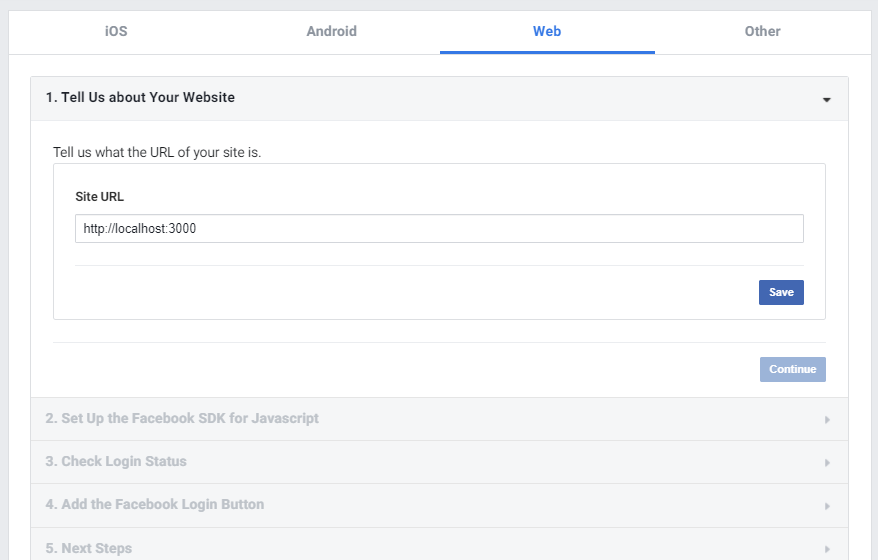
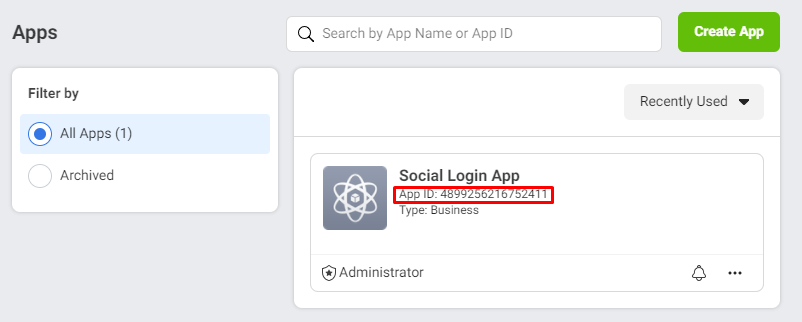
Step 5: Clicking on the Save button will create an application. You can see the application by clicking the My Apps link on top. Under the application name, you will find the App ID.
After, getting the App ID, let’s proceed with the integration of Facebook Login in React application.
How to Add Facebook Login in React Application?
- Step 1: Create React App
- Step 2: Install Bootstrap Library
- Step 3: Install React Facebook Login Package
- Step 4: Create Facebook Login Component
- Step 5: Add Facebook Login Component
- Step 6: Run React Application
Step 1: Create React App
Let’s begin by creating a new React application. head towards the terminal window and execute the following command:
npx create-react-app react-facebook-login-appThen, move inside the application directory:
cd react-facebook-login-appStep 2: Install Bootstrap Library
To quickly style our application, install the bootstrap package. Execute the following npm command:
npm install bootstrap --saveStep 3: Install React Facebook Login Package
Now, install the react-facebook-login package by executing the below command in the terminal:
npm install react-facebook-loginStep 4: Create Facebook Login Component
To keep the Facebook login separate, let’s create a new component under the src folder. Create a new file named facebooklogin.component.js under the src folder.
Then update the file with the following code:
import React, { useState } from "react";
import FacebookLogin from "react-facebook-login";
import "./App.css";

function FacebookLoginComponent() {
  const [login, setLogin] = useState(false);
  const [data, setData] = useState({});
  const [picture, setPicture] = useState("");

  const responseFacebook = (response) => {
    console.log(response);
    // Login failed
    if (response.status === "unknown") {
      alert("Login failed!");
      setLogin(false);
      return false;
    }
    setData(response);
    setPicture(response.picture.data.url);
    if (response.accessToken) {
      setLogin(true);
    } else {
      setLogin(false);
    }
  };
  const logout = () => {
    setLogin(false);
    setData({});
    setPicture("");
  };

  return (
    <div className="container">
      {!login && (
        <FacebookLogin
          appId="569720507786195"
          autoLoad={false}
          fields="name,email,picture"
          scope="public_profile,email,user_friends"
          callback={responseFacebook}
          icon="fa-facebook"
        />
      )}

      {login && (
        <div className="card">
          <div className="card-body">
            <img className="rounded" src={picture} alt="Profile" />
            <h5 className="card-title">{data.name}</h5>
            <p className="card-text">Email ID: {data.email}</p>
            <a href="#" className="btn btn-danger btn-sm" onClick={logout}>
              Logout
            </a>
          </div>
        </div>
      )}
    </div>
  );
}

export default FacebookLoginComponent;
The Facebook component is provided by the react-facebook-login, takes in props as following:
appId: Provide the Facebook application idautoLoad: To trigger the SignIn window when loadedfields: User claim propertiesscope: Defining the scope of values required from the profilecallback: Callback handler after authenticationicon: Icon for the Facebook Login button
We have defined setState to manage the data received after authentication of the user with a Facebook account. The values are getting saved including Email, Profile picture and Name.
Step 5: Add Facebook Login Component
Now, import the FacebookLoginComponent into the App.js file as shown below:
import './App.css';
import '../node_modules/bootstrap/dist/css/bootstrap.min.css';
import FacebookLoginComponent from './facebooklogin.component';

function App() {
  return (
    <div className="App">
       <h1>Facebook Login Tutorial in React App</h1>

       <FacebookLoginComponent />

    </div>
  );
}

export default App;
Step 6: Run React Application
Finally, run the application by hitting the below command:
npm startIt will start the server and deploy the application at the following URL:
http://localhost:3000
Conclusion
We have complete the tutorial on integrating Facebook login in React application. We used the react-facebook-login package module to quickly implement the Social authentication feature.