Creating a chatbot can be a challenging task, but with the help of OpenAI and React, it can be a relatively simple process. OpenAI is a leading AI research lab that is dedicated to creating safe AI, and React is a popular JavaScript library for building user interfaces. Together, these tools can be used to create a powerful and engaging chatbot experience for your users.
In this tutorial, we will be walking through the process of creating a chatbot using OpenAI and integrating it into a React application. We will cover the basics of creating an OpenAI model, training the model to understand user input, and integrating the chatbot into a React application.
Step 1: Install the Create-React-App tool
To start a new React project, you will first need to install the Create-React-App tool. You can do this by running the following command:
npm install -g create-react-appOnce you have the Create-React-App tool installed, you can use it to create a new React app by running the following command and replacing my-app with the desired name for your app:
create-react-app my-chatbot-app
Step 2: Install react-simple-chatbot
In your React project, install react-simple-chatbot by running the following command:
npm install react-simple-chatbot
Step 3: Create a new React component for the chatbot
Create a new React component for the chatbot, for example, Chatbot.js, and import react-simple-chatbot in it.
import React from 'react';
import Chatbot from 'react-simple-chatbot';

const MyChatbot = () => {
    return <Chatbot />
}
export default MyChatbot;
Step 4: Define the steps for the chatbot
In the Chatbot component, define the steps for the chatbot by passing an array of steps to the steps prop. Each step is an object with a message property for the bot’s message and a trigger property for the next step.
const MyChatbot = () => {
const steps = [
{
id: '1',
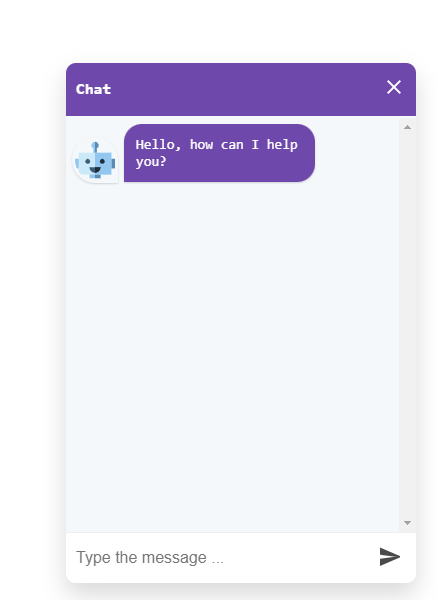
message: 'Hello, how can I help you?',
trigger: '2',
},
{
id: '2',
user: true,
trigger: '3',
},
{
id: '3',
message: 'I am sorry, I am not able to understand you at this moment, please try again later',
end: true,
},
];
return <Chatbot steps={steps} />
}
Step 5: Install openai client library
Install the OpenAI client library by running the following command
npm install openai
Step 6: Configure the OpenAI library with your API key
const { Configuration, OpenAIApi } = require("openai");
const configuration = new Configuration({
  apiKey: "YOUR_API_KEY",
});
const openai = new OpenAIApi(configuration);
You can get the OpenAPI key from here.
Step 7: Make a request to the GPT-3 model
In order to get a response from the GPT-3 model, you will need to make a request to the model. You can do this by calling the openai.createCompletionmethod and passing in the necessary parameters such as the model, prompt, and the number of responses you want.
const handleEnd = async ({ steps, values }) => {
    const response = await openai.createCompletion({
      model: "text-davinci-002",
      prompt: `${steps[0].value}`,
      temperature: 0.5,
    });
    return {
      id: "3",
      message: response.data.choices[0].text,
      user: "bot",
    };
  };
Step 7: Pass the GPT-3 response to the chatbot
Once you have received the response from the GPT-3 model, you can pass it to the chatbot to display it to the user. You can do this by passing the handleEnd function as a prop to the Chatbot component and triggering it in the steps prop on the end property of the user step.
const MyChatbot = () => {
  const handleEnd = async ({ steps, values }) => {
    const response = await openai.createCompletion({
      model: "text-davinci-002",
      prompt: `${steps[0].value}`,
      temperature: 0.5,
    });
    return {
      id: "3",
      message: response.data.choices[0].text,
      user: "bot",
    };
  };

  const steps = [
    {
      id: "1",
      message: "Hello, how can I help you?",
      trigger: "2",
    },
    {
      id: "2",
      user: true,
      trigger: handleEnd,
    },
    {
      id: "3",
      user: true,
      trigger: handleEnd,
    },
    {
      id: "4",
      message:
        "I am sorry, I am not able to understand you at this moment, please try again later",
      end: true,
    },
  ];

  return <Chatbot steps={steps} {...config} />;
};
You need to make a request to the GPT-3 model and pass the response to the chatbot. You can do this by creating a new function called handleEnd, and passing it as a prop to the Chatbot component.
Here is the full code for the MyChatbot component that includes the handleEnd function and the necessary imports:
import Chatbot from "react-simple-chatbot";

const { Configuration, OpenAIApi } = require("openai");
const configuration = new Configuration({
  apiKey: "YOUR_API_KEY",
});
const openai = new OpenAIApi(configuration);

// Set some properties of the bot
const config = {
  floating: true,
};

const MyChatbot = () => {
  const handleEnd = async ({ steps, values }) => {
    const response = await openai.createCompletion({
      model: "text-davinci-002",
      prompt: `${steps[0].value}`,
      temperature: 0.5,
    });
    return {
      id: "3",
      message: response.data.choices[0].text,
      user: "bot",
    };
  };

  const steps = [
    {
      id: "1",
      message: "Hello, how can I help you?",
      trigger: "2",
    },
    {
      id: "2",
      user: true,
      trigger: handleEnd,
    },
    {
      id: "3",
      user: true,
      trigger: handleEnd,
    },
    {
      id: "4",
      message:
        "I am sorry, I am not able to understand you at this moment, please try again later",
      end: true,
    },
  ];

  return <Chatbot steps={steps} {...config} />;
};
export default MyChatbot;
In the above code, the handleEnd function is an asynchronous function that takes an object with the steps and values properties. It makes a request to the GPT-3 model using the openai.createCompletion method and passing in the necessary parameters such as the model, prompt, and the number of responses you want. The GPT-3 model’s response is then returned by the function and passed to the chatbot.
You have to pass the handleEnd function as a prop to the Chatbot component, in the end property of the user step in the steps prop. The chatbot will trigger this function when the user step is ended.
In conclusion, building a chatbot in a React app using OpenAI can be a challenging task but with the right tools and techniques, it can be done efficiently.
In this tutorial, we have used the react-simple-chatbot package as the user interface and OpenAI’s API to generate responses for the chatbot. We have also discussed the pros and cons of using this method and provided code snippets to help you understand the process better.
However, it’s worth noting that there are many other chatbot packages and frameworks available for React, and it’s important to consider which one best suits your needs before implementing. Additionally, it’s important to consider the limitations of OpenAI’s API and the cost of using it for your project. Overall, building a chatbot in React with OpenAI is a powerful way to add an interactive and intelligent feature to your app, but it’s important to weigh the pros and cons and consider the cost before proceeding.