In this article, we will explore how to use various types of auth guards in Angular 15. Angular majorly provides these auth guards including CanActivate, CanActivateChild, CanDeactivate and CanLoad.
Route guards are essential for protecting various parts of an application based on different conditions, such as user authentication or authorization.
To better understand the concepts, we will work with a sample application involving students.
How to Implement Auth Guards in Angular 15 Application?
Follow these steps to easily implement Auth Guards in the Angular application:
Step 1 – Create an Angular App
Step 2 – Create Auth Guard Services
Step 3 – Setup Students’ Application
Step 4 – Update App Routing Module
Step 5 – Update the App Component
Step 1 – Create an Angular App
First, start by creating a new Angular application using the ng new command:
ng new students-app
cd students-app
Step 2 – Create Auth Guard Services
In this step, we will create the Auth services for CanActivate, CanActivateChild, CanDeactivate and CanLoad.
Execute the following generate commands to quickly create the services:
ng generate service AuthGuard
ng generate service ChildAuthGuard
ng generate service DeactivateGuard
ng generate service LoadGuard
After creating the services, we will update their respective files with the following code:
CanActivate
~src\app\auth-guard.service.ts
import { Injectable } from '@angular/core';
import {
  CanActivate,
  ActivatedRouteSnapshot,
  RouterStateSnapshot,
} from '@angular/router';

@Injectable({
  providedIn: 'root',
})
export class AuthGuardService implements CanActivate {
  constructor() {}

  get isLoggedIn(): boolean {
    return sessionStorage.getItem('isLoggedIn') === 'true';
  }

  set isLoggedIn(value: boolean) {
    sessionStorage.setItem('isLoggedIn', String(value));
  }

  canActivate(
    route: ActivatedRouteSnapshot,
    state: RouterStateSnapshot
  ): boolean {
    if (!this.isLoggedIn) {
      alert('Not Authenticated by canActivate - Please Login!');
    }
    return this.isLoggedIn;
  }

  toggleAuthentication() {
    this.isLoggedIn = !this.isLoggedIn;
  }
}
The CanActivate interface is used to determine if a route can be activated. It is commonly used for protecting routes that require user authentication. The interface has a single method named canActivate, that returns a boolean value, an Observable<boolean>, or a Promise<boolean>.
We have also created the get and set for isLoggedIn that will check the sessionStorage for the isLoggedIn status of the user. This same status will be shared by other Auth Guards for testing the features.
CanActivateChild
~src\app\child-auth-guard.service.ts
import { Injectable } from '@angular/core';
import {
  CanActivateChild,
  ActivatedRouteSnapshot,
  RouterStateSnapshot,
} from '@angular/router';
import { AuthGuardService } from './auth-guard.service';

@Injectable({
  providedIn: 'root',
})
export class ChildAuthGuardService implements CanActivateChild {
  constructor(private authGuardService: AuthGuardService) {}

  canActivateChild(
    route: ActivatedRouteSnapshot,
    state: RouterStateSnapshot
  ): boolean {
    if (!this.authGuardService.isLoggedIn) {
      alert('Not Authenticated by canActivateChild - Please Login!');
    }
    return this.authGuardService.isLoggedIn;
  }
}
The CanActivateChild interface is similar to CanActivate but is used for protecting child routes. It has a single method, canActivateChild, which also returns a boolean value, an Observable, or a Promise.
CanDeactivate
~src\app\deactivate-guard.service.ts
import { Injectable } from '@angular/core';
import {
  CanDeactivate,
  ActivatedRouteSnapshot,
  RouterStateSnapshot,
  UrlTree,
} from '@angular/router';
import { Observable } from 'rxjs';
import { StudentDetailComponent } from './student-detail/student-detail.component';

@Injectable({
  providedIn: 'root',
})
export class DeactivateGuardService
  implements CanDeactivate<StudentDetailComponent>
{
  canDeactivate(
    component: StudentDetailComponent,
    currentRoute: ActivatedRouteSnapshot,
    currentState: RouterStateSnapshot,
    nextState?: RouterStateSnapshot
  ):
    | Observable<boolean | UrlTree>
    | Promise<boolean | UrlTree>
    | boolean
    | UrlTree {
    if (component.formChanged) {
      return confirm(
        'You have unsaved changes. Are you sure you want to leave this page?'
      );
    }
    return true;
  }
}
The CanDeactivate interface is used to prevent users from accidentally navigating away from a component with unsaved changes. Here we have accessed the component and its formChanged variable.
CanLoad
~src\app\load-guard.service.ts
import { Injectable } from '@angular/core';
import {
  CanLoad,
  Route,
  UrlSegment,
  ActivatedRouteSnapshot,
  RouterStateSnapshot,
  UrlTree,
} from '@angular/router';
import { Observable, of } from 'rxjs';
import { AuthGuardService } from './auth-guard.service';

@Injectable({
  providedIn: 'root',
})
export class LoadGuardService implements CanLoad {
  constructor(private authGuardService: AuthGuardService) {}

  canLoad(
    route: Route,
    segments: UrlSegment[]
  ):
    | Observable<boolean | UrlTree>
    | Promise<boolean | UrlTree>
    | boolean
    | UrlTree {
    if (!this.authGuardService.isLoggedIn) {
      alert('Not Authenticated by canLoad - Please Login!');
    }
    return of(this.authGuardService.isLoggedIn);
  }
}
The CanLoad interface is used to prevent the lazy loading of a module based on certain conditions, like user authorization. We will use in routing module to check if lazy Loaded modules can be loaded based on the user’s logged-in status.
Step 3 – Setup Students’ Application
After creating the required Auth Guards, we will create the required components in our Student’s application.
Execute the following generate commands to quickly create the components:
ng generate component StudentList
ng generate component StudentDetail
ng generate module Lazy --route lazy --module app-routing
Above commands will create StudentListComponent, StudentDetailComponent and LazyModule.
Let’s update these components one by one with the required functionality to test Auth-based routing.
Update Students List Component
The Student List component will show a list of all the students. Open the student list component files and update them as shown below:
student-list.component.html
<h2>Student List</h2>

<table>
    <thead>
        <tr>
            <th>ID</th>
            <th>Name</th>
            <th>Actions</th>
        </tr>
    </thead>
    <tbody>
        <tr *ngFor="let student of students">
            <td>{{ student.id }}</td>
            <td>{{ student.name }}</td>
            <td>
                <a [routerLink]="['/students', student.id]">View Details</a>
            </td>
        </tr>
    </tbody>
</table>
student-list.component.ts
import { Component, OnInit } from '@angular/core';

@Component({
  selector: 'app-student-list',
  templateUrl: './student-list.component.html',
  styleUrls: ['./student-list.component.css'],
})
export class StudentListComponent implements OnInit {
  students = [
    { id: 1, name: 'John Doe' },
    { id: 2, name: 'Jane Smith' },
  ];

  constructor() {}

  ngOnInit(): void {}
}
Updated Student Details Component
Student Details Component will display the details when an item is clicked on a student list.
Under the details section, there will also be a Form which will show editable fields. If a user starts typing into it and tried to navigate off that page, an alert confirms box will show to alert the user about losing the entered data.
This is achieved by using the DeactivateGuardService.
The Student Details component will act as a child-routed component.
student-detail.component.html
<h2>Student Details</h2>
<p>ID: {{ student.id }}</p>
<p>Name: {{ student.name }}</p>

<form (ngSubmit)="onFormChange()">
    <label>
        Edit Student Name:
        <input type="text" [(ngModel)]="student.name" (change)="onFormChange()" name="studentName">
    </label>
    <button type="submit">Submit</button>
</form>
student-detail.component.ts
import { Component, OnInit } from '@angular/core';
import { ActivatedRoute } from '@angular/router';

@Component({
  selector: 'app-student-detail',
  templateUrl: './student-detail.component.html',
  styleUrls: ['./student-detail.component.css'],
})
export class StudentDetailComponent implements OnInit {
  formChanged = false;

  student: any;

  constructor(private route: ActivatedRoute) {}

  ngOnInit(): void {
    const id = Number(this.route.snapshot.paramMap.get('id'));
    this.student = { id: id, name: `Student ${id}` };
  }

  onFormChange() {
    this.formChanged = true;
  }
}
Step 4 – Update App Routing Module
This is the most important step of our tutorial. For each routing path, you will notice how we have implemented the necessary Auth Gaurd classes to limit the navigation or activate the paths.
Open the app-routing.module.ts file and update with following code:
import { NgModule } from '@angular/core';
import { RouterModule, Routes } from '@angular/router';
import { AuthGuardService } from './auth-guard.service';
import { DeactivateGuardService } from './deactivate-guard.service';
import { LoadGuardService } from './load-guard.service';
import { StudentListComponent } from './student-list/student-list.component';
import { StudentDetailComponent } from './student-detail/student-detail.component';
import { ChildAuthGuardService } from './child-auth-guard.service';

const routes: Routes = [
  {
    path: '',
    redirectTo: '/students',
    pathMatch: 'full',
  },
  {
    path: 'students',
    canActivate: [AuthGuardService],
    canActivateChild: [ChildAuthGuardService],
    children: [
      { path: '', component: StudentListComponent },
      {
        path: ':id',
        component: StudentDetailComponent,
        canDeactivate: [DeactivateGuardService],
      },
    ],
  },
  {
    path: 'lazy',
    canLoad: [LoadGuardService],
    loadChildren: () => import('./lazy/lazy.module').then((m) => m.LazyModule),
  },
];

@NgModule({
  imports: [RouterModule.forRoot(routes)],
  exports: [RouterModule],
})
export class AppRoutingModule {}
Step 5 – Update App Component
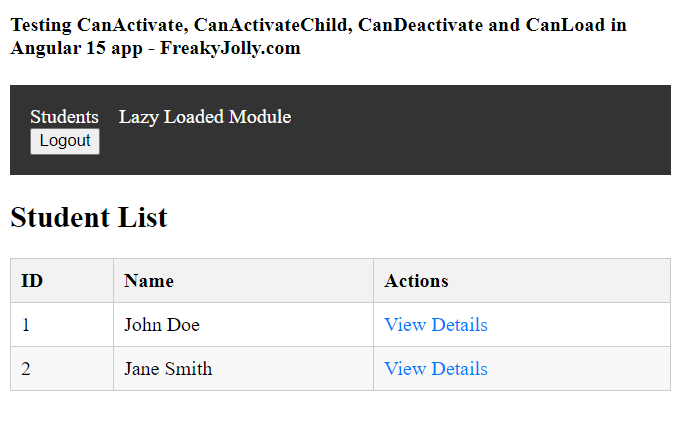
Finally, let’s have a look at our last but not least modification. The App Component will have a navigation bar with Login/ Logout button to control navigation through out the application.
app.component.html
<h4>Testing CanActivate, CanActivateChild, CanDeactivate and CanLoad in Angular 15 app - FreakyJolly.com</h4>
<nav>
  <ul>
    <li><a routerLink="/students">Students</a></li>
    <li><a routerLink="/lazy">Lazy Loaded Module</a></li>
  </ul>
  <button (click)="toggleAuthentication()">
    {{ authGuardService.isLoggedIn ? 'Logout' : 'Login' }}
  </button>
</nav>

<router-outlet></router-outlet>
app.component.ts
import { Component } from '@angular/core';
import { AuthGuardService } from './auth-guard.service';

@Component({
  selector: 'app-root',
  templateUrl: './app.component.html',
  styleUrls: ['./app.component.css'],
})
export class AppComponent {
  title = 'students-app';

  constructor(public authGuardService: AuthGuardService) {}

  toggleAuthentication() {
    this.authGuardService.toggleAuthentication();
  }
}
Run the Application
Now we are done with the implementation of Auth Guards services in our Students app. Execute the npm start or ng server command to start the webserver and open the application on http://localhost:4200
If a user tries to visit Student List or Lazy Loaded module, an alert message will show up with the respective guard name.
On the details page, if the user modifies the form field and tried to navigate off the page, confirm alert will show up to intimate about action to prevent accidental navigation and losing the content.
Conclusion
Route guards in Angular 15 offer powerful mechanisms to control and protect your application’s navigation. By implementing CanActivate, CanActivateChild, CanDeactivate, and CanLoad guards, you can ensure that users access only the routes they are authorized to, maintain application security, and optimize the loading of modules.
The practical example of a student application we explored in this article showcases how to effectively use route guards in real-life scenarios. Hope this will be helpful to kick start more advanced implementation.