Adding server-side pagination in the Material table using the Mat Paginator component. We will fetch the dynamic rows from the MySQL table and fetch them using the PHP file. In this tutorial, you will learn how to add dynamic pagination to load items for a page from a database on pagination.
In single-page applications like Angular, we create pages that are data-driven, where a single page can be used to load different types of data. Take an example of a page with a data table that is supposed to show data to the user in a tabular form. In that case, we can easily load a whole bunch of data from a remote server and render it into the data table. That can handle pagination across multiple records on the client-side if the number for rows are in hundreds of thousands.
But suppose, we have a huge number of rows which can be in millions that need to be presented to the user on a client screen. In that case, we can’t download the whole data at once as it will cause performance issues, wastage of network resources, rendering issues or even crash the browser.

In such a scenario, we can call the required data into small chunks of rows, that are relevant to the user. Users can ask for a particular page from a huge database that is required using the particular offset and limiting the number of rows.
In this guide, you will learn everything you need to know about implementing the server-side Material data-table pagination using the Mat Paginator component. Moreover, we will put dummy data into the MySQL database and call it using the PHP service layer with the help of HTTP get calls.
How to Add Server-Side Paginator in Mat Tables?
Follow these quick steps to implement the Server-Side pagination on Material tables:
Step 1 – Create Angular App
Step 2 – Install Material Library
Step 3 – Import Material Module
Step 4 – Create Material Table
Step 5 – Update Component Class
Step 6 – Setup MySQL Database
Step 7 – PHP Service API
Step 8 – Run Application
Step 1 – Create Angular App
To enable the ng command in the terminal window, make sure to instal the angular cli tool. If you already have, you can update it as well.
# Install NG CLI
npm install -g @angular/cli

#Update NG CLI
ng update
Afterwards, you can hit the following command to create a new angular project with the name provided:
ng new angular-material-table-appMove inside the application folder
cd angular-material-table-appStep 2 – Install Material Library
Thereafter creating and moving the terminal to the application folder, we will install the Material library by executing the ng add command. This makes the installation of the material library very easy, you can choose options while installation as shown below:
ng add @angular/material

# ? Choose a prebuilt theme name, or "custom" for a custom theme: Indigo/Pink
# ? Set up global Angular Material typography styles? No
# ? Set up browser animations for Angular Material? Yes
This will update the "styles" property array inside the angular.json file, which you can change anytime.
Step 3 – Import Material Module
The Material library provides huge set of usable API’s for its various modules and components. So we need to import only those modules, that we’re going to use in our application. This keeps out app more optimized and size-efficient.
Let’s import the MatTableModule, MatPaginatorModule and MatProgressBarModule for creating Datatable, its paginator and loader progress bar respectively.
Open the app.module.ts file and update the imports array:
import { NgModule } from '@angular/core';
import { BrowserModule } from '@angular/platform-browser';

import { AppRoutingModule } from './app-routing.module';
import { AppComponent } from './app.component';
import { BrowserAnimationsModule } from '@angular/platform-browser/animations';
import { MatTableModule } from '@angular/material/table';
import { ServerPaginationComponent } from './components/server-pagination/server-pagination.component';
import { ExpandTableComponent } from './components/expand-table/expand-table.component';
import { MatPaginatorModule } from '@angular/material/paginator';
import { MatProgressBarModule } from '@angular/material/progress-bar';


@NgModule({
  declarations: [
    AppComponent,
    ServerPaginationComponent,
    ExpandTableComponent
  ],
  imports: [
    BrowserModule,
    AppRoutingModule,
    BrowserAnimationsModule,
    MatTableModule, // <-- Added Table Module
    MatPaginatorModule, // <-- Added Paginator Module
    MatProgressBarModule, // <-- Added Loader Module
  ],
  providers: [],
  bootstrap: [AppComponent]
})
export class AppModule { }
Step 4 – Create Material Table
Now, open the app.component.html file and add the table with mat-table component. Also the mat-paginator component to create the pagination control.
Update the file as shown below:
<div class="mat-elevation-z8">
  <mat-progress-bar mode="indeterminate" *ngIf="isLoading"></mat-progress-bar>
  <table mat-table [dataSource]="dataSource">

    <!-- Position Column -->
    <ng-container matColumnDef="id">
      <th mat-header-cell *matHeaderCellDef> ID </th>
      <td mat-cell *matCellDef="let element"> {{element.id}} </td>
    </ng-container>

    <ng-container matColumnDef="firstname">
      <th mat-header-cell *matHeaderCellDef> First Name </th>
      <td mat-cell *matCellDef="let element"> {{element.firstname}} </td>
    </ng-container>

    <ng-container matColumnDef="lastname">
      <th mat-header-cell *matHeaderCellDef> Last Name </th>
      <td mat-cell *matCellDef="let element"> {{element.lastname}} </td>
    </ng-container>

    <ng-container matColumnDef="email">
      <th mat-header-cell *matHeaderCellDef> Email </th>
      <td mat-cell *matCellDef="let element"> {{element.email}} </td>
    </ng-container>

    <ng-container matColumnDef="reg_date">
      <th mat-header-cell *matHeaderCellDef> Reg Date </th>
      <td mat-cell *matCellDef="let element"> {{element.reg_date}} </td>
    </ng-container>

    <tr mat-header-row *matHeaderRowDef="displayedColumns"></tr>
    <tr mat-row *matRowDef="let row; columns: displayedColumns;"></tr>
  </table>

  <mat-paginator #paginator [length]="totalRows" [pageIndex]="currentPage" [pageSize]="pageSize"
    [pageSizeOptions]="pageSizeOptions" (page)="pageChanged($event)" aria-label="Select page">
  </mat-paginator>

</div>
The mat-progress-bar will show loader until the server API call is completed. Material table is getting populated via dataSource. The major roll on server-side pagination is getting handled by the MatPaginator and its input/output properties.
Step 5 – Update Component Class
After adding the Material table in the template HTML, now we need to update the class component with required variables and functions.
The loadData() function is calling the fetch function to load remote server data rows. We used the javascript fetch function instead of HttpClientModule to keep things simple.
Open the app.component.ts file and update as shown below:
import { Component, ViewChild } from '@angular/core';
import { MatPaginator, PageEvent } from '@angular/material/paginator';
import { MatTableDataSource } from '@angular/material/table';

interface USER {
  id: string;
  firstname: string;
  lastname: string;
  email: string;
  reg_date: string;
}

@Component({
  selector: 'app-server-pagination',
  templateUrl: './server-pagination.component.html',
  styleUrls: ['./server-pagination.component.css']
})
export class ServerPaginationComponent {

  ELEMENT_DATA: USER[] = [];
  isLoading = false;
  totalRows = 0;
  pageSize = 5;
  currentPage = 0;
  pageSizeOptions: number[] = [5, 10, 25, 100];

  displayedColumns: string[] = ['id', 'firstname', 'lastname', 'email', 'reg_date'];
  dataSource: MatTableDataSource<USER> = new MatTableDataSource();

  @ViewChild(MatPaginator)
  paginator!: MatPaginator;

  ngAfterViewInit() {
    this.dataSource.paginator = this.paginator;
  }

  ngOnInit(): void {
    //Load initial data
    this.loadData();
  }

  loadData() {
    this.isLoading = true;
    let URL = `http://localhost/database.php?pageno=${this.currentPage}&per_page=${this.pageSize}`;


    fetch(URL)
      .then(response => response.json())
      .then(data => {
        this.dataSource.data = data.rows;
        setTimeout(() => {
          this.paginator.pageIndex = this.currentPage;
          this.paginator.length = data.count;
        });
        this.isLoading = false;
      }, error => {
        console.log(error);
        this.isLoading = false;
      });
  }

  pageChanged(event: PageEvent) {
    console.log({ event });
    this.pageSize = event.pageSize;
    this.currentPage = event.pageIndex;
    this.loadData();
  }

}
There are paginator variable including following:
- totalRows : Totol Number of rows avaible to show in the data table
- pageSize : Rows to show on single page/view
- currentPage : Current page number offset.
- pageSizeOptions : Array of numbers to show items per page.
The pageChanged event is triggered when pagination controls are interacted by user. The event variable return various values which we assigned to the local class variable and sending them to the server API query in the fetch GET call.
Step 6 – Setup MySQL Database
We have setup a local XAMPP server with PhpMyAdmin to test the pagination. The dummy records are inserted into a mySQL database named user_database.
The test table tbl_users_list is having following scheme:
CREATE TABLE `tbl_users_list` (
  `id` int(6) UNSIGNED NOT NULL,
  `firstname` varchar(30) NOT NULL,
  `lastname` varchar(30) NOT NULL,
  `email` varchar(50) DEFAULT NULL,
  `reg_date` timestamp NOT NULL DEFAULT current_timestamp() ON UPDATE current_timestamp()
) ENGINE=InnoDB DEFAULT CHARSET=utf8mb4;
Execute following SQL queries:
INSERT INTO `tbl_users_list` (`id`, `firstname`, `lastname`, `email`, `reg_date`) VALUES
(1, 'Dayna', 'Kohler', 'afisher@example.org', '2019-12-18 14:48:53'),
(2, 'Torey', 'Kihn', 'imani08@example.net', '1977-12-05 05:02:25'),
(3, 'Frida', 'Jones', 'deonte88@example.org', '1972-04-09 23:14:17'),
(4, 'Jed', 'Gerhold', 'myrtle84@example.net', '2014-02-09 00:06:26'),
(5, 'Delmer', 'Predovic', 'carroll.camryn@example.com', '2019-04-20 22:28:24'),
(6, 'Roman', 'Flatley', 'turcotte.emile@example.net', '1981-08-28 09:28:17'),
(7, 'Colby', 'Hermiston', 'ritchie.lucio@example.org', '2020-12-29 09:42:40'),
(8, 'Diamond', 'Sawayn', 'johnathon41@example.net', '2017-01-30 13:41:17'),
(9, 'Henriette', 'Dach', 'aniya.hane@example.org', '1971-04-23 21:10:31'),
(10, 'Loyal', 'Schaden', 'zoey.roob@example.com', '2010-06-14 19:54:20');
You can also create dummy table rows by providing the scheme using this online tool.
Step 7 – PHP Service API
Now lets have a look on our PHP server API file, that will return the requested set of table row to populate the datatable. We created the file at this location src\app\server\database.php with following code:
<?php

header('Access-Control-Allow-Origin: *');
header('Access-Control-Allow-Methods: GET, POST');
header("Access-Control-Allow-Headers: X-Requested-With");

$servername = "localhost";
$username = "root";
$password = "";

// Create connection
$conn = new mysqli($servername, $username, $password);

// Check connection
if ($conn->connect_error) {
  die("Connection failed: " . $conn->connect_error);
}

$pageno = isset($_GET['pageno']) ? $_GET['pageno'] : 1;
$no_of_records_per_page = isset($_GET['per_page']) ? $_GET['per_page'] : 10;

$myArray = array();
$offset = ($pageno) * $no_of_records_per_page;

$conn=mysqli_connect($servername, $username, $password,"laravel_database");
// Check connection
if (mysqli_connect_errno()){
    echo "Failed to connect to MySQL: " . mysqli_connect_error();
    die();
}

$total_pages_sql = "SELECT COUNT(*) FROM tbl_users_list";
$result = mysqli_query($conn,$total_pages_sql);
$total_rows = mysqli_fetch_array($result)[0];
$total_pages = ceil($total_rows / $no_of_records_per_page);

$sql = "SELECT * FROM tbl_users_list LIMIT $offset, $no_of_records_per_page";
$sth = mysqli_query($conn, $sql);
$rows = array();

while($r = mysqli_fetch_assoc($sth)) {
  $rows['rows'][] = $r;
}

$rows['count'] = $total_rows;
$rows['total_pages'] = $total_pages;
$rows['pageno'] = $pageno;
$rows['rows_per_page'] = $no_of_records_per_page;
print json_encode($rows);
mysqli_close($conn);

?>
You can easily run the PHP file by keeping it into the C:\xampp\htdocs folder or running into the PHP server and executing the below command:
php -S 127.0.0.1:8080
Step 8 – Run Application
Now you need to run the Angular project by executing the below command into the terminal:
ng serve --open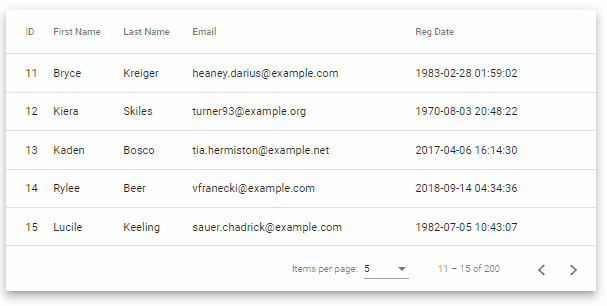
Conclusion
We discussed how to implement server-side pagination in Material datatable with paginator component. We used the fetch function to trigger HTTP API get a call to fetch the required set of page rows. We are only getting a particular set of items from the MySQL database using the PHP service API.
This method helps in keeping the application efficient more user friendly and healthy in terms of network usage.
Hope you enjoyed this tutorial. Thanks…