Angular’s team build Google’s Material design-based framework known as Angular Material. This framework is based on principles of Google material design, you can read more about it here.
Today we will discuss, on how we can fuse the beauty of Angular Material and its powerful components with Ionic 3 framework. At the end of this tutorial, you will be able to build an application which will have components from Angular Material which you can find here.
Let’s begin …
Step 1) Create a new Ionic 3 Application using Ionic cli.
If you already have an application you can continue with that.
Run following commands to create a new app
$ npm install -g ionic@latest
$ ionic start Ionic3AngularMaterialDemo blank
Go to the root of the app
$ cd Ionic3AngularMaterialDemo
Step 2) Add “Angular Material” modules in Ionic 3 App
We need to add Animations, CDK, and Material module using below command
$ npm install --save @angular/material @angular/cdk @angular/animations
Step 3) Configure Ionic 3 App to use Angular material Modules and CSS theme
At the root folder create a new folder “config” with file “copy.config.js“. Paste following content in it
copy.config.js
module.exports = {
    copyMaterialThemeCSS: {
        src: ['{{ROOT}}/node_modules/@angular/material/prebuilt-themes/indigo-pink.css'],
        dest: '{{WWW}}/assets'
    }
}
this will copy the theme file “indigo-pink.css” (you can choose anyone) to Ionic 3’s asset folder from Angular material’s prebuilt four themes.
Add Animation module (BrowserAnimationsModule) in app.module.ts. After adding file will look like this.
import { BrowserModule } from '@angular/platform-browser';
import { ErrorHandler, NgModule } from '@angular/core';
import { IonicApp, IonicErrorHandler, IonicModule } from 'ionic-angular';
import { SplashScreen } from '@ionic-native/splash-screen';
import { StatusBar } from '@ionic-native/status-bar';
import { BrowserAnimationsModule } from "@angular/platform-browser/animations";
import { MyApp } from './app.component';

@NgModule({
  declarations: [
    MyApp
  ],
  imports: [
    BrowserModule,
    IonicModule.forRoot(MyApp),
    BrowserAnimationsModule
  ],
  bootstrap: [IonicApp],
  entryComponents: [
    MyApp
  ],
  providers: [
    StatusBar,
    SplashScreen,
    {provide: ErrorHandler, useClass: IonicErrorHandler}
  ]
})
export class AppModule {}
Step 4) Now we will add Angular Material components in Home view and we will add a separate module for the “home page”.
create a new file home.module.ts
import { NgModule } from '@angular/core';
import { IonicPageModule } from 'ionic-angular';
import { HomePage } from './home';

import { MatButtonModule, MatCardModule, MatTabsModule, MatChipsModule, MatIconModule, MatToolbarModule, MatDatepickerModule, MatFormFieldModule, MatNativeDateModule } from "@angular/material";

@NgModule({
  declarations: [
    HomePage,
  ],
  imports: [
    IonicPageModule.forChild(HomePage),
    MatButtonModule,
    MatCardModule,
    MatTabsModule,
    MatChipsModule,
    MatIconModule,
    MatToolbarModule,
    MatDatepickerModule,
    MatFormFieldModule,
    MatNativeDateModule
  ],
  exports: [
    HomePage
  ]
})
export class HomePageModule {}
home.ts
import { Component } from '@angular/core';
import { IonicPage, NavController, NavParams } from 'ionic-angular';

@IonicPage()
@Component({
  selector: 'page-home',
  templateUrl: 'home.html',
})
export class HomePage {

  constructor(public navCtrl: NavController, public navParams: NavParams) {
  }

}
home.html
<ion-header>

  <ion-navbar color="primary">
    <ion-title text-center>Angular Material</ion-title>
  </ion-navbar>

</ion-header>


<ion-content padding>

  <h2>Multi-row toolbar</h2>

  <mat-toolbar color="primary">
    <mat-toolbar-row>
      <span>Custom Toolbar</span>
    </mat-toolbar-row>

    <mat-toolbar-row>
      <span>Second Line</span>
      <span class="example-spacer"></span>
      <mat-icon class="example-icon">verified_user</mat-icon>
    </mat-toolbar-row>

    <mat-toolbar-row>
      <span>Third Line</span>
      <span class="example-spacer"></span>
      <mat-icon class="example-icon">favorite</mat-icon>
      <mat-icon class="example-icon">delete</mat-icon>
    </mat-toolbar-row>
  </mat-toolbar>

  <h2>Basic datepicker</h2>


    <input matInput [matDatepicker]="picker" placeholder="Choose a date">
    <mat-datepicker-toggle matSuffix [for]="picker"></mat-datepicker-toggle>
    <mat-datepicker #picker></mat-datepicker>

</ion-content>
Now run this command to open application
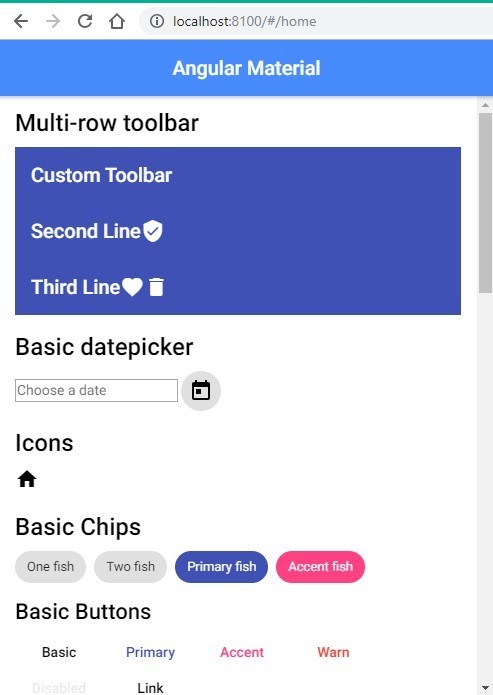
$ ionic serve --openIf everything goes well your page will look like this 🙂
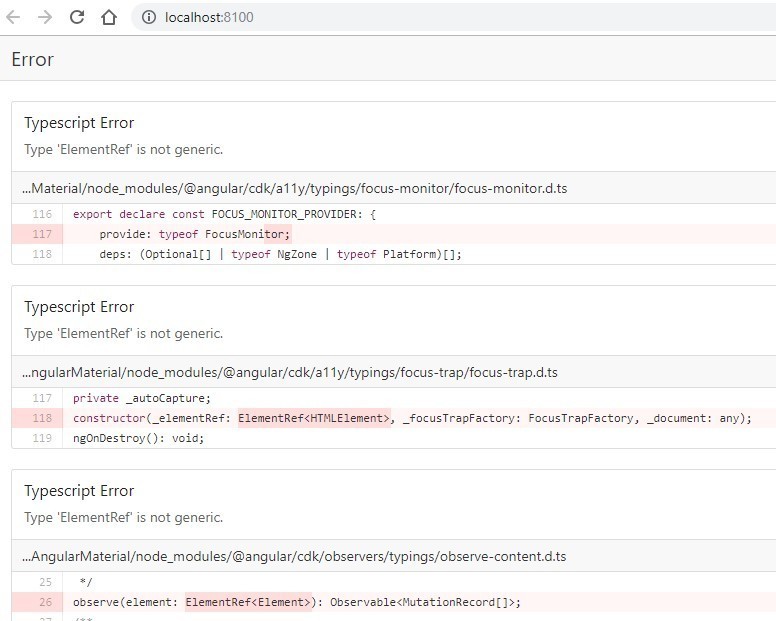
If you see some error like this
Then change versions to this in package.json to these:
...
...
  "dependencies": {
    "@angular/animations": "^5.1.1",
    "@angular/cdk": "^5.0.1",
    "@angular/material": "^5.0.1",
...
...
there is some version conflict error due to which it doesn’t work with new versions.
Let me know if you face any error.
Happy coding…


Leave a Reply