In this article, we will implement SQLite Database in Ionic 5 Angular based application by using SQLite Native plugin.
SQLite is used to set up a local device database that can be used to store data using SQL queries. We can easily do basic CRUD operations on data like Create, Retrieve, Update or Delete Data table rows.
It is a storage database that is available for native devices like an Android phone, so we can only test it on a real device.
SQLite Database is a preferred mode of storage on local devices due to some cool features:
– No limitations on data storage like we have in local or session storage.
– Complex logic can be implemented on data stored using SQL queries.
– Remote data can be saved on local devices for offline access.
– Data can be saved locally if no network is accessible then fed to a remote server when the network connects.
Let’s start the implementation steps!
Here we will create a simple one page Ionic 5 Application using Angular with basic SQLite operations:
1) Create Database
2) Create Table
3) Read Table Rows
4) Create/ Insert New Rows
5) Delete Table Rows
6) Edit/ Update Rows
Create a new Ionic Application
Using the latest Ionic CLI tool we will create an Ionic application using Angular with a blank template.
Run following NPM command to create the application:
$ ionic start ionic-sqlite-demo blank --type=angular

# Change root directory
$ cd ionic-sqlite-demo
Install & Configure SQLite Plugin
Run following NPM commands to install the SQLite Cordova and Native plugin:
$ ionic cordova plugin add cordova-sqlite-storage $ npm install @ionic-native/sqlite</pre> Now open the <strong>app.module.ts</strong> file to import the <code>SQLiteclass then add in theprovidersarray:// app.module.ts ... import { SQLite } from '@ionic-native/sqlite/ngx'; @NgModule({ ... providers: [ ... SQLite, { provide: RouteReuseStrategy, useClass: IonicRouteStrategy } ], bootstrap: [AppComponent] }) export class AppModule { }SQLite Implementation
To start using SQLite in the Home component class, we will add a few variables to keep SQLiteObject, Database name, Table name and few other:
... export class HomePage { databaseObj: SQLiteObject; readonly database_name: string = "freaky_datatable.db"; readonly table_name: string = "myfreakytable"; name_model: string = ""; row_data: any = []; // Handle Update Row Operation updateActive: boolean; to_update_item: any; constructor( private platform: Platform, private sqlite: SQLite ) { ... }Create an SQLite Database
To create a Database we can add login in the App component, but here to keep it simple we will use the
platform.ready()hook which is triggered when device is ready.constructor( private platform: Platform, private sqlite: SQLite ) { this.platform.ready().then(() => { this.createDB(); }).catch(error => { console.log(error); }) }</pre> In the callback call the<code> createDB()method to create a new Database if not created yet// Create DB if not there createDB() { this.sqlite.create({ name: this.database_name, location: 'default' }) .then((db: SQLiteObject) => { this.databaseObj = db; alert('freaky_datatable Database Created!'); }) .catch(e => { alert("error " + JSON.stringify(e)) }); }</pre> <h3></h3> <h3>Update Class with Insert, Read, Update and Delete Methods</h3> To execute <strong>CRUD</strong> operation we can simply execute SQL queries by using the <code>executeSqlmethod available in the SQLiteObject class. The completeHomePageclass will look like this://home.page.ts import { Component } from '@angular/core'; import { SQLite, SQLiteObject } from '@ionic-native/sqlite/ngx'; import { Platform } from '@ionic/angular'; @Component({ selector: 'app-home', templateUrl: 'home.page.html', styleUrls: ['home.page.scss'], }) export class HomePage { databaseObj: SQLiteObject; name_model: string = ""; row_data: any = []; readonly database_name: string = "freaky_datatable.db"; readonly table_name: string = "myfreakytable"; // Handle Update Row Operation updateActive: boolean; to_update_item: any; constructor( private platform: Platform, private sqlite: SQLite ) { this.platform.ready().then(() => { this.createDB(); }).catch(error => { console.log(error); }) } // Create DB if not there createDB() { this.sqlite.create({ name: this.database_name, location: 'default' }) .then((db: SQLiteObject) => { this.databaseObj = db; alert('freaky_datatable Database Created!'); }) .catch(e => { alert("error " + JSON.stringify(e)) }); } // Create table createTable() { this.databaseObj.executeSql(` CREATE TABLE IF NOT EXISTS ${this.table_name} (pid INTEGER PRIMARY KEY, Name varchar(255)) `, []) .then(() => { alert('Table Created!'); }) .catch(e => { alert("error " + JSON.stringify(e)) }); } //Inset row in the table insertRow() { // Value should not be empty if (!this.name_model.length) { alert("Enter Name"); return; } this.databaseObj.executeSql(` INSERT INTO ${this.table_name} (Name) VALUES ('${this.name_model}') `, []) .then(() => { alert('Row Inserted!'); this.getRows(); }) .catch(e => { alert("error " + JSON.stringify(e)) }); } // Retrieve rows from table getRows() { this.databaseObj.executeSql(` SELECT * FROM ${this.table_name} ` , []) .then((res) => { this.row_data = []; if (res.rows.length > 0) { for (var i = 0; i < res.rows.length; i++) { this.row_data.push(res.rows.item(i)); } } }) .catch(e => { alert("error " + JSON.stringify(e)) }); } // Delete single row deleteRow(item) { this.databaseObj.executeSql(` DELETE FROM ${this.table_name} WHERE pid = ${item.pid} ` , []) .then((res) => { alert("Row Deleted!"); this.getRows(); }) .catch(e => { alert("error " + JSON.stringify(e)) }); } // Enable update mode and keep row data in a variable enableUpdate(item) { this.updateActive = true; this.to_update_item = item; this.name_model = item.Name; } // Update row with saved row id updateRow() { this.databaseObj.executeSql(` UPDATE ${this.table_name} SET Name = '${this.name_model}' WHERE pid = ${this.to_update_item.pid} `, []) .then(() => { alert('Row Updated!'); this.updateActive = false; this.getRows(); }) .catch(e => { alert("error " + JSON.stringify(e)) }); } }Update Home Page Template
Let's update the Home Page template HTML to show buttons to Create Database, Create Table, Get Table's existing rows. Also, we will add an Input to enter the value to the database table.
In the Ionic Grid, we will list out existing Table rows and update it when a new row is added or updated.
Open the home.page.html file and replace with following code:
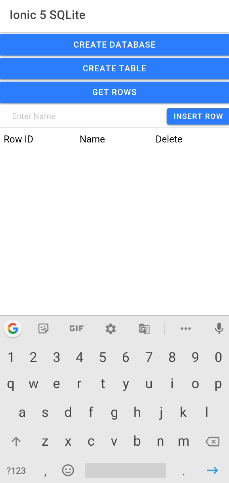
<ion-header>
<ion-toolbar>
<ion-title>
Ionic 5 SQLite
</ion-title>
</ion-toolbar>
</ion-header><ion-content padding text-center>
<ion-button expand="block" (click)="createDB()">
Create DataBase
</ion-button><ion-button expand="block" (click)="createTable()">
Create Table
</ion-button><ion-button expand="block" (click)="getRows()">
Get Rows
</ion-button><ion-item-divider>
<ion-input placeholder="Enter Name" [(ngModel)]="name_model"></ion-input>
<ng-container *ngIf="updateActive; else elseTemplateUpdate">
<ion-button expand="block" (click)="updateRow()">
Update Row
</ion-button>
</ng-container>
<ng-template #elseTemplateUpdate>
<ion-button expand="block" (click)="insertRow()">
Insert Row
</ion-button>
</ng-template></ion-item-divider>
<ion-grid>
<ion-row>
<ion-col>
Row ID
</ion-col>
<ion-col>
Name
</ion-col>
<ion-col>
Delete
</ion-col>
</ion-row>
<ion-row *ngFor="let item of row_data">
<ion-col>
{{item.pid}}
</ion-col>
<ion-col>
{{item.Name}}
</ion-col>
<ion-col>
<ion-button (click)="deleteRow(item)" size="small" color="danger">
<ion-icon name="trash"></ion-icon>
</ion-button>
<ion-button (click)="enableUpdate(item)" size="small" color="warning">
<ion-icon name="create"></ion-icon>
</ion-button>
</ion-col>
</ion-row>
</ion-grid></ion-content></pre>
That's it now you have a working application with its own SQLite Database where you can perform CRUD operations and do any type of operation using SQL queries.Just run your application in a real Native Android device by connecting it to your computer via USB cable and run following command:
<code>$ ionic cordova run android -l
Conclusion: Ionic SQLite Native provides a good option for storing data in local databases in the device itself. Moreover managing the database becomes easy using SQL based queries to do any logical task. The support and community of SQL are very large to answer any tricky challenge.
Category: Angular