Ionic Geolocation Native Plugin Example Tutorial
Compatible with Ionic 4 & 5 Angular
Using Ionic’s Geolocation native plugin we can get current coordinates and other information like accuracy, speed, timestamp, altitude etc.
Let’s check how to install Geolocation Native plugin in Ionic Angular application.
Install Geolocation Plugin
Run following NPM commands in project root using the terminal window:
$ ionic cordova plugin add cordova-plugin-geolocation $ npm install @ionic-native/geolocation</pre> <h3>Import in App Module</h3> To use the Geolocation plugin, open <strong>app.module.ts</strong> file to import the <code>Geolocationclass then update theimportsarray as shown below:// app.module.ts import { NgModule } from '@angular/core'; import { BrowserModule } from '@angular/platform-browser'; import { RouteReuseStrategy } from '@angular/router'; import { IonicModule, IonicRouteStrategy } from '@ionic/angular'; import { SplashScreen } from '@ionic-native/splash-screen/ngx'; import { StatusBar } from '@ionic-native/status-bar/ngx'; import { AppComponent } from './app.component'; import { AppRoutingModule } from './app-routing.module'; import { Geolocation } from '@ionic-native/geolocation/ngx'; @NgModule({ declarations: [AppComponent], entryComponents: [], imports: [BrowserModule, IonicModule.forRoot(), AppRoutingModule], providers: [ StatusBar, SplashScreen, Geolocation, { provide: RouteReuseStrategy, useClass: IonicRouteStrategy } ], bootstrap: [AppComponent] }) export class AppModule {}Use Geolocation
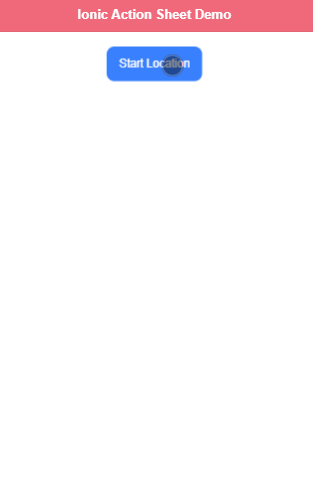
In the home.page.html add a button to call
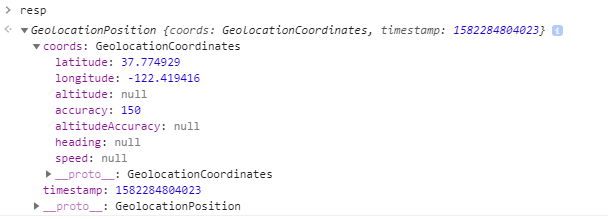
getCoordinates()method and a list to watch location changes by looping thelocationTracesobject using*ngFordirective.<ion-header [translucent]="true"> <ion-toolbar> <ion-title> Ionic Action Sheet Demo </ion-title> </ion-toolbar> </ion-header> <ion-content [fullscreen]="true" class="ion-padding"> <ion-list> <ion-item *ngFor="let location of locationTraces"> <ion-label class="ion-text-wrap"> <ion-label>Time: {{location.timestamp | date:'M/d/yy, h:mm a'}}</ion-label> <ion-label>Latitude: {{location.latitude}} Longitude: {{location.longitude}}</ion-label> <ion-label>Accuracy: {{location.accuracy}}</ion-label> </ion-label> </ion-item> </ion-list> <div class="ion-text-center"> <ng-container *ngIf="!locationWatchStarted; else elseTemplate"> <ion-button color="primary" (click)="getCoordinates()">Start Location</ion-button> </ng-container> <ng-template #elseTemplate> Location Watch Started! </ng-template> </div> </ion-content></pre> Now in the home.page.ts file import Geolocation to use its methods <code>getCurrentPosition()which returns the current device coordinates with other information:The
watchPosition()method keeps the track of changes in device location and returns the coordinates object when locations change.// home.page.ts import { Component } from '@angular/core'; import { Geolocation } from '@ionic-native/geolocation/ngx'; @Component({ selector: 'app-home', templateUrl: 'home.page.html', styleUrls: ['home.page.scss'], }) export class HomePage { locationWatchStarted:boolean; locationSubscription:any; locationTraces = []; constructor( private geolocation: Geolocation ) { } getCoordinates() { this.geolocation.getCurrentPosition().then((resp) => { this.locationTraces.push({ latitude:resp.coords.latitude, longitude:resp.coords.latitude, accuracy:resp.coords.accuracy, timestamp:resp.timestamp }); }).catch((error) => { console.log('Error getting location', error); }); this.locationSubscription = this.geolocation.watchPosition(); this.locationSubscription.subscribe((resp) => { this.locationWatchStarted = true; this.locationTraces.push({ latitude:resp.coords.latitude, longitude:resp.coords.latitude, accuracy:resp.coords.accuracy, timestamp:resp.timestamp }); }); } }In the locationTraces current and updated location will be pushed to show in list.
Category: Angular
 The
The