In this article, you will learn how to filter a dynamic data list using an Input field only when the filter or search button is clicked. There will also be a reset button to clear the Input control and show all the results.
Generally, we create a filter list where the results are filtered live as the user types in the Input control that is triggered on key press events. But sometimes, we may require a feature where the data list needs to be filtered only when a user clicks on the Filter or Search button or it can be a predefined filter selection like Radio buttons.
This tutorial will focus on filtering the Data list only when a button is clicked. We will learn how to achieve this functionality in our component class. Also, we will see Bootstrap styling classes to quickly add UI style to our filter data list.
How to Filter Data List on Button Click in Angular?
Follow these quick steps to create a button-triggered filter list in the Angular application:
- Install and Configure Bootstrap Style
- Setting up the Component
- Creating the Template
- Defining Data Types
- Implementing Filtering Logic
- Resetting the Filter
Install and Configure Bootstrap Style
First, will install the Bootstrap package in our Angular application by executing the below npm command:
npm install bootstrap
Now, we will add the Bootstrap CSS file in the angular.json file’s styles array as shown below:
"styles": [
  "src/styles.css",
  "node_modules/bootstrap/dist/css/bootstrap.min.css"
]
Setting up the Component
Thereafter, let’s setup the Angular component which will have the soul of our dynamic data list. We will define the required properties and methods to handle the data filter and reset functionality.
import { Component } from '@angular/core';

interface DataItem {
  name: string;
  description: string;
  // Add other properties as needed
}

@Component({
  selector: 'app-root',
  templateUrl: './app.component.html',
  styleUrls: ['./app.component.css'],
})
export class AppComponent {
  originalData: DataItem[] = []; // Define the type of originalData array
  filteredData: DataItem[] = []; // Define the type of filteredData array
  filterText = '';

  constructor() {
    // Initialize your originalData array with some data
    this.originalData = [
      { name: 'Item 1', description: 'Description 1' },
      { name: 'Item 2', description: 'Description 2' },
      // Add more data items
    ];
    this.filteredData = [...this.originalData]; // Initialize filteredData with original data
  }

  filterData() {
    this.filteredData = this.originalData.filter((item) => {
      return item.name.toLowerCase().includes(this.filterText.toLowerCase());
    });
  }

  resetFilter() {
    this.filterText = '';
    this.filteredData = [...this.originalData];
  }
}
In the above code, we have the DataItem interface to represent the data structure of each item in our data list. The originalData array keeps the full data list whereas the filterData array populates the filtered results based on the term entered in the input control. The filterText model stores the term entered by user inside the Input field.
Creating the Template
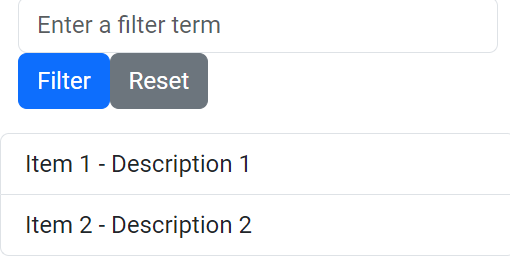
After setting up the class, we will add the required elements in the HTML template including the Input control, buttons for Filter and Reset, and the iteration list with *ngFor directive. Open the app.component.html file and update it with the following:
<div>
  <input type="text" [(ngModel)]="filterText" placeholder="Enter a filter term">
  <button (click)="filterData()">Filter</button>
  <button (click)="resetFilter()">Reset</button>
</div>

<ul>
  <li *ngFor="let item of filteredData">
    {{ item.name }} - {{ item.description }}
  </li>
</ul>
Defining Data Types
To help TypeScript infer and validate types we need to add the DataItem interface for our data list which can be different in your case. This makes the code error-free, easy to maintain and robust. In our case, to keep the tutorial at ease we have added the interface in the component itself as shown below:
interface DataItem {
  name: string;
  description: string;
}
Implementing Filtering Logic
The special feature of our tutorial is that we only update the filtered list when a user clicks on the Filter button, this is achieved here by the way we used the filterData() method, that filters the originalData array based on the user’s input and updates the filteredData array. Which is triggered on click on the Filter button.
  filterData() {
    this.filteredData = this.originalData.filter((item) => {
      return item.name.toLowerCase().includes(this.filterText.toLowerCase());
    });
  }
Here we are comparing each item by lowercase conversion and then comparing it with the user-searched term to filter the list and populate it in the filteredData.
Resetting the Filter
The Reset button is also called a resetFilter function which is clearing out the Input model value and re-assigning the original data that is whole data list to the filterData to display all the items:
  resetFilter() {
    this.filterText = '';
    this.filteredData = [...this.originalData];
  }
Conclusion
We have successfully implemented the Filter data list which is getting triggered only when a user clicks on a button which can be any kind of user action. The main thing to focus on here is how we can control the live filter process of data lists as types in the Input control.