Bootstrap provided a wide variety of easy to use Web Components for UI development. NG-Bootstrap is Angular based library using which we can use Bootstrap UI web components in Angular’s latest versions.
You can check other posts on Angular + Bootstrap
Angular 9/8 NgBootstrap 6 | Datepicker And Timepicker Tutorial
In this post, we will discuss another very important Web Component available in Ng-Bootstrap library which is a Carousel. Using Carousel we can add a Content or Image slider with many usable options.
Here we will create a new Angular 7 Project and Integrate Ng-Bootstrap to use Carousel component.
Let’s get started!
Create New Angular Project Using CLI
First, we will create a new Angular Project using Angular CLI. Make sure you have installed the latest version on Angular CLI by running following command
$ npm install -g @angular/cliCreate a new Angular project then select few options asked. We have not selected Angular routing to make this demo easier.
$ ng new angular-ng-bootstrap-carousel
? Would you like to add Angular routing? No
? Which stylesheet format would you like to use? SCSS
Change directory to point our project
$ cd angular-ng-bootstrap-carouselIf you have Visual Studio Code installed then run following command to open the project in VS Code directly.
$ code .
Install Bootstrap in Angular Project
Let's install Bootstrap by running following NPM command. This will install the latest bootstrap version ( Current is 4.1.0 )
$ npm install --save @ng-bootstrap/ng-bootstrapng-bootstrap includes UI components only, so for adding styling to these components we need to include CSS styling file in the index.html at Angular project root
<link rel="stylesheet" href="https://stackpath.bootstrapcdn.com/bootstrap/4.3.1/css/bootstrap.min.css" >Import NgbModule ( Bootstrap module ) in the app.module.ts file
import { BrowserModule } from '@angular/platform-browser';
import { NgModule } from '@angular/core';

import { AppComponent } from './app.component';

import { NgbModule } from '@ng-bootstrap/ng-bootstrap';

@NgModule({
  declarations: [
    AppComponent
  ],
  imports: [
    BrowserModule,
    NgbModule
  ],
  providers: [],
  bootstrap: [AppComponent]
})
export class AppModule { }
Add Carousel Component in Application
As we have already added NgbModule in the app.module.ts file, so we can add any Bootstrap component. Now open app.component.html file then add following HTML with <ngb-carousel> carousel directive
<ngb-carousel *ngIf="images">
<ng-template ngbSlide>
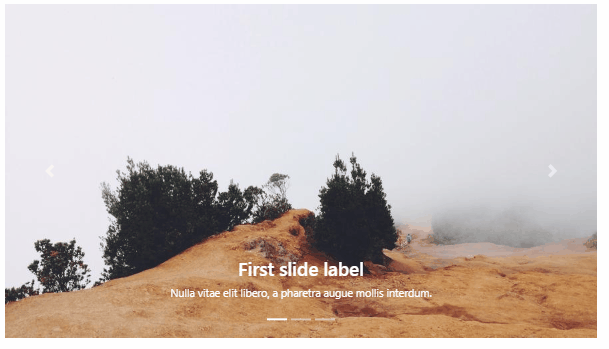
<img [src]="images[0]" alt="Random first slide">
<div class="carousel-caption">
<h3>First slide label</h3>
<p>Nulla vitae elit libero, a pharetra augue mollis interdum.</p>
</div>
</ng-template>
<ng-template ngbSlide>
<img [src]="images[1]" alt="Random second slide">
<div class="carousel-caption">
<h3>Second slide label</h3>
<p>Lorem ipsum dolor sit amet, consectetur adipiscing elit.</p>
</div>
</ng-template>
<ng-template ngbSlide>
<img [src]="images[2]" alt="Random third slide">
<div class="carousel-caption">
<h3>Third slide label</h3>
<p>Praesent commodo cursus magna, vel scelerisque nisl consectetur.</p>
</div>
</ng-template>
</ngb-carousel>ngbSlide represents a single slide of the carousel which is having a <img> tag and a <div> with a carousel-caption class to add text on the slide image
Add the following images object in the app.compont.ts file
import { Component } from '@angular/core';

@Component({
  selector: 'app-root',
  templateUrl: './app.component.html',
  styleUrls: ['./app.component.css']
})
export class AppComponent {

  images = [1, 2, 3].map(() => `https://picsum.photos/900/500?random&t=${Math.random()}`);

}

Configuration of carousel
There are a number of configuration parameters available which can be added to the individual carousel as follows
<ngb-carousel *ngIf="images"
    showNavigationArrows="true"
    interval="1000"
    pauseOnHover="false">

...
...
</ngb-carousel>
or Global configuration as follows
import { Component } from '@angular/core';
import { NgbCarouselConfig } from '@ng-bootstrap/ng-bootstrap';

@Component({
  selector: 'app-root',
  templateUrl: './app.component.html',
  styleUrls: ['./app.component.css']
})
export class AppComponent {

  images = [1, 2, 3].map(() => `https://picsum.photos/900/500?random&t=${Math.random()}`);

  constructor(config: NgbCarouselConfig) {
    // customize default values of carousels used by this component tree
    config.interval = 1500;
    config.wrap = false;
    config.keyboard = false;
    config.pauseOnHover = false;
    config.wrap = true;
  }
}
Due to the white color of navigation arrows, these become invisible to a user on bright images. Just add the following CSS style in the styles.css file to add a nice background on hover of Carousel navigation.
.carousel-control-prev:hover{
    background: rgba(0, 0, 0, 0.7);
}
.carousel-control-next:hover{
    background: rgba(0, 0, 0, 0.7);
}
So here we Added a nice and simple bootstrap's traditional Carousel in Angular 7 application. You can check other Angular carousel tutorials here.