In this React 16+ tutorial, we’ll get to know How to dynamically manage the className property on components by adding conditional expressions in the function and class components using the classnames package.
Sometimes we may face a situation where even classes on the components need dynamic implementations. In that case, adding inline expressions or conditions proves a bit challenging.
The classnames package module is built to help in such a scenario and even proves a more advanced problem solver.
What is Classnames?
It is simple Javascript library used mainly for joining various or multiple classes together. The classnames allows adding classes continually using expressions. It is well supported by nearly any creative javascript framework or environments like Node.js, Browserify, or webpack.
Today we’ll check how to use it in the ReactJs application by a step by step tutorial.
Create a React Application
First, we’ll create a new React application using npx create-react-app command
$ npx create-react-app react-select-appMove inside the react app
$ cd react-select-appRun application
$ npm start
Install Classnames package
After creating the ReactJs application, install the classnames package by hitting below npm command int he terminal window:
$ npm install classnames --save
Using Classnames in the React application
To use import the classNames from 'classnames/bind' as shown
import classNames from 'classnames/bind';After that define, a styles object with key-value pair acting as an alias for the classes
const styles = {
  success: 'success-wrap',
  error: 'error-wrap',
  warning: 'warning-wrap'
};
Here, for example, the success key assigned the class name 'success-wrap'
Next, bind these styles to object with the classNames using bind() method
let cx = classNames.bind(styles);
Now we can easily add required classes on a component by adding conditions expression
let className = cx({
      messagebox: true,
      success: true,
      error: false,
      warning: false,
    });
Instead of providing the boolean value directly, you can have functions or expressions to return a boolean value. For example
success: isTaskDone ? true : false,Finally, we can use inside the App component class as shown below:
// App.js
import React, { Component } from 'react';
import './App.css';
import classNames from 'classnames/bind';

const styles = {
  success: 'success-wrap',
  error: 'error-wrap',
  warning: 'warning-wrap'
};

let cx = classNames.bind(styles);

class App extends Component {

  render() {

    let message = 'Request is approved successfully';

    let className = cx({
      messagebox: true,
      success: true,
      error: false,
      warning: false,
    });

    return (
      <div className="App" >
        <h3>Status Of My Request</h3>

        <div className={className}>
          {message}
        </div>

      </div >
    );
  }

}

export default App;
If you notice above, the 'messagebox' class is required always so we don’t need to add in the styles object.
Adding SCSS style
To make it look better, add these styles in the App.css
.messagebox {
  padding: 15px;
  background: #ccc;
  border: 1px solid #6666;
}
.success-wrap {
  background: #b9ffb9;
  border: 1px solid #75e175;
}
.error-wrap {
  background: #ffb4b4;
  border: 1px solid #ef4e4e;
}
.warning-wrap {
  background: #ffe58e;
  border: 1px solid #ffce28;
}
Now run the application by hitting $ npm start
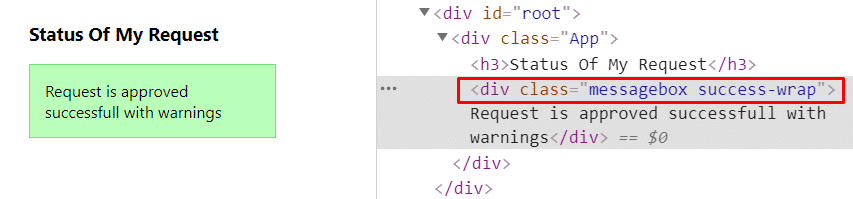
Inline Class Conditional Expressions
We can also define conditional expression object on the component itself as shown below for the same results.
// App.js
import React, { Component } from 'react';
import './App.css';
import classNames from 'classnames/bind';

class App extends Component {

  render() {

    let message = 'Request is approved successfull with warnings';

    return (
      <div className="App" >
        <h3>Status Of My Request</h3>

        <div className={classNames({
          messagebox: true,
          'success-wrap': true,
          'error-wrap': false,
          'warning-wrap': false,
        })}>
          {message}
        </div>

      </div >
    );
  }

}

export default App;
Conclusion
We discussed how to use the Classnames package inside the ReactJs application for adding dynamic implementation of classes on the components. Here we discussed only a few examples but its scope of usages can be expanded as per requirements. Check more details on official documentation.
Feel free to share your thoughts…