Getting Call logs from a device in the application can be used in a number of ways for genuine purposes like to share invite link or message someone from an application itself.
In Ionic also we can get Call Logs of the device using Cordova and ionic Native plugins. Usage of Call Logs plugin is easy but a little tricky.
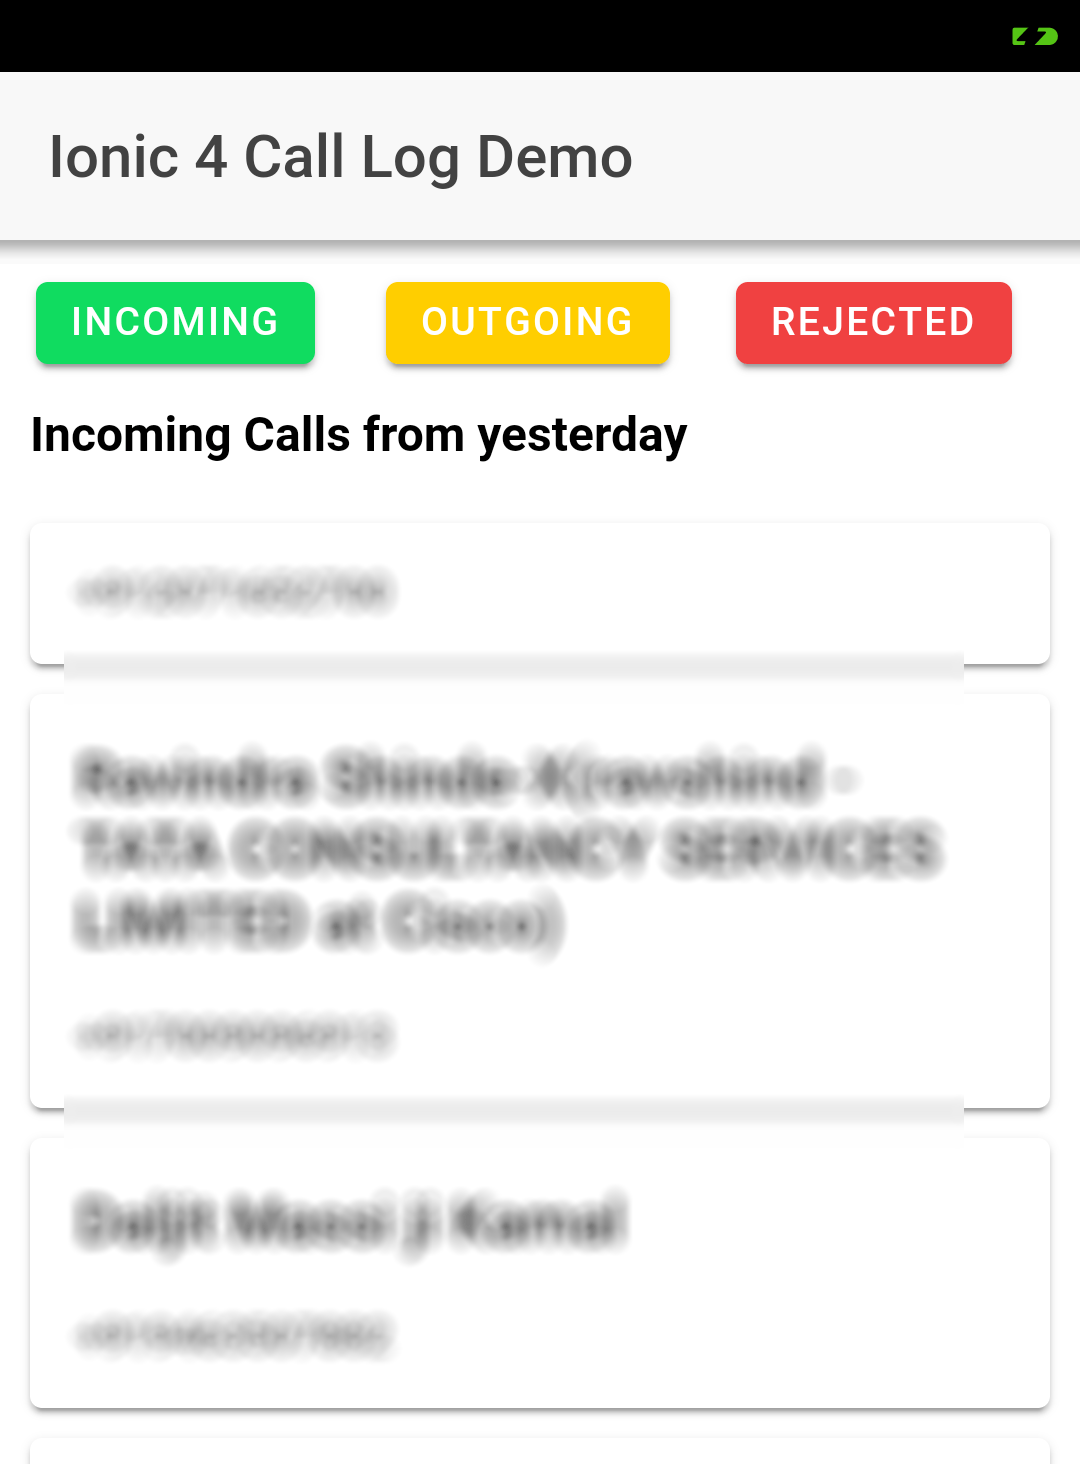
So In this post we are going to create a new Ionic 4 application and will create a view to listing Recent Call Logs from Device and user can Call that number by simply tapping on it. A user can switch Contact log details between Incoming, Outgoing and Rejected.
Let’s get started!
Also Read: Ionic 4 | How to Call a Number Directly from Ionic 4 Native Application
Create a new Ionic 4 Application
Create a new application using Ionic CLI
To create an application you must have NodeJS and Ionic Cordova CLI
$ npm install -g ionic cordova
Run the following command to create a new application
$ ionic start Ionic4CallLog blank --type=angular
$ cd Ionic4CallLog
Install Cordova and Ionic Native Plugin
We will install the following two plugins
CallLog plugin to fetch Call logs from recent call storage of the device. This plugin provides a filter attribute using which we can fetch details using multiple filters like type, number, name, date etc.
$ ionic cordova plugin add cordova-plugin-calllog
$ npm install --save @ionic-native/call-log@beta
CallNumber plugin to enable the user to tap on listed call item to call directly by just single tap.
$ ionic cordova plugin add call-number
$ npm install --save @ionic-native/call-number@beta
Add these plugin in App’s module
After importing and adding plugins in providers array out app.module.ts file will look like this
import { NgModule } from '@angular/core';
import { BrowserModule } from '@angular/platform-browser';
import { RouteReuseStrategy } from '@angular/router';

import { IonicModule, IonicRouteStrategy } from '@ionic/angular';
import { SplashScreen } from '@ionic-native/splash-screen/ngx';
import { StatusBar } from '@ionic-native/status-bar/ngx';

import { AppComponent } from './app.component';
import { AppRoutingModule } from './app-routing.module';

import { CallLog } from '@ionic-native/call-log/ngx';
import { CallNumber } from '@ionic-native/call-number/ngx';

@NgModule({
  declarations: [AppComponent],
  entryComponents: [],
  imports: [BrowserModule, IonicModule.forRoot(), AppRoutingModule],
  providers: [
    StatusBar,
    SplashScreen,
    CallLog,
    CallNumber,
    { provide: RouteReuseStrategy, useClass: IonicRouteStrategy }
  ],
  bootstrap: [AppComponent]
})
export class AppModule {}
Update Home View HTML
In home.page.html file replace following HTML to show buttons to filter between call log types and list calls in cards. You can change this structure according to needs.
<ion-header>
  <ion-toolbar>
    <ion-title>
      Ionic 4 Call Log Demo
    </ion-title>
  </ion-toolbar>
</ion-header>

<ion-content>
    <ion-grid>
        <ion-row>
          <ion-col size="4">
              <ion-button (click)="getContacts('type','1','==')" size="small" color="success">Incoming</ion-button>
          </ion-col>
          <ion-col size="4">
              <ion-button (click)="getContacts('type','2','==')" size="small" color="warning">Outgoing</ion-button>
          </ion-col>
          <ion-col size="4">
              <ion-button (click)="getContacts('type','5','==')" size="small" color="danger">Rejected</ion-button>
          </ion-col>
        </ion-row>
        <ion-row>
          <ion-col>
              <strong>{{listTyle}}</strong>
          </ion-col>
        </ion-row>
    </ion-grid>

    <ion-card  *ngFor="let contact of recordsFound" (click)="callThisNumber(contact['number'])">
        <ion-card-header  *ngIf="contact['name']" >
          <ion-card-title>{{contact["name"]}}</ion-card-title>
        </ion-card-header>

        <ion-card-content>
            <strong>{{contact["number"]}}</strong>
        </ion-card-content>
    </ion-card>

</ion-content>
Add Plugin Methods in Home Component
In the home.page.ts file, we will update component with methods for Call Log and Call Number.
import { Component } from '@angular/core';
import { Platform } from '@ionic/angular';


import { CallLog, CallLogObject } from '@ionic-native/call-log/ngx';
import { CallNumber } from '@ionic-native/call-number/ngx';


@Component({
  selector: 'app-home',
  templateUrl: 'home.page.html',
  styleUrls: ['home.page.scss'],
})
export class HomePage {

  filters: CallLogObject[];
  recordsFound: any;
  recordsFoundText: string;
  listTyle:string;

  constructor(
    private callLog: CallLog,
    private callNumber: CallNumber,
    private platform: Platform
    ) {


    this.platform.ready().then(() => {

      this.callLog.hasReadPermission().then(hasPermission => {
        if (!hasPermission) {
          this.callLog.requestReadPermission().then(results => {
            this.getContacts("type","1","==");
          })
            .catch(e => alert(" requestReadPermission " + JSON.stringify(e)));
        } else {
          this.getContacts("type", "1", "==");
        }
      })
        .catch(e => alert(" hasReadPermission " + JSON.stringify(e)));
    });

  }

    getContacts(name, value, operator) {
      if(value == '1'){
        this.listTyle = "Incoming Calls from yesterday";
      }else if(value == '2'){
        this.listTyle = "Ougoing Calls from yesterday";
      }else if(value == '5'){
        this.listTyle = "Rejected Calls from yesterday";
      }

      //Getting Yesterday Time
      var today = new Date();
      var yesterday = new Date(today);
      yesterday.setDate(today.getDate() - 1);
      var fromTime = yesterday.getTime();

      this.filters = [{
        name: name,
        value: value,
        operator: operator,
      }, {
        name: "date",
        value: fromTime.toString(),
        operator: ">=",
      }];
      this.callLog.getCallLog(this.filters)
        .then(results => {
          this.recordsFoundText = JSON.stringify(results);
          this.recordsFound = results;//JSON.stringify(results);
        })
        .catch(e => alert(" LOG " + JSON.stringify(e)));
    }


    callThisNumber(number){
      this.callNumber.callNumber(number, true)
      .then(res => console.log('Launched dialer!', res))
      .catch(err => console.log('Error launching dialer', err));
    }

}
Now you can test this application in a real device by running following command
$ ionic cordova run android --deviceKnow more on How to Run Ionic Application in Device Using USB Cable?
So after running it successfully, an application will look like this.
You can check more filter option on plugin documentation here.
Leave a Reply