In this post, we’ll discuss how to implement Slick Image and content slider in Angular latest version using the <strong>ngx-slick-carousel</strong> package in few steps.
Slick Image Carousel is very popular for a number of great features like AutoPlay, LazyLoaded images, Responsive and mobile-first layout with other many customizable features. It is a jQuery based library that is widely used in static applications.
In a reactive application like Angular, we have only a few libraries available to provide good user interaction and provide responsive carousel experience. Slick is one of them, in this post we are going to implement Slick carousel in Angular application using the ngx-slick-carousel adaptor. Using this package you can easily add Slick carousel in the Angular application.
Moreover, as a bonus tip, we will also customize the arrow navigation with nice-looking image navigation by updating a few CSS styles. It is an optional styling to do, you can also go with the already available navigation style.

Also, See:
Angular – Implement Ultimate! Swiper Image Slider/ Carousel in 3 Steps
Owl Carousel 2 in Angular 6/7
Owl Carousel 2 with Custom Navigation in jQuery
Let’s start implementing the Slick Carousel in the Angular application.
Setup Angular CLI
Angular CLI is the most prefered and official way for creating a new Angular project.
Make sure you have installed the latest version of the Angular CLI tool on your system.
Run following npm command to install
$ npm install -g @angular/cli
Create a new Angular 9 project
Next, create a new Angular project by running following ng command in the terminal
$ ng new angular-slick-tutorialOn hitting above command, ng CLI will ask few configurational questions
? Would you like to add Angular routing? No
? Which stylesheet format would you like to use? CSS
Now move to the project folder
$ cd angular-slick-tutorialRun the project by executing below command
$ ng serve --open
Install Slick Package
After creating the project, we’ll install the<strong> ngx-slick-carousel</strong> package and other dependencies for <strong>jquery</strong> and <strong>slick-carousel</strong>. Run following npm commands one by one to install packages
$ npm install jquery --save
$ npm install slick-carousel --save
$ npm install ngx-slick-carousel --save
Style and library configuration
To add Slick carousel, make changes in the angular.json file to include Slick js and CSS files. These files will be available after installing the above packages in step 2
angular.json
...
...
            "styles": [
              "src/styles.scss",
              "node_modules/slick-carousel/slick/slick.scss",
              "node_modules/slick-carousel/slick/slick-theme.scss"
            ],
            "scripts": [
              "node_modules/jquery/dist/jquery.min.js",
              "node_modules/slick-carousel/slick/slick.min.js"
            ],
...
...
Make changes in app main module file to include Slick package.
app.module.ts
import { BrowserModule } from '@angular/platform-browser';
import { NgModule } from '@angular/core';

import { AppComponent } from './app.component';

// Import your library
import { SlickCarouselModule } from 'ngx-slick-carousel';


@NgModule({
  declarations: [
    AppComponent
  ],
  imports: [
    BrowserModule,
    // Specify your library as an import
    SlickCarouselModule
  ],
  providers: [],
  bootstrap: [AppComponent]
})
export class AppModule { }
Add slick directive in App component with various attribute options and event handling.
app.component.html
<!-- You can now use your library component in app.component.html -->
<ngx-slick-carousel class="carousel" #slickModal="slick-carousel" [config]="slideConfig" (init)="slickInit($event)"
(breakpoint)="breakpoint($event)" (afterChange)="afterChange($event)" (beforeChange)="beforeChange($event)">
<div ngxSlickItem *ngFor="let slide of slides" class="slide">
<img src="https://i.picsum.photos/id/{{slide}}/300/200.jpg" alt="" width="100%">
</div>
</ngx-slick-carousel>
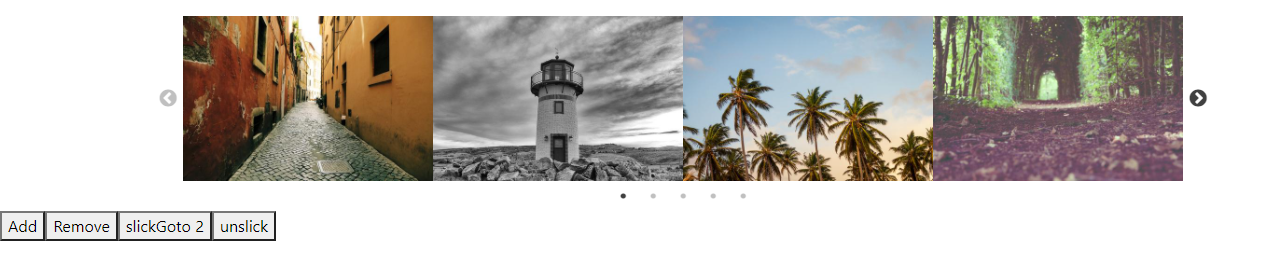
<button (click)="addSlide()">Add</button>
<button (click)="removeSlide()">Remove</button>
<button (click)="slickModal.slickGoTo(2)">slickGoto 2</button>
<button (click)="slickModal.unslick()">unslick</button>
Slick directive above having methods which need to be added in App component file app.component.ts
import { Component } from '@angular/core';

@Component({
  selector: 'app-root',
  templateUrl: './app.component.html',
  styleUrls: ['./app.component.scss']
})
export class AppComponent {
  title = 'ngSlick';


  slides = [342, 453, 846, 855, 234, 564, 744, 243];

  slideConfig = {
    "slidesToShow": 4,
    "slidesToScroll": 1,
    "nextArrow": "<div class='nav-btn next-slide'></div>",
    "prevArrow": "<div class='nav-btn prev-slide'></div>",
    "dots": true,
    "infinite": false
  };

  addSlide() {
    this.slides.push(488)
  }

  removeSlide() {
    this.slides.length = this.slides.length - 1;
  }

  slickInit(e) {
    console.log('slick initialized');
  }

  breakpoint(e) {
    console.log('breakpoint');
  }

  afterChange(e) {
    console.log('afterChange');
  }

  beforeChange(e) {
    console.log('beforeChange');
  }


}
Slick carousel next prev navigation buttons can be customized by adding the following CSS in styles.scss
.slick-slider {
  width: 90%;
  margin: auto;
  background: #000;
}

.nav-btn {
  height: 47px;
  position: absolute;
  width: 26px;
  cursor: pointer;
  top: 100px !important;
}

.prev-slide.slick-disabled,
.next-slide.slick-disabled {
  pointer-events: none;
  opacity: 0.2;
}

.prev-slide {
  background: url(assets/images/nav-icon.png) no-repeat scroll 0 0;
  left: -33px;
}

.next-slide {
  background: url(assets/images/nav-icon.png) no-repeat scroll -24px 0px;
  right: -33px;
}

.prev-slide:hover {
  background-position: 0px -53px;
}

.next-slide:hover {
  background-position: -24px -53px;
}
See the working demo link here
Serve the Application
You can now quickly check the Slick Carousel working by hitting the following command
$ ng serve --openit will open the application at localhost:4200, and the carousel will look like this
Conclusion
Finally, we’re done with the Slick Carouse implementation tutorial in the Angular application. We discussed how to easily and quickly configure the application to add a fully customised carousel.