In this tutorial, we will add Tabs navigation in the Ionic 5 Angular application. By tapping on these tabs bar a user can navigate through different application pages by which can be switched using the Angular Routing mechanism.
Tabs based navigation provides quick access to major sections of an application like search product, cart, settings, and profile. Each tab page is a separate page/ component which is navigated defining lazy-loaded routing.
Let’s check how to quickly add Tabs navigation in an Ionic 5 Angular application.
Create a new Ionic 5 Application
Install the latest version of Ionic CLI by running following npm command:
$ npm install -g @ionic/cli
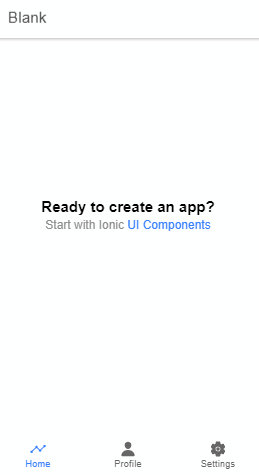
After updating the CLI package, we will create an Ionic Angular application with a blank template by running following npm command:
$ ionic start ionic-angular-tabs-demo blank --type=angular
Change the directory to application root:
$ cd ionic-angular-tabs-demo
In our blank template application, we already have Home page, so with that let’s create two new pages Profile and Settings by running following command:
$ ionic generate page profile
$ ionic generate page settings
Also create a new page tab-bar which will act as a Tab Navigation on which a user can tap to switch between Home, Profile and Setting page.
$ ionic generate page tab-bar
After creating pages above, the directory structure of our app will look like this:

Update TabBarPage Routing and Template
The TabBarPage component plays a major role in adding tabbed navigation to the application.
In the ~tab-bar/tab-bar.page.html file, we will add ion-tabs, ion-tab-bar and ion-tab-button ui components in the following structure:
<ion-tabs>

  <ion-tab-bar slot="bottom">

    <ion-tab-button tab="home">
      <ion-icon name="analytics"></ion-icon>
      <ion-label>Home</ion-label>
    </ion-tab-button>

    <ion-tab-button tab="profile">
      <ion-icon name="person"></ion-icon>
      <ion-label>Profile</ion-label>
    </ion-tab-button>

    <ion-tab-button tab="settings">
      <ion-icon name="settings"></ion-icon>
      <ion-label>Settings</ion-label>
    </ion-tab-button>

  </ion-tab-bar>

</ion-tabs>
Each <ion-tab-button> element act as a tab and the tab attribute takes a routing path to navigate.
In the ~tab-bar/tab-bar-routing.module.ts file, we need to update the routing path and structure to use the children property which will have routing paths of tab pages as shown below:
// tab-bar-routing.module.ts
import { NgModule } from '@angular/core';
import { Routes, RouterModule } from '@angular/router';

import { TabBarPage } from './tab-bar.page';

const routes: Routes = [
  {
    path: 'tabs',
    component: TabBarPage,
    children: [
      {
        path: 'home',
        children: [
          {
            path: '',
            loadChildren: () =>
              import('../home/home.module').then(m => m.HomePageModule)
          }
        ]
      },
      {
        path: 'profile',
        children: [
          {
            path: '',
            loadChildren: () =>
              import('../profile/profile.module').then(m => m.ProfilePageModule)
          }
        ]
      },
      {
        path: 'settings',
        children: [
          {
            path: '',
            loadChildren: () =>
              import('../settings/settings.module').then(m => m.SettingsPageModule)
          }
        ]
      },
      {
        path: '',
        redirectTo: '/tabs/home',
        pathMatch: 'full'
      }
    ]
  },
  {
    path: '',
    redirectTo: '/tabs/home',
    pathMatch: 'full'
  }
];

@NgModule({
  imports: [RouterModule.forChild(routes)],
  exports: [RouterModule],
})
export class TabBarPageRoutingModule { }
Update App Routing
Last by not least, in the main routing file which is the app-routing.module.ts file, we just need to load the TabBarPageModule as shown below which will take care of all other pages.
// app-routing.module.ts
import { NgModule } from '@angular/core';
import { PreloadAllModules, RouterModule, Routes } from '@angular/router';

const routes: Routes = [
  {
    path: '',
    loadChildren: () => import('./tab-bar/tab-bar.module').then(m => m.TabBarPageModule)
  }
];

@NgModule({
  imports: [
    RouterModule.forRoot(routes, { preloadingStrategy: PreloadAllModules })
  ],
  exports: [RouterModule]
})
export class AppRoutingModule { }
That’s it! Just run your application by executing the $ ng serve --open command to tab navigation working 🙂
You can add any number of tabs that can adjust easily in a similar way.