In this post, we will add Google’s Firebase service in an Ionic Application to use Firebase Authentication service. We’ll create login, registration and dashboard pages using which a user can register with email and password after login user will be redirected to the Dashboard.
Firebase is a powerful cloud-based service provider for development as well production level. It is well known for cloud services like Authentication, Analytics, Messaging services, Firestore (No SQL Database), Storage ( store multimedia files ), Social Login and many more.
We’ll use the Authentication service and create an application to demonstrate Login and Registration functionality where a user can log in as well as Register if not having an account already using Email ID and Password. We will also validate user inputs using Angular’s Reactive Form Validation. After successful login user can click on Logout link to go back to the login screen from the dashboard.
Let’s get started!
Update to the latest version
Make sure you have the latest version of @ionic/cli package installed. You can update it by running below command in the terminal window.
$ npm install -g @ionic/cli</pre> The current version of <code>@ionic/cliis version 6.6.0Create new Ionic App
Now create a new Ionic application using Angular framework using--type=angularoption with starterblanktemplate. Run the following command in the terminal to create a new application.$ ionic start ionic-firebase-email-authentication blank --type=angular </pre> move to the application folder <pre class="wp-block-prismatic-blocks"><code class="language-javascript">$ cd ionic-firebase-email-authentication</pre> then open application folder in Visual Studio Code in installed by running <pre class="wp-block-prismatic-blocks"><code class="language-javascript">$ code .</pre> <h3>Install Firebase in Ionic Application</h3> The <code>angularfireis a Firebase official package for Angular applications. This package lets an Angular project to use all Firebase services. For using the Firebase services we'll install the@angular/fireandfirebasepackages by running following npm command.$ npm install firebase @angular/fire --save</pre> <h3>Integrate Firebase Project in Ionic Application</h3> Next, we need to create a Firebase app in the <a href="https://firebase.google.com/" target="_blank" rel="noopener noreferrer">Firebase Console</a> then get credential which will be added in our Ionic Application to connect to Firebase application. Follow these steps to create a new Firebase project and application: <strong>Step 1)</strong> Visit <strong>Firebase</strong> <a href="https://firebase.google.com/" target="_blank" rel="noopener noreferrer">here</a> then click on Get Started if you have not created an account yet. <a href="https://www.freakyjolly.com/wp-content/uploads/2019/02/Screenshot_6-1.png"><img class="alignnone wp-image-1857" src="https://www.freakyjolly.com/wp-content/uploads/2019/02/Screenshot_6-1.png" alt="" width="287" height="209" /></a> <strong>Step 2)</strong> Click on "<strong>Add project</strong>" then enter app-related information click on "create" <a href="https://www.freakyjolly.com/wp-content/uploads/2019/02/Screenshot_7-1.png"><img class="alignnone size-full wp-image-1858" src="https://www.freakyjolly.com/wp-content/uploads/2019/02/Screenshot_7-1.png" alt="" width="523" height="504" /></a> <strong>Step 3)</strong> Next click on "<strong>Web App</strong>" icon to get configuration text with app secret info which we will add in out Ionic 4 Application to communicate with services related to this Firebase project. <a href="https://www.freakyjolly.com/wp-content/uploads/2019/02/Screenshot_8-1.png"><img class="alignnone wp-image-1859" src="https://www.freakyjolly.com/wp-content/uploads/2019/02/Screenshot_8-1.png" alt="" width="336" height="236" /></a><a href="https://www.freakyjolly.com/wp-content/uploads/2019/02/Screenshot_9-1.png"><img class="alignnone wp-image-1860" src="https://www.freakyjolly.com/wp-content/uploads/2019/02/Screenshot_9-1.png" alt="" width="402" height="277" /></a> <strong>Step 4)</strong> As we are going to add Email registration, let's enable Email authentication by clicking on "<strong>Authentication</strong>" link on left sidebar then click on "<strong>Sign-in method</strong>" tab. After that enable "<strong>Email/Password</strong>" option. <a href="https://www.freakyjolly.com/wp-content/uploads/2019/02/Screenshot_3-1.jpg"><img class="alignnone wp-image-1854" src="https://www.freakyjolly.com/wp-content/uploads/2019/02/Screenshot_3-1.jpg" alt="" width="545" height="241" /></a> <a href="https://www.freakyjolly.com/wp-content/uploads/2019/02/Screenshot_4-1.jpg"><img class="alignnone wp-image-1855" src="https://www.freakyjolly.com/wp-content/uploads/2019/02/Screenshot_4-1.jpg" alt="" width="474" height="293" /></a> <h3></h3> <h3>Update environment file to add Firebase configuration</h3> After creating a Firebase application you need to update the "<strong>~ionic-firebase-email-authentication/src/environments/environment.ts</strong>" file with the credential you got In previous steps as shown below. <pre class="wp-block-prismatic-blocks"><code class="language-javascript">export const environment = { production: false, firebase: { apiKey: "AIzXXXXXXXXXXXXXXXWZMPN90HFrp4", authDomain: "test-projeXXXXXXX.firebaseapp.com", databaseURL: "https://test-projeXXXXXXX.firebaseio.com", projectId: "test-projeXXXXXXX7", storageBucket: "test-projeXXXXXXXX.appspot.com", messagingSenderId: "446XXXXXX105" } };</pre> <em>Note: Replace the above values with your Firebase project credentials</em> Note 2: You can now delete the home page as we will create new pages as per example application like Login, Register, Dashboard and also create a service to communicate with Firebase Database called Firestore. <h3></h3> <h3>Create Pages using following Ionic CLI shortcuts</h3> Run the following generate commands to create new pages required for our login authentication application. <pre class="wp-block-prismatic-blocks"><code class="language-javascript">$ ionic generate page login $ ionic generate page register $ ionic generate page dashboard</pre> <h3></h3> To communicate with the Firebase Authentication methods and keep login, register and logout logic separate, create a new service by running below generate command <pre class="wp-block-prismatic-blocks"><code class="language-javascript">$ ionic g service services/authentication</pre> <h3>Update the Service with Login, Register and Logout Methods</h3> We have created a new service at "~ionic-firebase-email-authentication/src/app/services/authentication.service.ts". The <strong>AuthenticateService</strong> will have methods for login, register, get user details and logout. To register new user in Firebase Authentication service, we'll call the <code>createUserWithEmailAndPassword()method with email and password provided by a user from register page. For Log in a user, thesignInWithEmailAndPassword()is called available in theAngularFireAuthclass. ThesignOut()method available in theAngularFireAuthclass will remove the user session in the Firebase Authentication service. Also, we have auserDetails()method which will return details od logged in user. As this service is set toprovidedIntorootso we don't need to add this service in theprovidersarray in any module.// authentication.service.ts import { Injectable } from "@angular/core"; import { AngularFireAuth } from '@angular/fire/auth'; @Injectable({ providedIn: 'root' }) export class AuthenticateService { constructor( private afAuth: AngularFireAuth ) { } registerUser(value) { return new Promise<any>((resolve, reject) => { this.afAuth.createUserWithEmailAndPassword(value.email, value.password) .then( res => resolve(res), err => reject(err)) }) } loginUser(value) { return new Promise<any>((resolve, reject) => { this.afAuth.signInWithEmailAndPassword(value.email, value.password) .then( res => resolve(res), err => reject(err)) }) } logoutUser() { return new Promise((resolve, reject) => { if (this.afAuth.currentUser) { this.afAuth.signOut() .then(() => { console.log("LOG Out"); resolve(); }).catch((error) => { reject(); }); } }) } userDetails() { return this.afAuth.user } } </pre> After deleting the home page and creating above new pages and service (authentication.service.ts) our app's directory structure will look like this. <a href="https://www.freakyjolly.com/wp-content/uploads/2019/02/Screenshot_7.jpg"><img class="alignnone size-full wp-image-1863" src="https://www.freakyjolly.com/wp-content/uploads/2019/02/Screenshot_7.jpg" alt="" width="285" height="396" /></a> <h3></h3> <h3>Changes in App'module and routing module</h3> We need to make changes in the <strong>app.module.ts</strong> and <strong>app-routing.module.ts</strong> file to include Firebase module's and update routing default paths as we have deleted the Home page. <h4><strong>app.module.ts</strong></h4> Here we'll import the <code>AngularFireModuleandAngularFireAuthModulemodules. If you need to use other Firebase services just import them here as well. We'll also initialize theAngularFireModulewith firebase credentials using configuration we have in theenvironmentfile.// app.module.ts import { NgModule } from '@angular/core'; import { BrowserModule } from '@angular/platform-browser'; import { RouteReuseStrategy } from '@angular/router'; import { IonicModule, IonicRouteStrategy } from '@ionic/angular'; import { SplashScreen } from '@ionic-native/splash-screen/ngx'; import { StatusBar } from '@ionic-native/status-bar/ngx'; import { AppComponent } from './app.component'; import { AppRoutingModule } from './app-routing.module'; import { AngularFireModule } from '@angular/fire'; import { AngularFireAuthModule } from '@angular/fire/auth'; import { environment } from '../environments/environment'; @NgModule({ declarations: [AppComponent], entryComponents: [], imports: [ BrowserModule, IonicModule.forRoot(), AppRoutingModule, AngularFireAuthModule, AngularFireModule.initializeApp(environment.firebase) ], providers: [ StatusBar, SplashScreen, { provide: RouteReuseStrategy, useClass: IonicRouteStrategy } ], bootstrap: [AppComponent] }) export class AppModule { }
app-routing.module.ts
// app-routing.module.ts import { NgModule } from '@angular/core'; import { PreloadAllModules, RouterModule, Routes } from '@angular/router'; const routes: Routes = [ // { // path: 'home', // loadChildren: () => import('./home/home.module').then( m => m.HomePageModule) // }, { path: '', redirectTo: 'login', pathMatch: 'full' }, { path: 'login', loadChildren: () => import('./login/login.module').then(m => m.LoginPageModule) }, { path: 'register', loadChildren: () => import('./register/register.module').then(m => m.RegisterPageModule) }, { path: 'dashboard', loadChildren: () => import('./dashboard/dashboard.module').then(m => m.DashboardPageModule) }, ]; @NgModule({ imports: [ RouterModule.forRoot(routes, { preloadingStrategy: PreloadAllModules }) ], exports: [RouterModule] }) export class AppRoutingModule { }Import
FormsModuleandReactiveFormsModuleAs we are using Form Validations using React approach, in the login.module.ts and register.module.ts file we need to import the
ReactiveFormsModulein theimportsarray@NgModule({ imports: [ CommonModule, FormsModule, ReactiveFormsModule, IonicModule, ... ], declarations: [LoginPage] })
Login Page
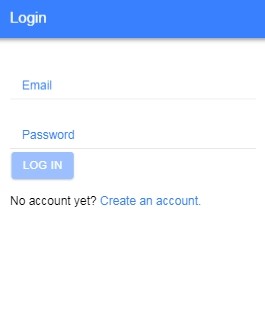
Replace the following HTML and Component code having validation to check user input email and password. We have used Reactive form validation with defined rules in the component itself.
login.page.ts
// login.page.tscommand in the terminal. The Ionic app will look like this
import { Component, OnInit } from '@angular/core';
import { FormGroup, FormBuilder, Validators, FormControl } from '@angular/forms';
import { NavController } from '@ionic/angular';
import { AuthenticateService } from '../services/authentication.service';@Component({
selector: 'app-login',
templateUrl: './login.page.html',
styleUrls: ['./login.page.scss'],
})
export class LoginPage implements OnInit {validations_form: FormGroup;
errorMessage: string = '';constructor(
private navCtrl: NavController,
private authService: AuthenticateService,
private formBuilder: FormBuilder) { }
ngOnInit() {
this.validations_form = this.formBuilder.group({
email: new FormControl('', Validators.compose([
Validators.required,
Validators.pattern('^[a-zA-Z0-9_.+-]+@[a-zA-Z0-9-]+.[a-zA-Z0-9-.]+$')
])),
password: new FormControl('', Validators.compose([
Validators.minLength(5),
Validators.required
])),
});
}validation_messages = {
'email': [
{ type: 'required', message: 'Email is required.' },
{ type: 'pattern', message: 'Please enter a valid email.' }
],
'password': [
{ type: 'required', message: 'Password is required.' },
{ type: 'minlength', message: 'Password must be at least 5 characters long.' }
]
};loginUser(value) {
this.authService.loginUser(value)
.then(res => {
console.log(res);
this.errorMessage = "";
this.navCtrl.navigateForward('/dashboard');
}, err => {
this.errorMessage = err.message;
})
}goToRegisterPage() {
this.navCtrl.navigateForward('/register');
}}
</pre>
<h4>login.page.html</h4>
<pre><code class="language-markup"><ion-header>
<ion-toolbar color="primary">
<ion-title>Login</ion-title>
</ion-toolbar>
</ion-header><ion-content class="ion-padding">
<form class="form" [formGroup]="validations_form" (ngSubmit)="loginUser(validations_form.value)"><ion-item>
<ion-label position="floating" color="primary">Email</ion-label>
<ion-input type="text" formControlName="email"></ion-input>
</ion-item>
<div class="validation-errors">
<ng-container *ngFor="let validation of validation_messages.email">
<div class="error-message"
*ngIf="validations_form.get('email').hasError(validation.type) && (validations_form.get('email').dirty || validations_form.get('email').touched)">
{{ validation.message }}
</div>
</ng-container>
</div><ion-item>
<ion-label position="floating" color="primary">Password</ion-label>
<ion-input type="password" formControlName="password" class="form-controll" required></ion-input>
</ion-item>
<div class="validation-errors">
<ng-container *ngFor="let validation of validation_messages.password">
<div class="error-message"
*ngIf="validations_form.get('password').hasError(validation.type) && (validations_form.get('password').dirty || validations_form.get('password').touched)">
{{ validation.message }}
</div>
</ng-container>
</div><ion-button class="submit-btn" type="submit" [disabled]="!validations_form.valid">Log In</ion-button>
<label class="error-message">{{errorMessage}}</label>
</form>
<p class="go-to-register">
No account yet? <a (click)="goToRegisterPage()">Create an account.</a>
</p>
</ion-content></pre>
<h3>Register Page</h3>
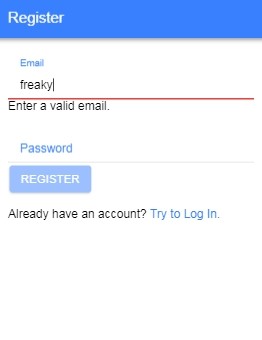
If the user is not registered then he will get an error message then registration is required. Replace following code in register.page.ts and register.page.html<img class="alignnone wp-image-4092 size-full" src="https://www.freakyjolly.com/wp-content/uploads/2019/02/Pasted-into-Ionic-54-Firebase-Login-Registration-by-Email-and-Password-2.png" />
<h4>register.page.ts</h4>
<pre class="wp-block-prismatic-blocks"><code class="language-javascript">// register.page.ts
import { Component, OnInit } from '@angular/core';
import { FormGroup, FormBuilder, Validators, FormControl } from '@angular/forms';
import { AuthenticateService } from '../services/authentication.service';
import { NavController } from '@ionic/angular';@Component({
selector: 'app-register',
templateUrl: './register.page.html',
styleUrls: ['./register.page.scss'],
})
export class RegisterPage implements OnInit {validations_form: FormGroup;
errorMessage: string = '';
successMessage: string = '';validation_messages = {
'email': [
{ type: 'required', message: 'Email is required.' },
{ type: 'pattern', message: 'Enter a valid email.' }
],
'password': [
{ type: 'required', message: 'Password is required.' },
{ type: 'minlength', message: 'Password must be at least 5 characters long.' }
]
};constructor(
private navCtrl: NavController,
private authService: AuthenticateService,
private formBuilder: FormBuilder
) { }ngOnInit() {
this.validations_form = this.formBuilder.group({
email: new FormControl('', Validators.compose([
Validators.required,
Validators.pattern('^[a-zA-Z0-9_.+-]+@[a-zA-Z0-9-]+.[a-zA-Z0-9-.]+$')
])),
password: new FormControl('', Validators.compose([
Validators.minLength(5),
Validators.required
])),
});
}tryRegister(value) {
this.authService.registerUser(value)
.then(res => {
console.log(res);
this.errorMessage = "";
this.successMessage = "Your account has been created. Please log in.";
}, err => {
console.log(err);
this.errorMessage = err.message;
this.successMessage = "";
})
}goLoginPage() {
this.navCtrl.navigateBack('');
}}
</pre>
<h4>register.page.html</h4>
<pre><code class="language-markup"><ion-header>
<ion-toolbar color="primary">
<ion-title>Register</ion-title>
</ion-toolbar>
</ion-header><ion-content class="ion-padding">
<form class="form" [formGroup]="validations_form" (ngSubmit)="tryRegister(validations_form.value)"><ion-item>
<ion-label position="floating" color="primary">Email</ion-label>
<ion-input type="text" formControlName="email"></ion-input>
</ion-item>
<div class="validation-errors">
<ng-container *ngFor="let validation of validation_messages.email">
<div class="error-message"
*ngIf="validations_form.get('email').hasError(validation.type) && (validations_form.get('email').dirty || validations_form.get('email').touched)">
{{ validation.message }}
</div>
</ng-container>
</div><ion-item>
<ion-label position="floating" color="primary">Password</ion-label>
<ion-input type="password" formControlName="password" class="form-controll" required></ion-input>
</ion-item>
<div class="validation-errors">
<ng-container *ngFor="let validation of validation_messages.password">
<div class="error-message"
*ngIf="validations_form.get('password').hasError(validation.type) && (validations_form.get('password').dirty || validations_form.get('password').touched)">
{{ validation.message }}
</div>
</ng-container>
</div><ion-button class="submit-btn" type="submit" [disabled]="!validations_form.valid">Register</ion-button>
<label class="error-message">{{errorMessage}}</label>
<label class="success-message">{{successMessage}}</label>
</form>
<p class="go-to-login">Already have an account? <a (click)="goLoginPage()">Try to Log In.</a></p>
</ion-content></pre>
<h4></h4>
<h3>Dashboard Page</h3>
After the user successfully login with registered details will land on the dashboard page, which will also have a logout link on the footer.<img class="alignnone wp-image-4091 size-full" src="https://www.freakyjolly.com/wp-content/uploads/2019/02/Pasted-into-Ionic-54-Firebase-Login-Registration-by-Email-and-Password-1.png" />
<h4>dashboard.page.ts</h4>
<pre class="wp-block-prismatic-blocks"><code class="language-javascript">// dashboard.page.ts
import { Component, OnInit } from '@angular/core';
import { NavController } from '@ionic/angular';
import { AuthenticateService } from '../services/authentication.service';@Component({
selector: 'app-dashboard',
templateUrl: './dashboard.page.html',
styleUrls: ['./dashboard.page.scss'],
})
export class DashboardPage implements OnInit {userEmail: string;
constructor(
private navCtrl: NavController,
private authService: AuthenticateService
) { }ngOnInit() {
this.authService.userDetails().subscribe(res => {
console.log('res', res);
if (res !== null) {
this.userEmail = res.email;
} else {
this.navCtrl.navigateBack('');
}
}, err => {
console.log('err', err);
})}
logout() {
this.authService.logoutUser()
.then(res => {
console.log(res);
this.navCtrl.navigateBack('');
})
.catch(error => {
console.log(error);
})
}
}
</pre>
<h4>dashboard.page.html</h4>
<pre><code class="language-markup"><ion-header>
<ion-toolbar>
<ion-title>Dashboard</ion-title>
</ion-toolbar>
</ion-header><ion-content class="ion-padding">
<ion-grid>
<ion-row>
<ion-col text-center>
Welcome to Dashboard!
</ion-col>
</ion-row>
<ion-row>
<ion-col text-center>
Your Registered EmailID : {{userEmail}}
</ion-col>
</ion-row>
</ion-grid></ion-content>
<ion-footer (click)="logout()">
<ion-toolbar color="secondary">
<ion-title>Log out</ion-title>
</ion-toolbar>
</ion-footer></pre>
That's it now we have a working Ionic Angular application using Firebase Authentication services, where a user can register and log in using email and password.Now you can run the application by hitting the <code>$ ionic serve --open
Get source code in GitHub Repo here
So in this post, we discussed how to integrate Google Firebase service in Ionic Application to create login and registration functionality. As per requirements, we can include more Firebase services like Firestore, Messaging, Social login which we will discuss in coming articles.
Category: Firebase


Leave a Reply