In this Angular 9/8/7/6 tutorial, we’ll learn How to create a file upload section to display selected image and convert it into Base64 format. While selecting a file we’ll add validation for the file type, height & width of images.
Uploading media files like profile images or PDF or Word documents to the server via a web form is a common practice in data-centric applications.
In Angular application where data is sent via HTTP calls, we can easily convert images and docs to the Base64 string and send them to the server is using HTTP Post.
After getting the Base64 string we can easily convert it to a real file and save at server disk with file name and path saved in the database.
We’ll create an Image upload section to select a file using a form with File input control and convert it into base64 string by adding a change event.
Validation of file type and checking heigh & width in case of images will be there to check file uploads on the client-side without any third-party package.
In our method, we will also add a check for images only and width/height limitations to give user appropriate messages for not allowed content.
Let’s start it…
Create a Form in Template
In the template, we’ll add a form having file input control with (change) event handler. This change event will do file conversion into base64 after validating file type and other validations for height and width in case we are allowing images.
In the form, we have NgIf Else controlled by isImageSaved variable section to display a placeholder image or selected image after selection.
A removeImage() method is added on a button which will be visible after an image is selected.
Now add the following HTML template with form in the component.
<form>
<div class="form-group">
<fieldset class="form-group">
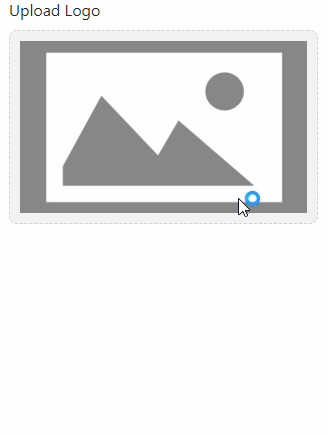
<label>Upload Logo</label>
{{imageError}}
<div class="custom-file fileInputProfileWrap">
<input type="file" (change)="fileChangeEvent($event)" class="fileInputProfile">
<div class="img-space">
<ng-container *ngIf="isImageSaved; else elseTemplate">
<img [src]="cardImageBase64" />
</ng-container>
<ng-template #elseTemplate>
<img src="./../../assets/placeholder.png" class="img-responsive">
</ng-template>
</div>
</div>
</fieldset>
</div>
<a class="btn btn-danger" (click)="removeImage()" *ngIf="isImageSaved">Remove</a>
</form>The imageError variable is used to show the message to the user if any. By default the placeholder image will be shown, after the selection of image and conversion to base64 string image will be shown set isImageSaved to true.
In the input file tag, we have added a method fileChangeEvent bind to the (change) event. This method is called after the file is selected by the user.
Update Class Component
Next, we will update the component class with the variables and fileChangeEvent() method as shown below:
import { Component, OnInit } from '@angular/core';
import * as _ from 'lodash';

@Component({
    selector: 'app-photo-base64',
    templateUrl: './photo-base64.component.html',
    styleUrls: ['./photo-base64.component.css']
})
export class PhotoBase64Component implements OnInit {

    imageError: string;
    isImageSaved: boolean;
    cardImageBase64: string;

    constructor() { }

    ngOnInit() {
    }

    fileChangeEvent(fileInput: any) {
        this.imageError = null;
        if (fileInput.target.files && fileInput.target.files[0]) {
            // Size Filter Bytes
            const max_size = 20971520;
            const allowed_types = ['image/png', 'image/jpeg'];
            const max_height = 15200;
            const max_width = 25600;

            if (fileInput.target.files[0].size > max_size) {
                this.imageError =
                    'Maximum size allowed is ' + max_size / 1000 + 'Mb';

                return false;
            }

            if (!_.includes(allowed_types, fileInput.target.files[0].type)) {
                this.imageError = 'Only Images are allowed ( JPG | PNG )';
                return false;
            }
            const reader = new FileReader();
            reader.onload = (e: any) => {
                const image = new Image();
                image.src = e.target.result;
                image.onload = rs => {
                    const img_height = rs.currentTarget['height'];
                    const img_width = rs.currentTarget['width'];

                    console.log(img_height, img_width);


                    if (img_height > max_height && img_width > max_width) {
                        this.imageError =
                            'Maximum dimentions allowed ' +
                            max_height +
                            '*' +
                            max_width +
                            'px';
                        return false;
                    } else {
                        const imgBase64Path = e.target.result;
                        this.cardImageBase64 = imgBase64Path;
                        this.isImageSaved = true;
                        // this.previewImagePath = imgBase64Path;
                    }
                };
            };

            reader.readAsDataURL(fileInput.target.files[0]);
        }
    }

    removeImage() {
        this.cardImageBase64 = null;
        this.isImageSaved = false;
    }

}
In the fileChangeEvent there are few variables to take values for max file size allowed and max height and width of the uploaded file.
            // Size Filter Bytes
            const max_size = 20971520;
            const allowed_types = ['image/png', 'image/jpeg'];
            const max_height = 15200;
            const max_width = 25600;
For Other File Type
To enable upload of other file types, just add more to allowed_types array:
'application/msword'
'application/vnd.openxmlformats-officedocument.wordprocessingml.document'
'image/jpg'
'image/jpeg'
'application/pdf'
'image/png'
'application/vnd.ms-excel'
'application/vnd.openxmlformats-officedocument.spreadsheetml.sheet'
The uploaded file will be converted to base64 string in the imgBase64Path variable.
To remove the selected image there is also removeImage() method.
Adding CSS Style
To style the form we are using Bootstrap CSS which can easily add in the index.html file’s <head> section as shown below:
<link rel="stylesheet" href="https://stackpath.bootstrapcdn.com/bootstrap/4.4.1/css/bootstrap.min.css">
Also, we need to put some CSS styles to make it work.
.image-wrap {
    padding: 10px;
    border: solid 1px #e0e0e0;
    display: inline-block;
}

.img-space {
    border: dashed 1px #d3d3d3;
    border-radius: 8px;
    background-color: #f2f2f2;
    height: auto;
    width: 100%;
    padding: 10px;
    min-height:175px;
}

.img-space img {
    display: block;
    width: 100%;
    height: 100%;
    margin: auto;
    cursor: pointer;
}

.fileInputProfileWrap {
    width: 100%;
    height: auto;
}

.fileInputProfile {
    position: absolute;
    height: 100%;
    width: 100%;
    z-index: 99;
    opacity: 0;
}
.fileInputProfile[disabled] + .img-space{
    pointer-events: none;
    cursor: not-allowed!important;
}
After implementing the above changes run Angular application by hitting $ ng serve --o. The file upload form will look like this:
Conclusion
In this tutorial, we got to know how to select an Image and display its preview while converting it into the base65 format string. We also added validation to check file types and width height. This is done without any third-party module.
Do share your feedback. Thanks for reading…
THANKS DUDEEEE
if (!_.includes(allowed_types, fileInput.target.files[0].type)) {Angular throws an error in this line!
Would this be the correct version?
if (!fileInput.target.files[0].type.includes(allowed_types)) {
Yes! that’s also correct if you are not using the Lodash library.
Vice versa: !allowedTypes.includes(fileInput.target.files[0].type)
npm install lodash
&
( !allowed_types.includes(event.target.files[0].type) )
works just fine