Image Carousels provides a good front-end user experience to show graphics or images in a small space in an interactive way.
But in Angular Application we hardly find great carousels/ image sliders to work with. In this tutorial, we will implement a Great Simple and Easy to Use Angular Image Carousel.
Let’s get started!
# Create a Project
Make sure you have the latest version of Angular CLI installed
$ npm install @angular/cli@latestNow create a new Angular Project by running following commands
$ ng new angular-carousel-tutorial
$ ? Would you like to add Angular routing? No
$ ? Which stylesheet format would you like to use? SCSS
# Install the Carousel Package in Application
Now we will install the carouselamos by joselcvarela using the following npm command
$ npm install ng2-carouselamos --save# Import in Application Module
In app.module.ts, Import package and add in the imports array
import { BrowserModule } from '@angular/platform-browser';
import { NgModule } from '@angular/core';
import { AppComponent } from './app.component';

import { Ng2CarouselamosModule } from 'ng2-carouselamos';

@NgModule({
  declarations: [
    AppComponent
  ],
  imports: [
    BrowserModule,
    Ng2CarouselamosModule
  ],
  providers: [],
  bootstrap: [AppComponent]
})
export class AppModule { }
# Adding in Component
Add following HTML structure, having carousel directive and other options in app.component.html file
<div id="container">
  <div
    ng2-carouselamos
    class="slides-wrapper"
    [items]="images"
    [width]="850"
    [$prev]="prev"
    [$next]="next"
    [$item]="item"
  >
  </div>


  <ng-template #prev>
    <img src="assets/images/prev.png" id="left" />
  </ng-template>
  <ng-template #next>
    <img src="assets/images/next.png" id="right" />
  </ng-template>
  <ng-template #item let-item let-i="index">

  <div class="slide-items">
    <img src="{{ item.name }}">
  </div>
</div>

</ng-template>
<strong>ng2-carouselamos</strong>: It is the directive for the carousel.
<strong>[items]</strong>: Will have the object of items which we will define in home.ts.
<strong>[width]</strong>: Width of carousel taking value in Pixels.
<strong>#prev</strong> & <strong>#next</strong> having templates for next and previous buttons.
<strong>#item</strong> defines the HTML template for each item which will iterate using items object.
# Define items object in App Component
In the app.component.ts file, we will define the list of items for the object.
import { Component } from '@angular/core';

@Component({
  selector: 'app-root',
  templateUrl: './app.component.html',
  styleUrls: ['./app.component.scss']
})
export class AppComponent {
  title = 'NG7Swiper';

  images: Array<any> = []


  constructor() {
    this.images = [
      { name: 'http://lorempixel.com/640/480/animals/' },
      { name: 'http://lorempixel.com/640/480/abstract/' },
      { name: 'http://lorempixel.com/640/480/business/' },
      { name: 'http://lorempixel.com/640/480/cats/' },
      { name: 'http://lorempixel.com/640/480/city/' },
      { name: 'http://lorempixel.com/640/480/food/' },
      { name: 'http://lorempixel.com/640/480/nightlife/' },
      { name: 'http://lorempixel.com/640/480/fashion/' },
      { name: 'http://lorempixel.com/640/480/people/' },
      { name: 'http://lorempixel.com/640/480/nature/' },
      { name: 'http://lorempixel.com/640/480/sports/' },
      { name: 'http://lorempixel.com/640/480/transport/' },
    ]
  }
}
In this tutorial, we have used Random Images from Faker.js.
# Adding CSS Style
In styles.scss file, we will add the following style to add width to images container and main container id. We are adding this style in styles.scss as we have HTML in app.component.html.
/* You can add global styles to this file, and also import other style files */
#container {
    width: 100%;
    margin: 5em auto;
    padding: 0;
    .ng2-carouselamos-container{
        width: 70%;
        margin: auto;
    }
    .slide-items{
        margin-right: 10px;
        img{
            width: 210px;
        }
    }
}
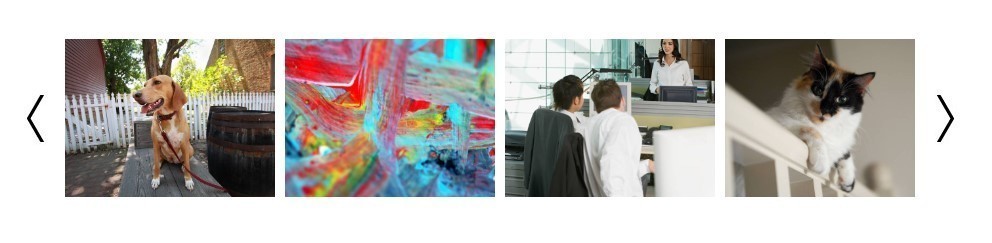
After successfully performing all steps, Run <span class="lang:js decode:true crayon-inline ">$ ng serve --open </span>to open in a browser. The above Carousel will look like as shown below.